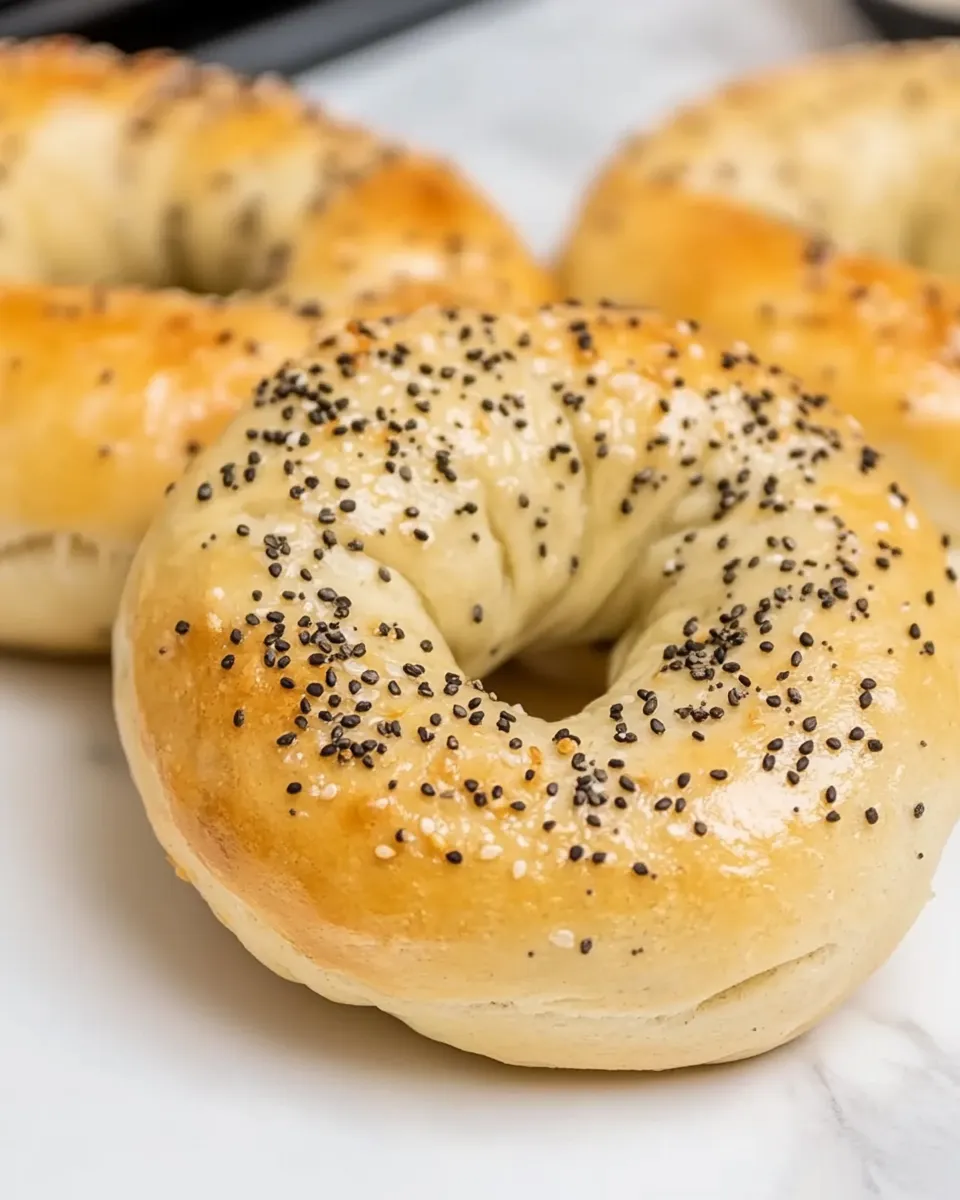
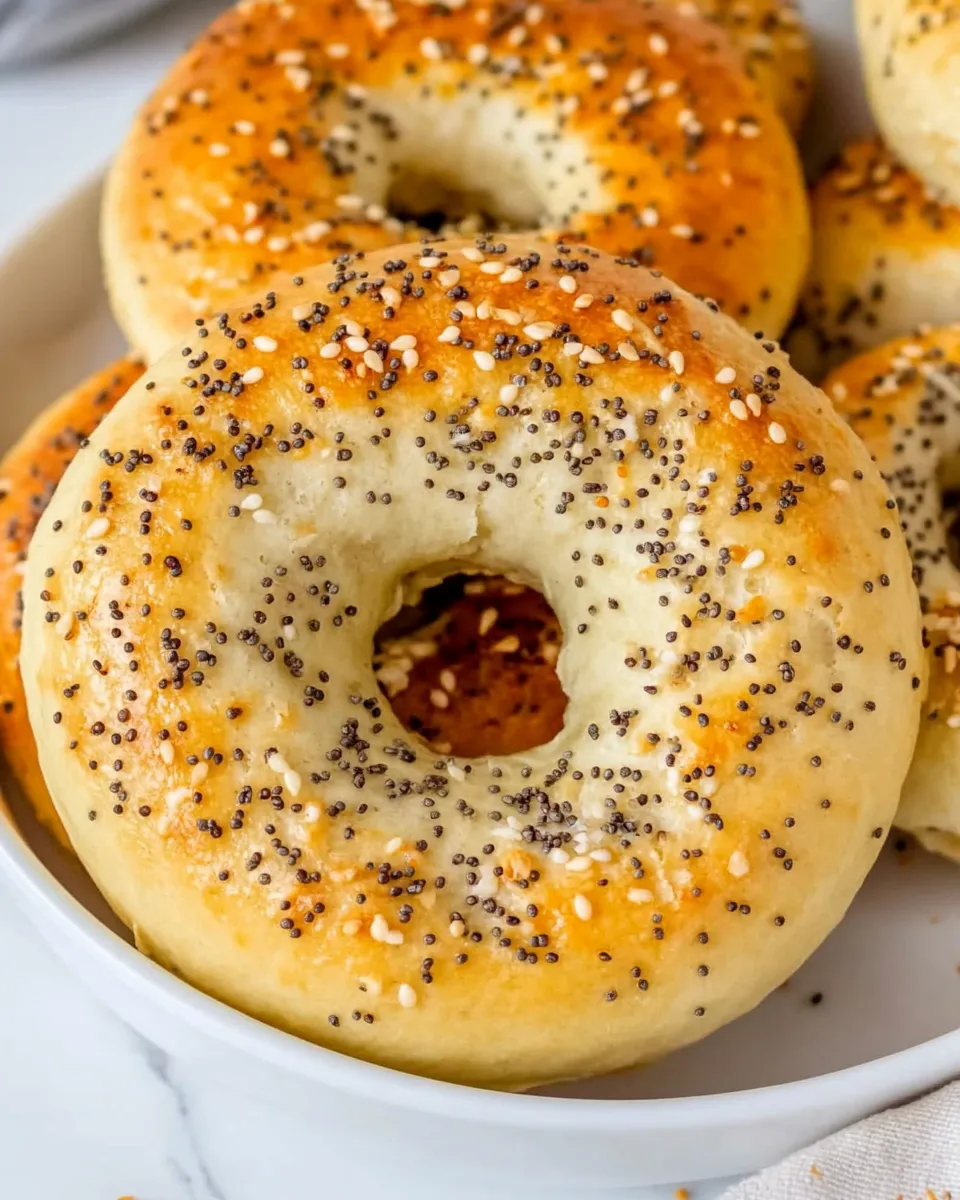
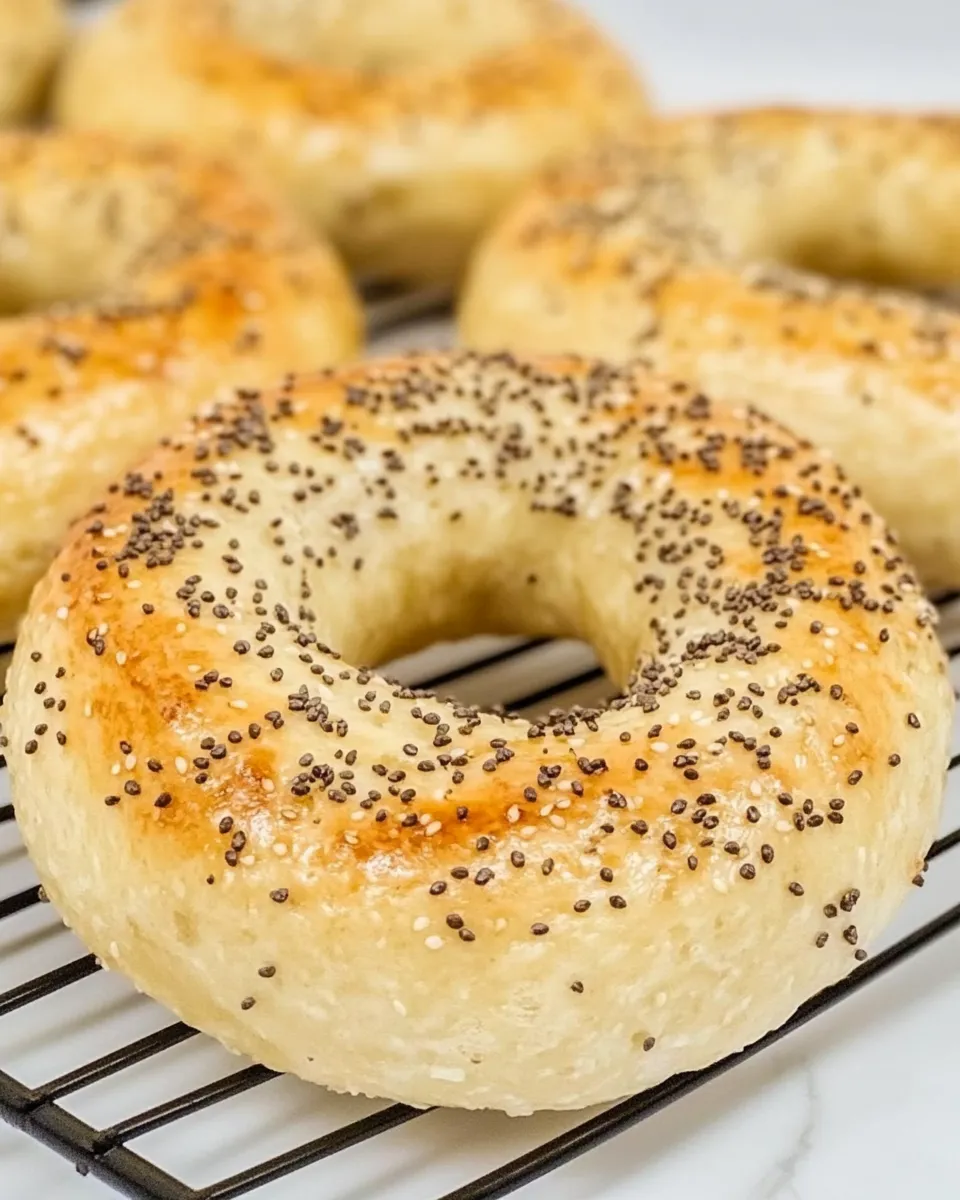
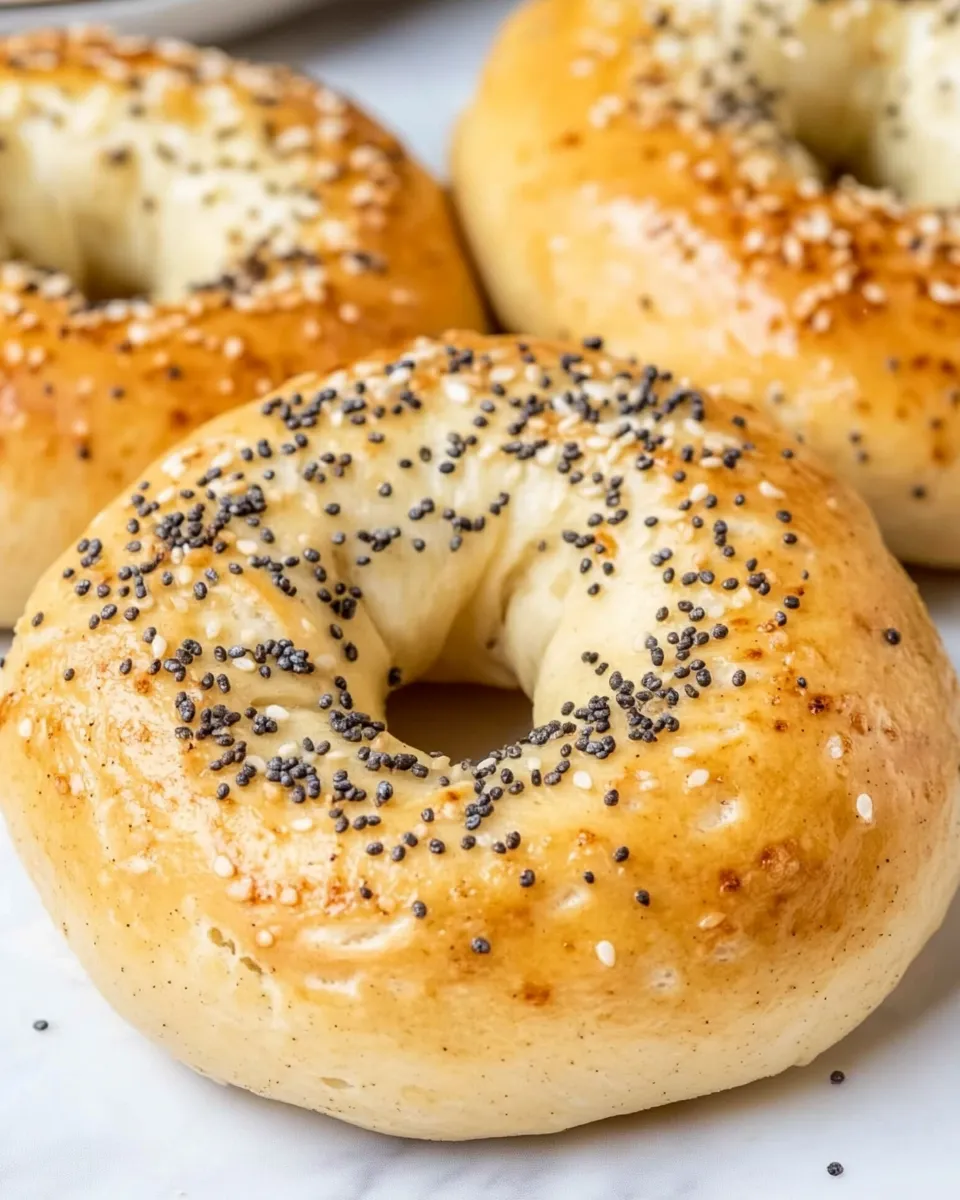
Protein Bagels
If you’re looking for a delicious way to incorporate more protein into your diet, look no further than these homemade Protein Bagels. These bagels are not only high in protein but also incredibly simple to make, requiring just a few key ingredients. Perfect for breakfast, a snack, or even a post-workout treat, these protein-packed delights will satisfy your cravings without compromising your health goals.
Why It’s Crowd-Pleasing
Protein Bagels appeal to everyone, from health enthusiasts to carb lovers. They are fluffy, chewy, and wonderfully satisfying, making them an excellent alternative to traditional bagels. The combination of Greek yogurt and protein powder provides a nutrient-dense option that keeps you full longer. Whether you spread them with cream cheese, top them with avocado, or enjoy them plain, they are sure to be a hit with family and friends.
The Essentials
To whip up these delightful Protein Bagels, you will need the following ingredients:
- 1/2 cup Self-rising flour – This will give your bagels their structure and rise.
- 1/2 cup Unflavored protein powder – Choose a brand you love for the best flavor and texture.
- 1 cup Non-fat Greek yogurt – This adds moisture and protein, making your bagels deliciously soft.
- 1 large egg white – The egg white helps bind the ingredients together and adds a nice sheen.
Equipment & Tools
To get started, you’ll need a few kitchen tools:
- Mixing bowl – For mixing your dough.
- Silicone spatula – Great for combining ingredients evenly.
- Baking sheet – To bake your bagels on.
- Parchment paper – Prevents sticking and makes cleanup easy.
- Oven – Preheated to ensure a perfect bake.
Cook Protein Bagels Like This
Creating your Protein Bagels is a breeze. Just follow these simple steps:
Step 1: Preheat the Oven
Begin by preheating your oven to 350°F (175°C). This ensures that your bagels bake evenly.
Step 2: Combine Dry Ingredients
In a mixing bowl, combine the self-rising flour and unflavored protein powder. Stir well to ensure that the dry ingredients are evenly mixed.
Step 3: Add Wet Ingredients
Next, add the non-fat Greek yogurt and the egg white to the dry mixture. Use a silicone spatula to mix everything together until a dough begins to form.
Step 4: Knead the Dough
Once the dough is combined, lightly flour your countertop and transfer the dough onto it. Knead the dough for about 2-3 minutes until it is smooth and elastic.
Step 5: Shape the Bagels
Divide the dough into equal portions, about 4-6 pieces depending on how large you want your bagels. Roll each piece into a ball, then poke a hole through the center to form the classic bagel shape. You can also roll them into a rope and then connect the ends if you prefer.
Step 6: Bake the Bagels
Line a baking sheet with parchment paper and place your shaped bagels on it. Bake in the preheated oven for 20-25 minutes, or until they are lightly golden brown.
Step 7: Cool and Enjoy
Once baked, remove the bagels from the oven and let them cool on a wire rack. Serve them warm or store them for later!
Seasonal Flavor Boosts
Feeling adventurous? Elevate your Protein Bagels with these seasonal flavor boosts:
- Everything Bagel Seasoning – Sprinkle on top for a classic flavor.
- Cinnamon and Raisin – Add cinnamon and a handful of raisins to the dough for a sweet twist.
- Cheddar and Chive – Mix in shredded cheddar cheese and fresh chives for a savory option.
- Garlic and Herb – Incorporate garlic powder and your favorite dried herbs for a Mediterranean flair.
Pro Tips & Notes
- For a gluten-free version, use a gluten-free self-rising flour blend.
- Experiment with different flavors of protein powder for unique bagel tastes.
- Store the dough in the refrigerator for up to 24 hours before baking for a quick meal prep option.
- Be careful not to over-knead the dough, as it can result in tough bagels.
Shelf Life & Storage
Protein Bagels are best enjoyed fresh but can be stored for later:
Keep your bagels in an airtight container at room temperature for up to 3 days. For longer storage, freeze them in a freezer-safe bag for up to 3 months. To enjoy, simply thaw them in the fridge overnight and toast before serving.
Protein Bagels Q&A
Can I make these bagels without egg white?
Yes! You can substitute the egg white with a flaxseed egg (1 tablespoon of ground flaxseed mixed with 2.5 tablespoons of water) for a vegan option.
What kind of protein powder works best for these bagels?
Unflavored whey protein powder works best, but you can also use plant-based protein powders. Just be aware that the texture and taste may vary slightly.
Can I add toppings before baking?
Absolutely! Feel free to sprinkle toppings like sesame seeds, poppy seeds, or cheese on top of the bagels before placing them in the oven.
How do I know when the bagels are done baking?
The bagels should be golden brown on the outside and sound hollow when tapped on the bottom. If they seem too soft, give them a few extra minutes in the oven.
Before You Go
These Protein Bagels are not just a healthy alternative; they are a delicious way to fuel your day. With their chewy texture and customizable flavors, they’re bound to become a favorite in your household. Whether you’re enjoying them for breakfast, a snack, or even a light dinner, they’ll keep you satisfied and energized. So roll up your sleeves and get ready to whip up a batch of these protein-packed delights. Happy baking!
Protein Bagels
Ingredients
Equipment
Method
- Begin by preheating your oven to 350°F (175°C) to ensure even baking.
- In a mixing bowl, combine the self-rising flour and unflavored protein powder. Stir well.
- Add the non-fat Greek yogurt and egg white to the dry mixture. Mix with a silicone spatula until a dough forms.
- Lightly flour your countertop and knead the dough for 2-3 minutes until smooth and elastic.
- Divide the dough into 4-6 equal portions, roll into balls, and poke a hole in the center to shape into bagels.
- Line a baking sheet with parchment paper and place your shaped bagels on it. Bake for 20-25 minutes until golden brown.
- Remove from the oven and let cool on a wire rack. Serve warm or store for later!
Notes
- For gluten-free, use a gluten-free self-rising flour blend.
- Experiment with different flavors of protein powder for unique tastes.
- Store dough in the refrigerator for up to 24 hours for quick meal prep.