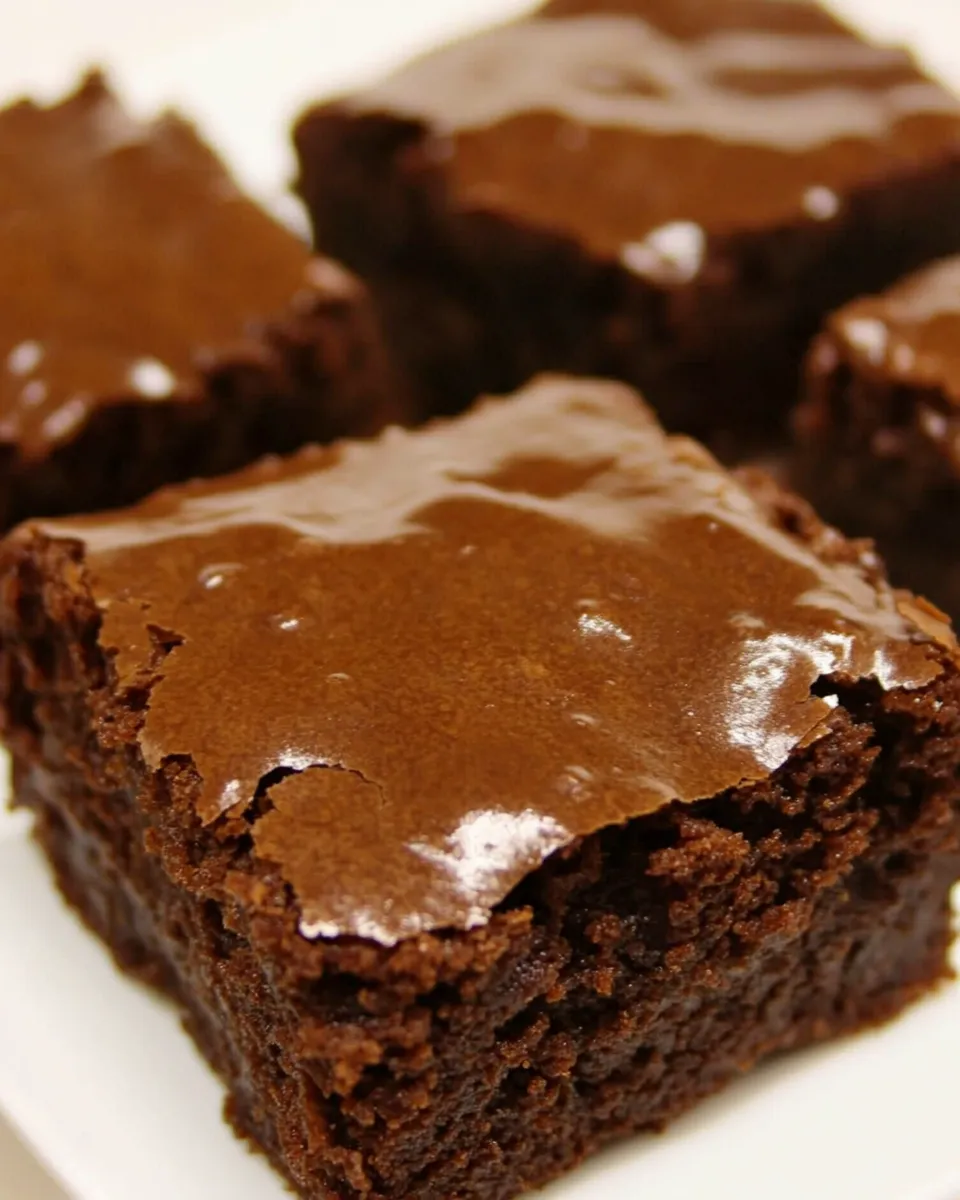
Espresso Brownies
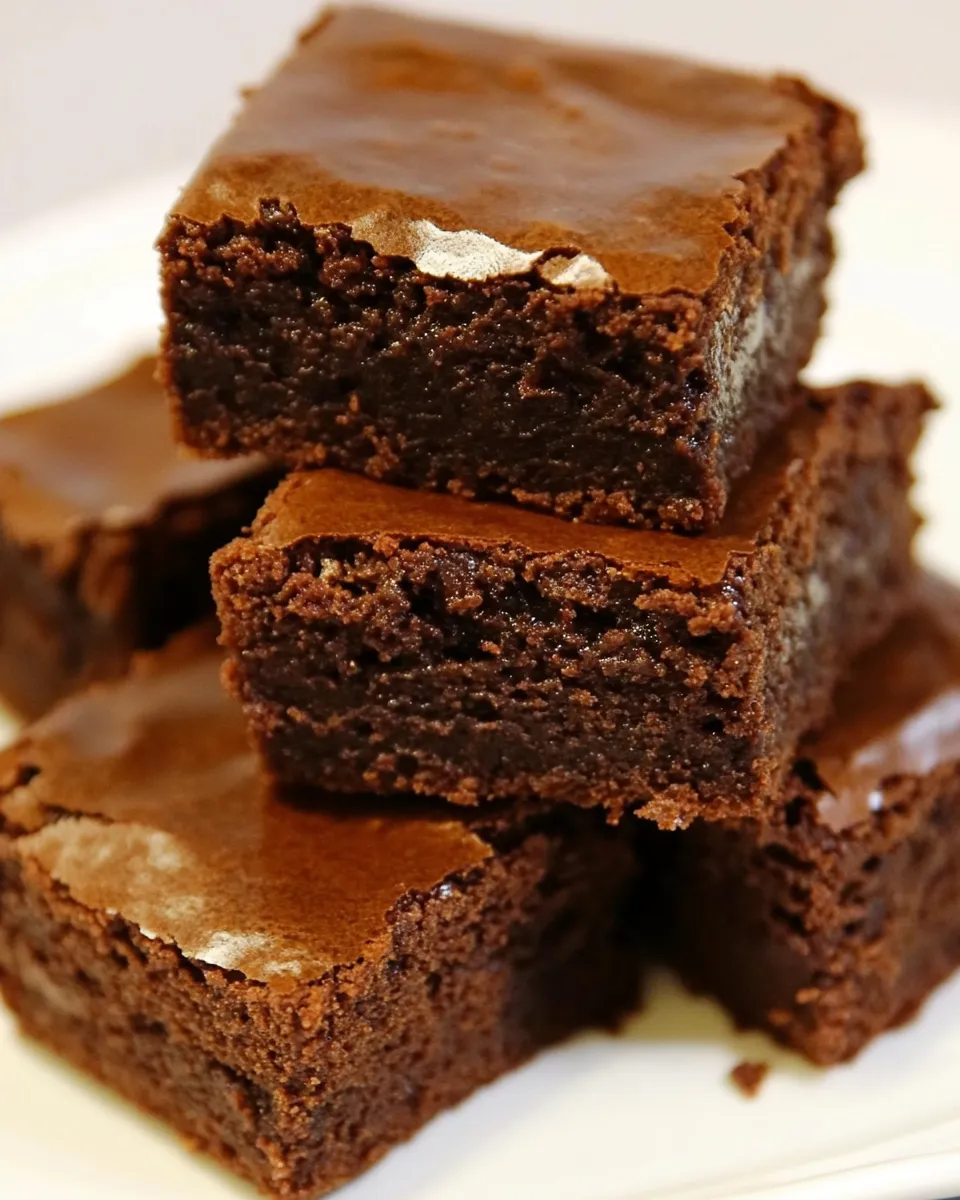
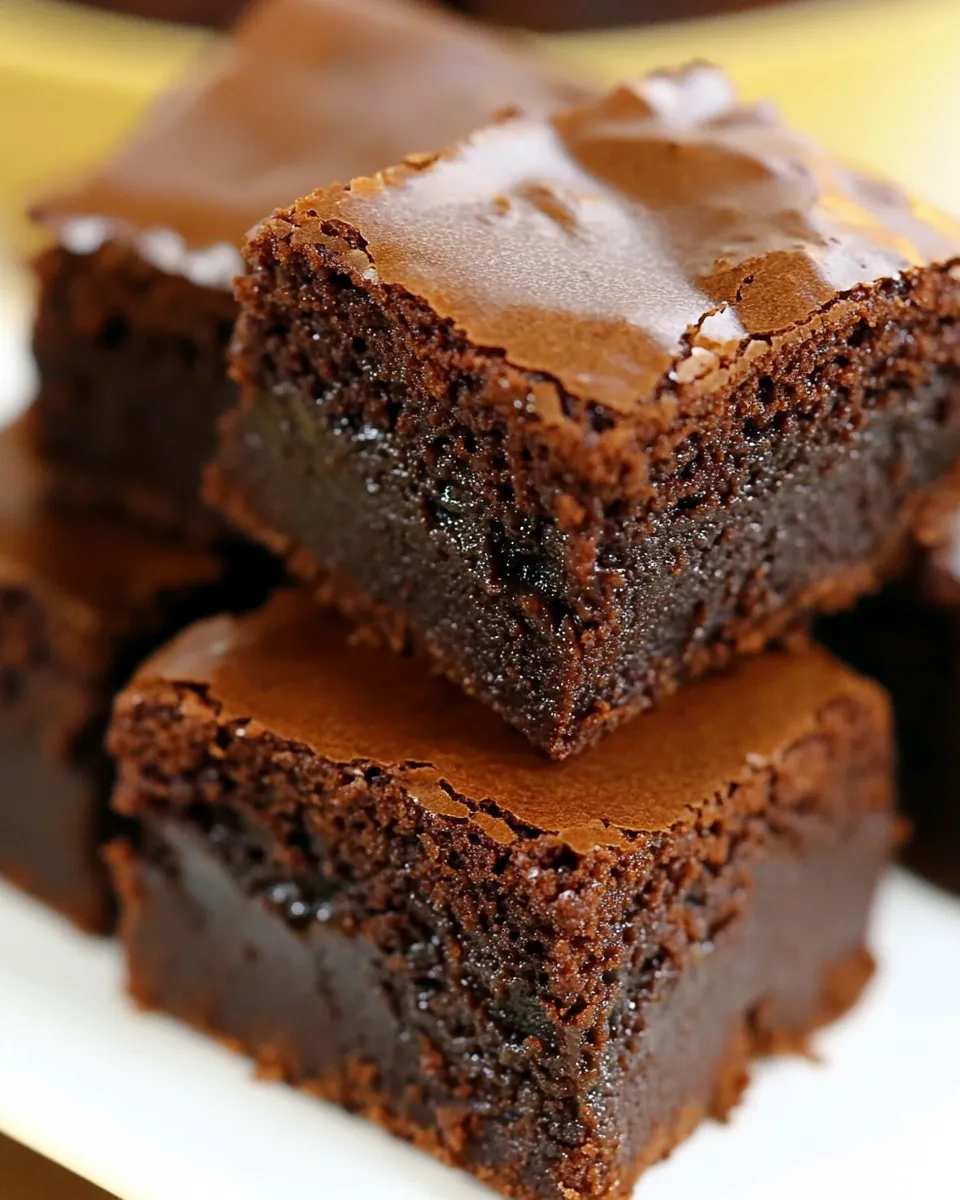
If you’re on the hunt for a decadent dessert that combines the rich flavors of chocolate and coffee, look no further than these Espresso Brownies! They’re fudgy, intensely chocolatey, and have just the right amount of espresso to elevate them to a whole new level of deliciousness. Perfect for coffee lovers and sweet tooths alike, these brownies are sure to impress at any gathering or satisfy your late-night cravings.
The secret to achieving that perfect texture lies in the balance of ingredients, and with just a few simple steps, you’ll have a batch of brownies that are not only easy to make, but also utterly irresistible. Let’s dive into the recipe and discover why these Espresso Brownies work every time!
Why It Works Every Time
Creating the perfect brownie is all about understanding how the ingredients interact. Here’s why these Espresso Brownies are destined for success:
– The combination of semisweet chocolate morsels and butter creates a rich, fudgy texture that melts in your mouth.
– A touch of espresso powder enhances the chocolate flavor without making the brownies taste like coffee.
– The addition of hot water helps to bloom the espresso powder, releasing its full flavor and ensuring a deep, satisfying taste.
– Using both granulated sugar and powdered sugar gives the brownies the perfect sweetness and texture.
What Goes In
To whip up these delicious Espresso Brownies, you’ll need the following ingredients:
- 1 cup all-purpose flour
- 1/2 teaspoon baking powder
- 1/4 teaspoon salt
- 1/3 cup hot water
- 1 tablespoon espresso powder
- 1 cup granulated sugar
- 1/2 cup butter or margarine
- 2 cups semisweet chocolate morsels
- 3 large eggs
- 1 teaspoon espresso powder
- 1/2 cup whipping cream
- 1/2 cup powdered sugar
Each ingredient plays a vital role in creating the rich flavor and moist texture that defines a perfect brownie.
Appliances & Accessories
To make your baking experience as smooth as possible, you’ll want to have the following appliances and accessories on hand:
- Oven – Preheat to 350°F (175°C) for the best baking results.
- Mixing bowls – A large bowl for combining wet and dry ingredients.
- Whisk or electric mixer – To thoroughly mix your ingredients.
- 9×13 inch baking pan – The ideal size for these brownies.
- Parchment paper – Helps with easy removal of brownies from the pan.
- Measuring cups and spoons – For accurate ingredient measurements.
Having these tools ready will ensure that your baking process is efficient and enjoyable.
Espresso Brownies: How It’s Done

Now, let’s get to the exciting part—making those luscious Espresso Brownies! Follow these simple steps for a guaranteed success:
Step 1: Prepare the Baking Pan
Preheat your oven to 350°F (175°C). Grease a 9×13 inch baking pan or line it with parchment paper for easy removal.
Step 2: Mix Dry Ingredients
In a medium bowl, whisk together the all-purpose flour, baking powder, and salt. Set this mixture aside as you prepare the wet ingredients.
Step 3: Combine Espresso Powder and Hot Water
In a small bowl, dissolve 1 tablespoon of espresso powder in 1/3 cup of hot water. This step helps to enhance the coffee flavor in your brownies.
Step 4: Melt Chocolate and Butter
In a large mixing bowl, combine the semisweet chocolate morsels and butter. Melt them together using a microwave or a double boiler until smooth and glossy. Stir occasionally to avoid burning.
Step 5: Mix in Sugars and Eggs
Once the chocolate mixture is cool, add the granulated sugar and mix until well combined. Then, add the eggs one at a time, mixing well after each addition. Finally, stir in the dissolved espresso mixture.
Step 6: Combine Dry and Wet Ingredients
Slowly fold the dry ingredient mixture into the wet ingredients. Be careful not to overmix; you want to combine them just until no streaks of flour remain.
Step 7: Bake
Pour the brownie batter into the prepared baking pan, spreading it evenly. Bake for 25-30 minutes, or until a toothpick inserted in the center comes out with a few moist crumbs.
Step 8: Cool and Prepare Topping
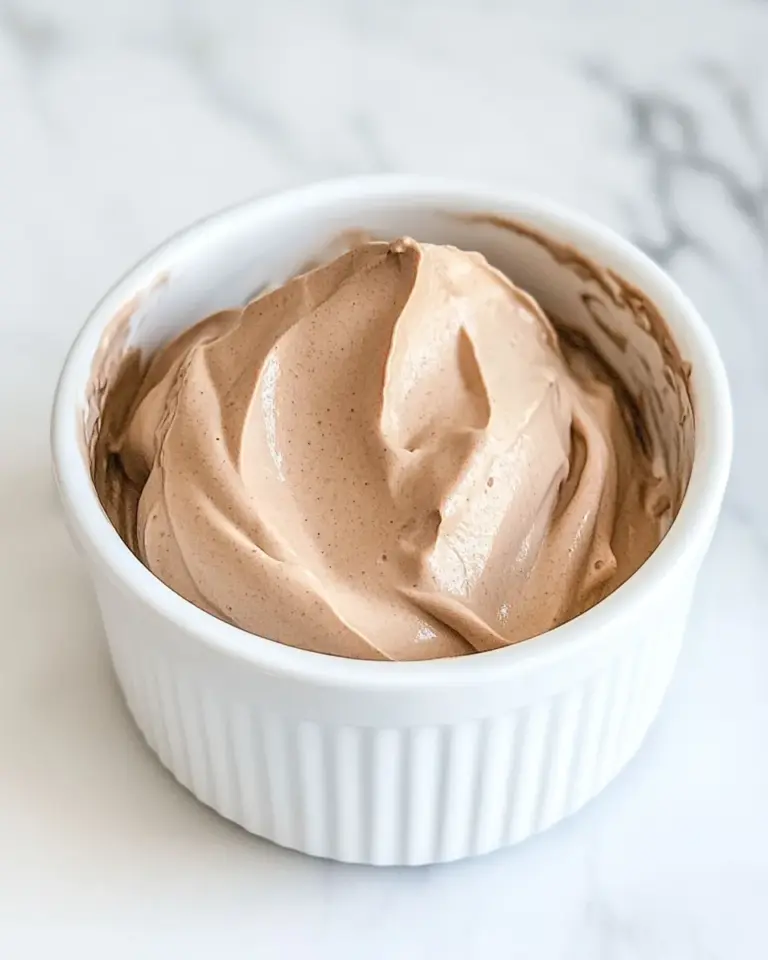
Allow the brownies to cool in the pan. While they cool, prepare the espresso whipped cream by beating the whipping cream with 1 teaspoon of espresso powder and powdered sugar until soft peaks form.
Step 9: Serve
Once the brownies are completely cool, cut them into squares and serve with a generous dollop of espresso whipped cream on top. Enjoy your delightful Espresso Brownies!
Adaptations for Special Diets
If you need to make adjustments for dietary preferences or restrictions, consider the following adaptations:
- Gluten-free: Substitute all-purpose flour with a gluten-free flour blend.
- Dairy-free: Use a plant-based butter alternative and coconut cream for the whipped topping.
- Lower sugar: Reduce the amount of granulated sugar or use a sugar alternative like coconut sugar.
- Vegan: Replace eggs with flaxseed meal or a commercial egg replacer and use vegan chocolate chips.
These adaptations can help everyone enjoy a slice of these sumptuous Espresso Brownies!
Troubleshooting Tips
Even with a tried-and-true recipe, you might run into a few hiccups. Here are some troubleshooting tips:
- If your brownies come out too dry, try reducing the baking time slightly or check your oven temperature with an oven thermometer.
- If the brownies are too gooey in the center, they may need a few more minutes in the oven—just keep an eye on them.
- Ensure your chocolate and butter mixture isn’t too hot when adding eggs to prevent them from cooking.
- If your brownies are sticking to the pan, ensure you have greased it well or used parchment paper.
With these tips, you’ll be well on your way to perfecting your Espresso Brownies!
Storing, Freezing & Reheating
To keep your Espresso Brownies fresh and delicious, follow these guidelines:
- Storing: Keep the brownies in an airtight container at room temperature for up to 3 days. For longer freshness, refrigerate them.
- Freezing: Cut the brownies into squares and layer them between sheets of parchment paper in an airtight container. They can be frozen for up to 3 months.
- Reheating: To enjoy warm brownies, microwave them for about 10-15 seconds or heat them in a preheated oven at 350°F (175°C) for a few minutes.
With proper storage, you can savor these Espresso Brownies long after they’re baked!
Your Top Questions
Can I use instant coffee instead of espresso powder?
While espresso powder provides a richer flavor, you can substitute instant coffee if needed. Just use the same amount for a similar taste.
How do I know when the brownies are done baking?
The brownies are done when a toothpick inserted into the center comes out with a few moist crumbs. If it comes out clean, they may be overbaked.
Can I add nuts or other mix-ins to my brownies?
Absolutely! Chopped walnuts or pecans make a great addition. Just fold them in gently before pouring the batter into the pan.
How can I make these brownies more chocolatey?
For an extra chocolate kick, you can mix in additional chocolate morsels or use dark chocolate in place of semisweet chocolate.
Next Steps
Now that you have mastered the art of making Espresso Brownies, it’s time to indulge in your creation! Consider pairing them with a scoop of vanilla ice cream or enjoying them with a hot cup of coffee for a delightful treat. Share these brownies with friends and family or keep them all to yourself for a special afternoon snack. The possibilities are endless, and the taste is simply divine.
Whether it’s for a special occasion or just because you deserve a treat, these Espresso Brownies are sure to become a favorite in your dessert repertoire. Happy baking!
Espresso Brownies
Ingredients
Equipment
Method
- Preheat your oven to 350°F (175°C). Grease a 9x13 inch baking pan or line it with parchment paper for easy removal.
- In a medium bowl, whisk together the all-purpose flour, baking powder, and salt. Set this mixture aside as you prepare the wet ingredients.
- In a small bowl, dissolve 1 tablespoon of espresso powder in 1/3 cup of hot water. This step helps to enhance the coffee flavor in your brownies.
- In a large mixing bowl, combine the semisweet chocolate morsels and butter. Melt them together using a microwave or a double boiler until smooth and glossy. Stir occasionally to avoid burning.
- Once the chocolate mixture is cool, add the granulated sugar and mix until well combined. Then, add the eggs one at a time, mixing well after each addition. Finally, stir in the dissolved espresso mixture.
- Slowly fold the dry ingredient mixture into the wet ingredients. Be careful not to overmix; you want to combine them just until no streaks of flour remain.
- Pour the brownie batter into the prepared baking pan, spreading it evenly. Bake for 25-30 minutes, or until a toothpick inserted in the center comes out with a few moist crumbs.
- Allow the brownies to cool in the pan. While they cool, prepare the espresso whipped cream by beating the whipping cream with 1 teaspoon of espresso powder and powdered sugar until soft peaks form.
- Once the brownies are completely cool, cut them into squares and serve with a generous dollop of espresso whipped cream on top. Enjoy your delightful Espresso Brownies!
Notes
- For gluten-free brownies, substitute all-purpose flour with a gluten-free flour blend.
- Use plant-based butter and coconut cream for a dairy-free option.
- Reduce granulated sugar for a lower sugar version.