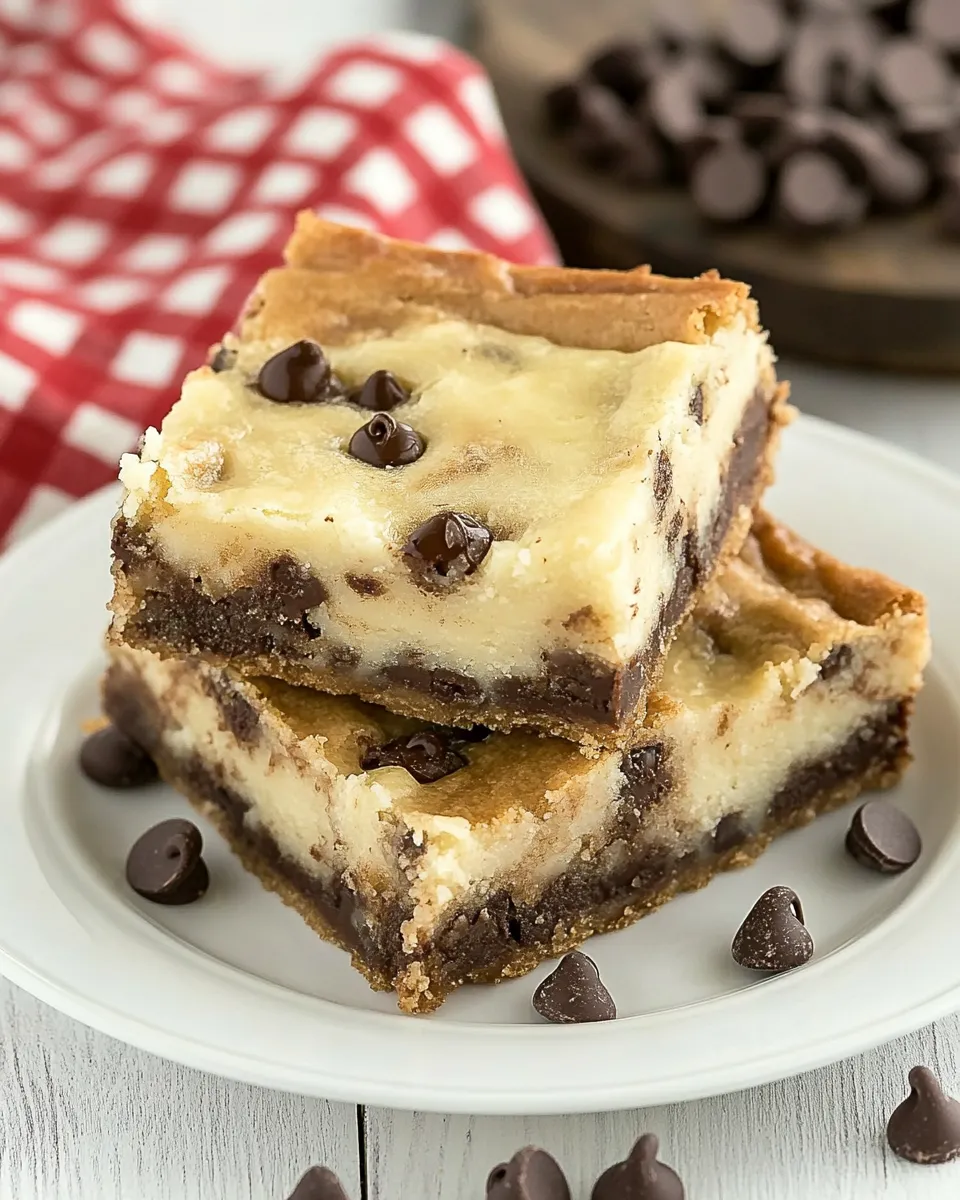
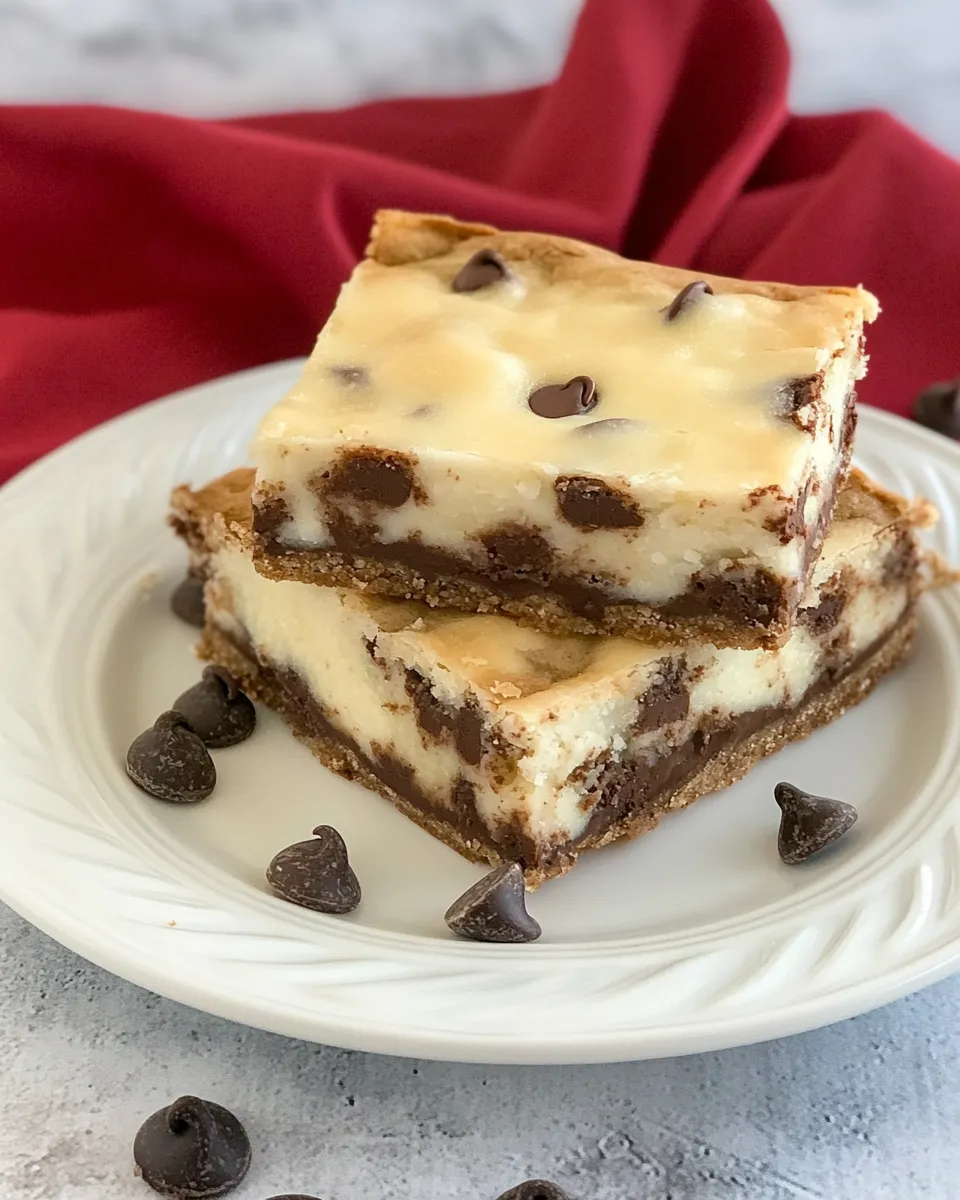
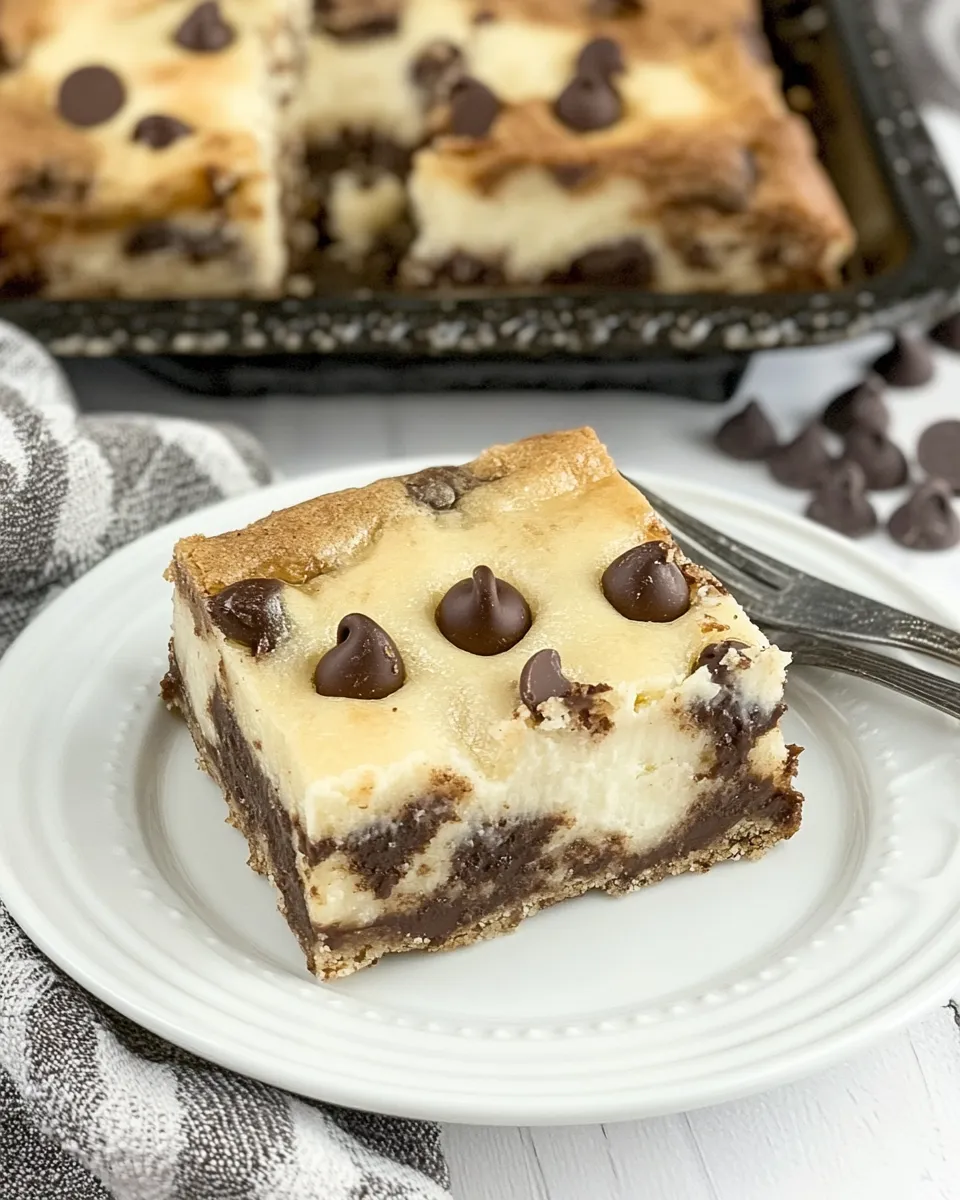
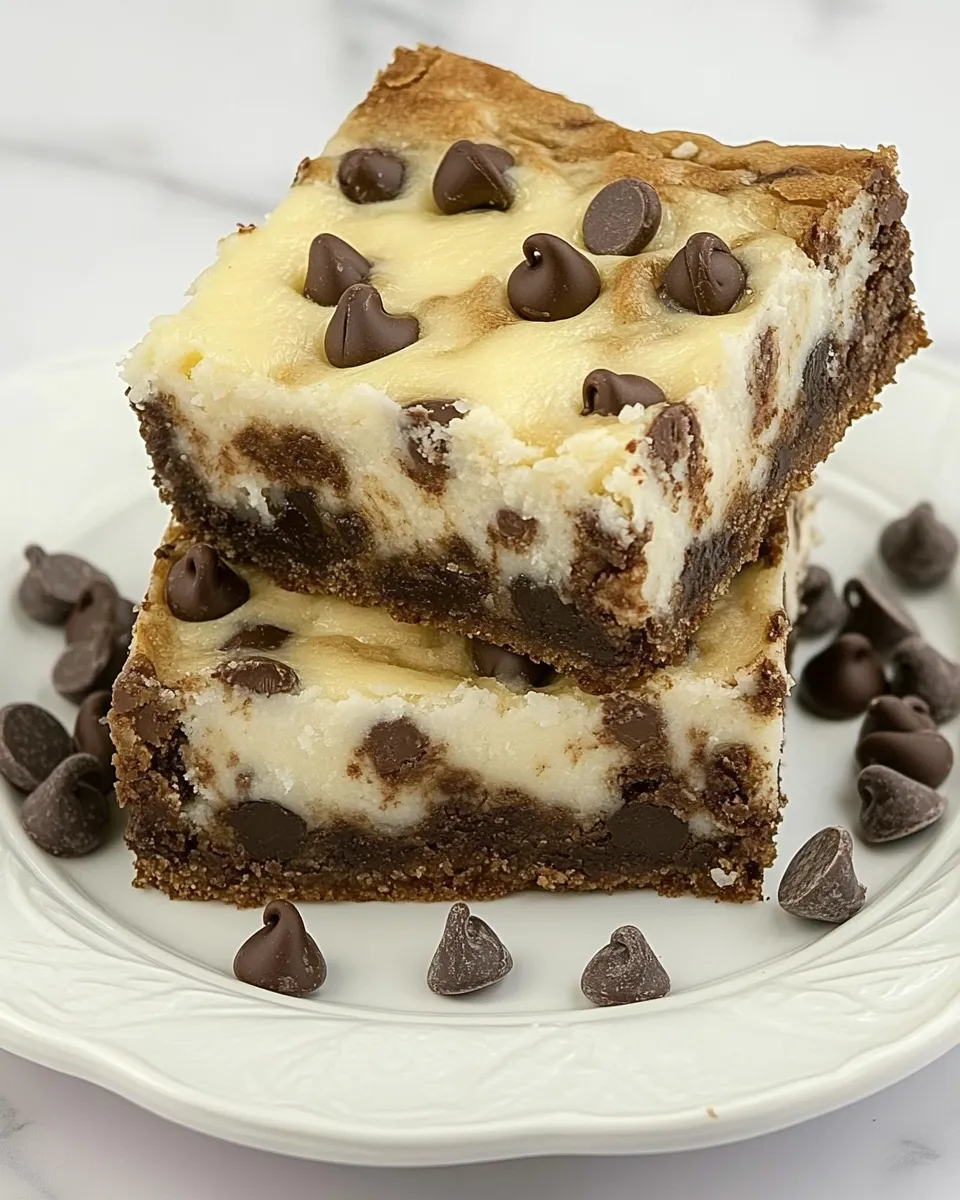
Cheesecake Filled Chocolate Chip Bars
If you’re searching for a dessert that combines the rich, gooey goodness of chocolate chip cookies with the creamy, velvety delight of cheesecake, look no further! Cheesecake Filled Chocolate Chip Bars are the ultimate indulgence, perfect for any occasion. With a buttery cookie base filled with a luscious cheesecake layer, these bars are not only visually appealing but also incredibly satisfying to eat. Whether you’re hosting a gathering, celebrating a special occasion, or just treating yourself, these bars are sure to impress.
Why It Deserves a Spot
These Cheesecake Filled Chocolate Chip Bars deserve a prime spot in your dessert repertoire for several reasons. First and foremost, they are a crowd-pleaser. The combination of chocolate and cheesecake is universally loved, making them the perfect treat to share with friends and family. Additionally, they are straightforward to prepare, requiring no fancy techniques or complicated steps. Plus, they can be made ahead of time and stored, allowing for easy serving whenever the craving strikes. Finally, the balance of flavors and textures makes each bite a delightful experience that you won’t soon forget.
Gather These Ingredients
To create your very own Cheesecake Filled Chocolate Chip Bars, you’ll need to gather the following ingredients:
- 1 cup butter (at room temperature) – This will give your bars that rich, buttery flavor.
- 1 cup brown sugar – For that deep, molasses-like sweetness.
- 1/2 cup sugar – Just the right amount for added sweetness.
- 2 eggs – These will help bind the ingredients together.
- 2 teaspoons vanilla extract – For a warm, aromatic flavor.
- 1/2 teaspoon salt – Enhances the overall flavor profile.
- 1 teaspoon baking soda – This will help your bars rise perfectly.
- 2 1/4 cups flour – The foundation of your cookie base.
- 2 cups semisweet chocolate chips – Because no chocolate chip dessert is complete without them!
Equipment & Tools
Before diving into the baking process, make sure you have the following equipment ready:
- Mixing bowls – For combining your ingredients.
- Electric mixer – This will make creaming the butter and sugars a breeze.
- 9×13-inch baking pan – Perfect for baking your bars evenly.
- Spatula – For spreading the cookie dough and cheesecake mixture.
- Parchment paper – Optional but recommended for easy removal of the bars.
- Cooling rack – To cool your bars completely before slicing.
How to Prepare Cheesecake Filled Chocolate Chip Bars
Step 1: Preheat the Oven
Start by preheating your oven to 350°F (175°C). This ensures that your bars bake evenly and achieve that perfect golden color.
Step 2: Prepare the Baking Pan
Line your 9×13-inch baking pan with parchment paper, leaving some overhang on the sides. This will help you lift the bars out easily once they are baked.
Step 3: Make the Cookie Base
In a large mixing bowl, cream together the butter, brown sugar, and white sugar using an electric mixer. Beat until the mixture is light and fluffy, which should take about 2-3 minutes.
Step 4: Add the Eggs and Vanilla
Add the eggs one at a time, mixing well after each addition. Then, stir in the vanilla extract until combined.
Step 5: Combine the Dry Ingredients
In another bowl, whisk together the flour, baking soda, and salt. Gradually add this dry mixture to the wet ingredients, mixing until just combined. Be careful not to overmix!
Step 6: Fold in the Chocolate Chips
Gently fold in the semisweet chocolate chips using a spatula, ensuring they are evenly distributed throughout the dough.
Step 7: Prepare the Cheesecake Filling
In a separate bowl, beat together 8 ounces of softened cream cheese, 1/2 cup of sugar, and 1 egg until smooth and creamy. This will be your luscious cheesecake filling.
Step 8: Layer the Mixtures
Spread half of the cookie dough into the prepared baking pan, creating an even layer. Next, pour the cheesecake mixture over the cookie base, spreading it evenly. Finally, dollop the remaining cookie dough on top of the cheesecake filling, using a spatula to gently spread it out. It’s okay if some cheesecake peeks through!
Step 9: Bake
Place the pan in the preheated oven and bake for 30-35 minutes, or until the edges are golden and a toothpick inserted in the center comes out clean. Be careful not to overbake, as you want the bars to remain soft and chewy.
Step 10: Cool and Slice
Once baked, remove the pan from the oven and let it cool in the pan for about 10-15 minutes. Then, use the parchment paper to lift the bars out and transfer them to a cooling rack. Allow them to cool completely before slicing them into squares.
Warm & Cool Weather Spins
These Cheesecake Filled Chocolate Chip Bars can be enjoyed year-round with a few tweaks:
- Warm Weather: Serve them chilled, as they make a refreshing treat on hot days. You can also add a dollop of whipped cream or a scoop of vanilla ice cream on top for extra indulgence.
- Cool Weather: Serve warm from the oven with a drizzle of melted chocolate or caramel sauce. They pair perfectly with a cup of hot cocoa or coffee.
Errors to Dodge
When making your Cheesecake Filled Chocolate Chip Bars, avoid these common pitfalls:
- Not letting the butter soften: Room temperature butter is crucial for a smooth and creamy cookie dough.
- Overmixing the dough: This can lead to tough bars; mix just until combined.
- Not cooling properly: Allow the bars to cool completely before slicing to avoid a gooey mess.
- Overbaking: Keep an eye on your bars; they should be soft in the center when removed from the oven.
Save for Later: Storage Tips
To keep your Cheesecake Filled Chocolate Chip Bars fresh and delicious:
Store the bars in an airtight container at room temperature for up to 3 days. For longer storage, you can refrigerate them for up to a week. If you want to keep them for even longer, consider freezing them. Simply wrap each bar in plastic wrap and place them in a freezer-safe container. They can be frozen for up to 3 months. When you’re ready to enjoy, simply thaw at room temperature or heat them in the microwave for a few seconds.
Top Questions & Answers
Can I use different types of chocolate chips?
Absolutely! Feel free to substitute with milk chocolate, dark chocolate, or even white chocolate chips for a different flavor profile.
Can I make these bars gluten-free?
Yes! You can use a gluten-free all-purpose flour blend in place of the regular flour, and the results will still be delicious.
What can I add to the cheesecake filling for extra flavor?
You can mix in a teaspoon of lemon zest, a splash of almond extract, or even some mini chocolate chips for a twist on the classic flavor.
Can I double the recipe?
Yes, you can double the recipe! Just make sure to use a larger baking pan and adjust the baking time as needed. Keep an eye on them as they bake to ensure they don’t overcook.
Before You Go
Thank you for joining me on this delicious journey to create Cheesecake Filled Chocolate Chip Bars! I hope this recipe inspires you to bake and share these delightful bars with your loved ones. The combination of rich chocolate and smooth cheesecake is simply irresistible, and I can’t wait for you to experience the joy they bring. So grab your ingredients, preheat that oven, and let the baking magic begin! Enjoy every bite!
Cheesecake Filled Chocolate Chip Bars
Ingredients
Equipment
Method
- Step 1: Preheat your oven to 350°F (175°C).
- Step 2: Line your 9x13-inch baking pan with parchment paper.
- Step 3: In a large mixing bowl, cream together the butter, brown sugar, and white sugar using an electric mixer until light and fluffy.
- Step 4: Add the eggs one at a time, mixing well after each addition, then stir in the vanilla extract.
- Step 5: In another bowl, whisk together the flour, baking soda, and salt. Gradually add to the wet ingredients, mixing until just combined.
- Step 6: Gently fold in the semisweet chocolate chips.
- Step 7: In a separate bowl, beat together the cream cheese, sugar, and egg until smooth and creamy for the cheesecake filling.
- Step 8: Spread half of the cookie dough in the prepared pan, pour the cheesecake mixture over it, then dollop the remaining cookie dough on top.
- Step 9: Bake for 30-35 minutes, until the edges are golden and a toothpick inserted comes out clean.
- Step 10: Let cool for 10-15 minutes, then lift out using parchment paper and cool completely before slicing.
Notes
- Store bars in an airtight container at room temperature for up to 3 days.
- For longer storage, refrigerate for up to a week.
- Freeze wrapped bars for up to 3 months for a longer treat.