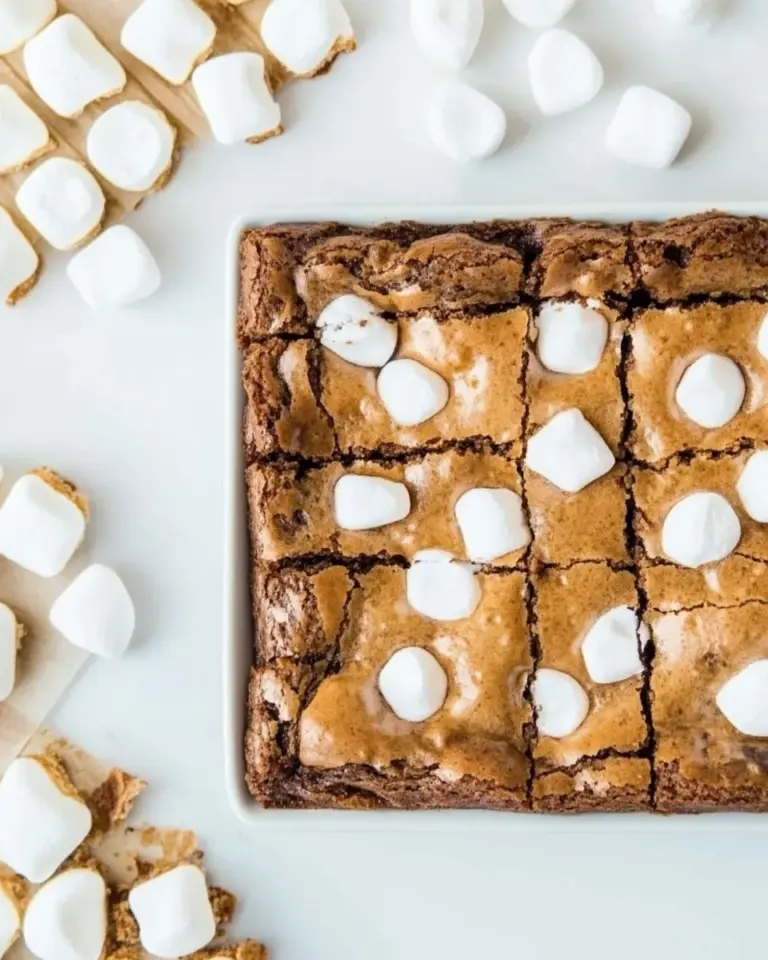
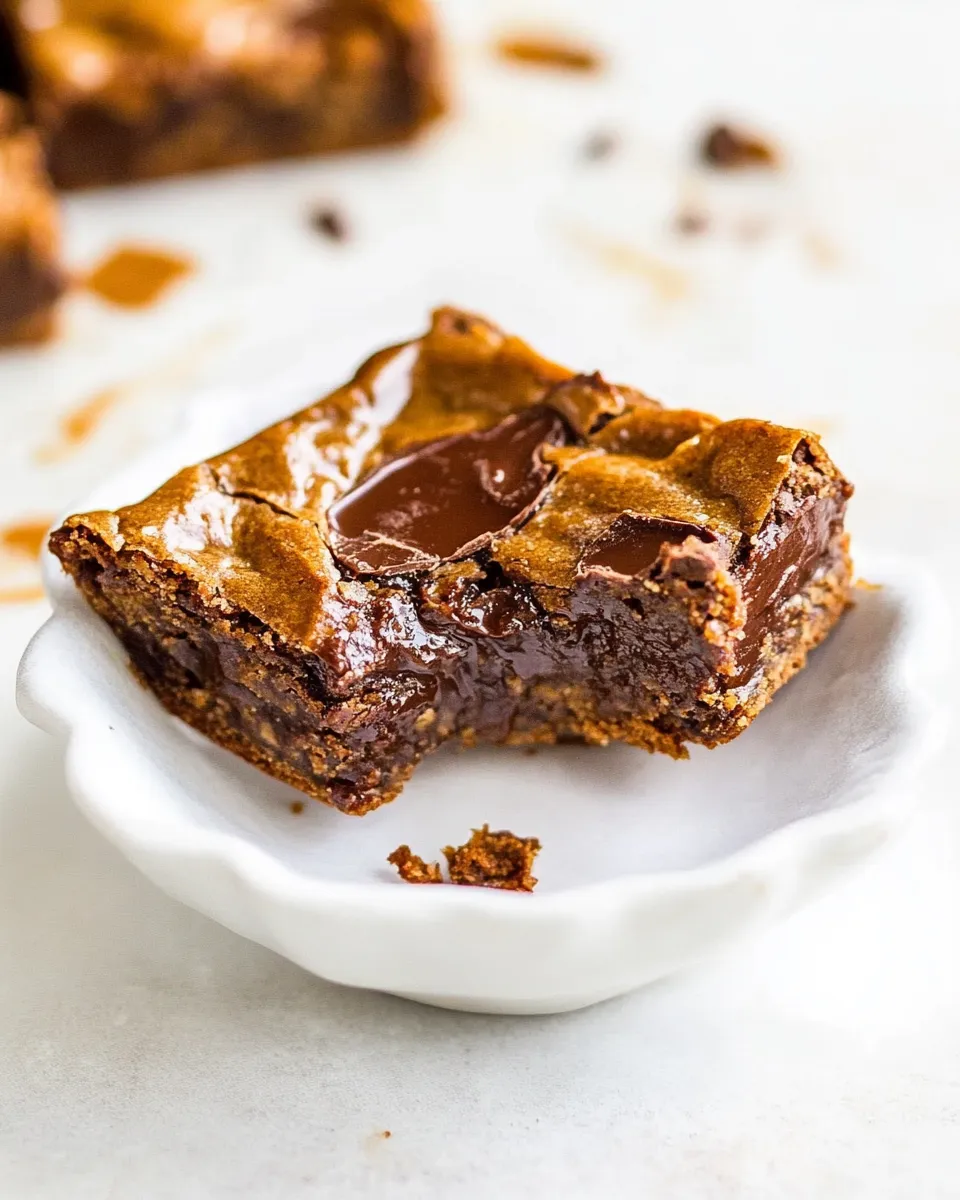
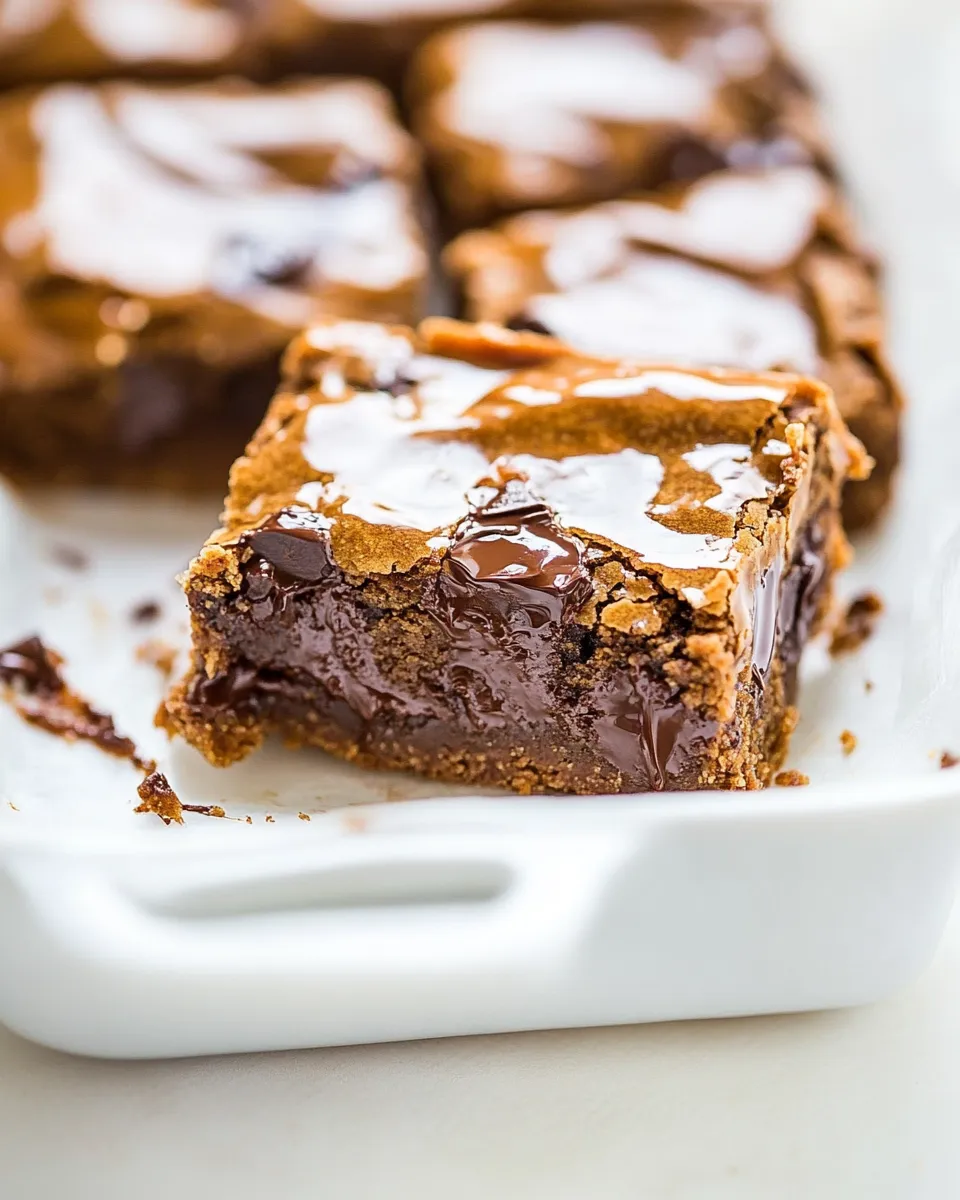
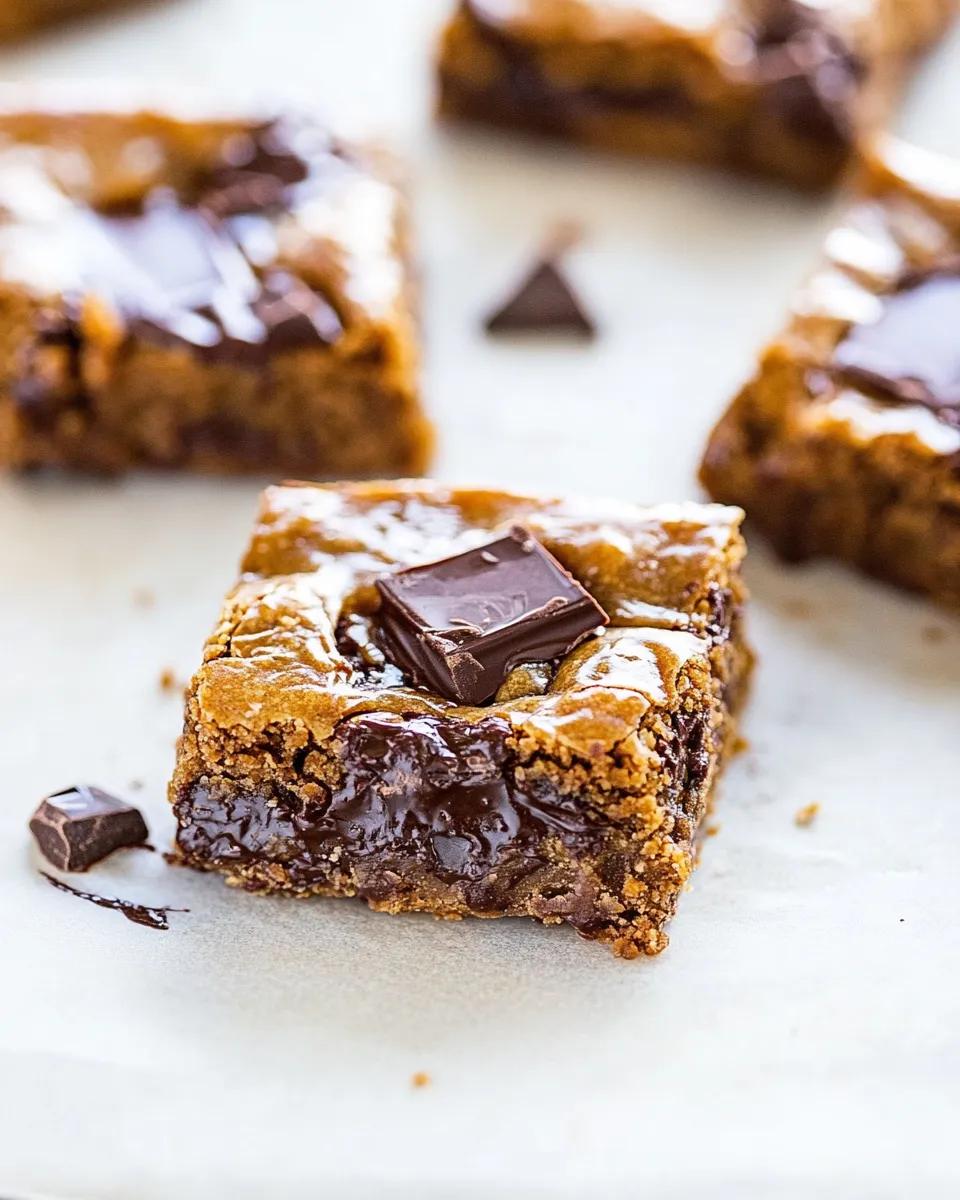
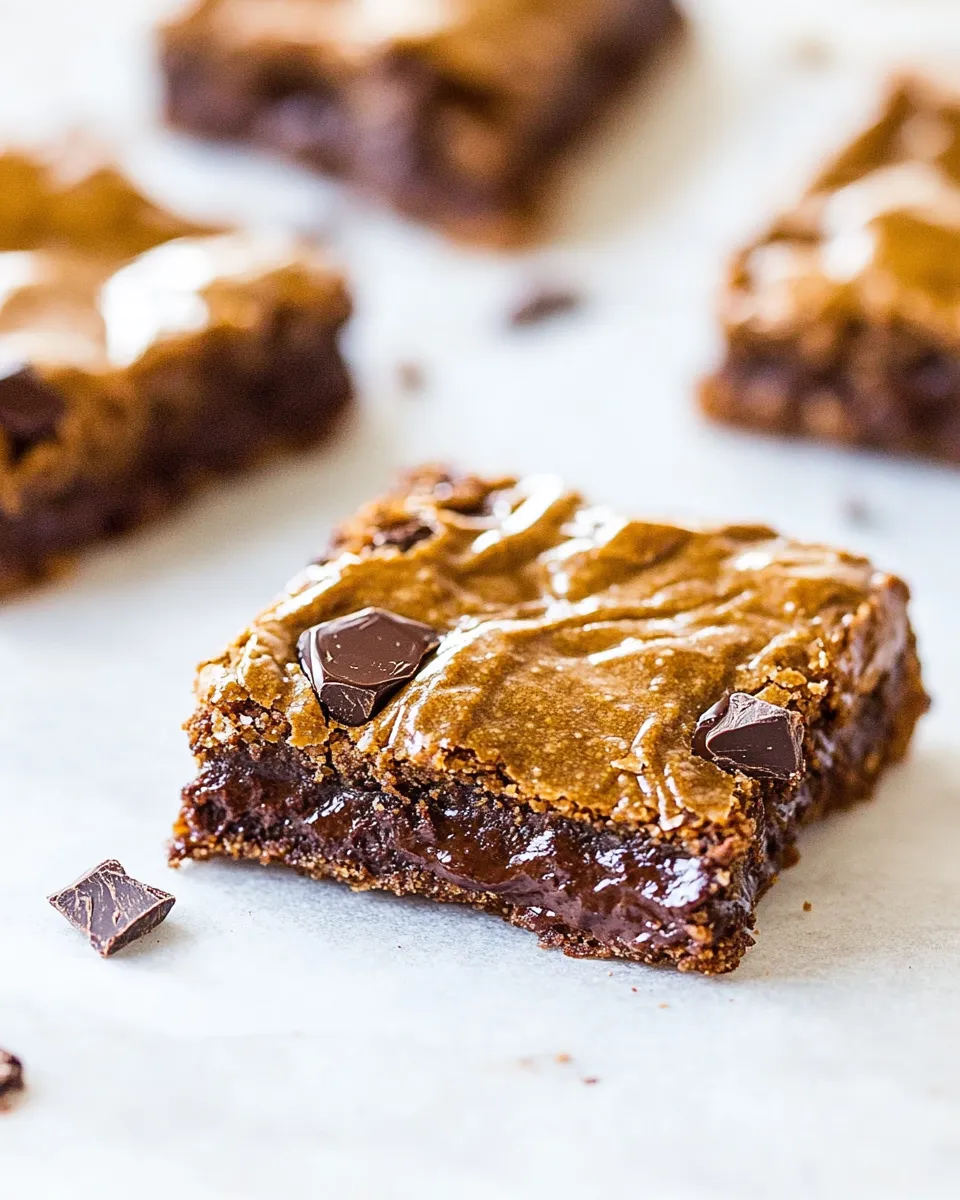
Gooey Chocolate Chunk Cookie Butter Bars
There’s just something about the combination of cookie butter and chocolate that takes dessert to a whole new level. If you’re on the hunt for a decadent treat that will impress your friends and family, look no further! These Gooey Chocolate Chunk Cookie Butter Bars are rich, chewy, and bursting with flavor. Picture a bar that melds the creamy sweetness of cookie butter with luscious chunks of chocolate, all brought together in a gorgeous, gooey texture that’s simply irresistible. Let’s dive into how to make these delightful bars!
What You’ll Love About This Recipe
- Easy to make with simple ingredients.
- Rich, gooey texture that melts in your mouth.
- Perfect for sharing at parties or keeping all to yourself!
- Versatile: Enjoy them warm or at room temperature.
- Chocolate chunks throughout for that extra bite of sweetness.
The Essentials
- 1 cup creamy cookie butter – This is the star of the show, providing that unique flavor and texture.
- 1/2 cup light brown sugar, packed – Adds moisture and a hint of caramel flavor.
- 1/3 cup granulated sugar – For sweetness and structure.
- 1 tablespoon vanilla extract – Enhances the overall flavor profile.
- 1 large egg plus one egg yolk – Ensures a rich and gooey texture.
- 1/4 cup molasses (not black strap) – Introduces a deep, rich flavor that complements the cookie butter.
- 1 cup plus 1 tablespoon all-purpose flour (not packed!) – The base for our bars.
- 1 and 1/2 teaspoons ground cinnamon – Adds warmth and spice.
- 1/2 teaspoon salt – Balances the sweetness.
- 4 ounces semi-sweet chocolate, chopped into chunks – For that gooey chocolate goodness.
- 2 ounces semi-sweet chocolate, chopped into chunks, for topping – Extra chocolate, because why not?
- Flaky sea salt – For a delightful finishing touch.
Equipment at a Glance
- Mixing bowls – For combining your ingredients.
- Rubber spatula or wooden spoon – For mixing without overworking the batter.
- 9×9-inch baking pan – Perfect size for these gooey bars.
- Parchment paper – Makes for easy removal and cleanup.
- Oven – To bake your delicious bars to perfection.
Gooey Chocolate Chunk Cookie Butter Bars, Made Easy
Step 1: Preheat Your Oven
Start by preheating your oven to 350°F (175°C). This ensures that your cookie butter bars bake evenly and become perfectly gooey.
Step 2: Prepare the Baking Pan
Line your 9×9-inch baking pan with parchment paper, leaving some overhang on the sides for easy removal later. Lightly grease the parchment to ensure nothing sticks.
Step 3: Mix the Wet Ingredients
In a large mixing bowl, combine the 1 cup creamy cookie butter, 1/2 cup light brown sugar, 1/3 cup granulated sugar, and 1 tablespoon vanilla extract. Stir until well combined and creamy.
Step 4: Add the Eggs and Molasses
To the mixture, add 1 large egg, 1 egg yolk, and 1/4 cup molasses. Mix until everything is beautifully blended.
Step 5: Combine the Dry Ingredients
In a separate bowl, whisk together 1 cup plus 1 tablespoon all-purpose flour, 1 and 1/2 teaspoons ground cinnamon, and 1/2 teaspoon salt.
Step 6: Mix Dry and Wet Ingredients
Gradually add the dry mixture to the wet mixture. Using a rubber spatula or wooden spoon, mix until just combined. Be careful not to overmix, as this will affect the texture of your bars.
Step 7: Fold in the Chocolate Chunks
Gently fold in 4 ounces of chopped semi-sweet chocolate until evenly distributed throughout the batter.
Step 8: Spread the Batter in the Pan
Pour the batter into the prepared baking pan, spreading it evenly.
Step 9: Add Toppings
Sprinkle the remaining 2 ounces of chopped chocolate on top of the batter, pressing them gently into the surface. This extra chocolate will melt and create a delicious topping.
Step 10: Bake
Bake in your preheated oven for 20-25 minutes. You’ll want the edges to be set while the center remains slightly gooey. A toothpick inserted into the center should come out with a few moist crumbs.
Step 11: Cool and Sprinkle
Once baked, remove from the oven and let it cool in the pan for about 10 minutes. Sprinkle with flaky sea salt for that perfect contrast of flavors.
Step 12: Slice and Serve
Using the parchment overhang, lift the bars out of the pan and onto a cutting board. Slice into squares or rectangles, and serve warm or at room temperature. Enjoy the gooey goodness!
What to Use Instead
- Coconut sugar instead of light brown sugar for a less refined option.
- Maple syrup can replace molasses if you’re looking for a different flavor.
- Gluten-free all-purpose flour can be used for a gluten-free version.
- Milk chocolate chunks if you prefer a sweeter bar.
Pro Tips & Notes
- For an extra layer of flavor, consider adding a teaspoon of espresso powder to enhance the chocolate taste.
- Make sure your cookie butter is at room temperature to ensure easy mixing.
- If you prefer a thicker bar, you can bake in an 8×8-inch pan instead.
- These bars can be stored in an airtight container for up to a week, but trust us, they won’t last that long!
Cooling, Storing & Rewarming
Let your Gooey Chocolate Chunk Cookie Butter Bars cool completely in the pan before slicing. Store them in an airtight container at room temperature for up to a week. If you want to enjoy them warm, simply pop them in the microwave for about 10-15 seconds to revive that gooey texture.
Troubleshooting Q&A
Why are my bars too dry?
Overbaking is often the culprit. Make sure to check for doneness a few minutes before the suggested baking time.
Can I use crunchy cookie butter instead of creamy?
Absolutely! Just keep in mind that the texture will be a bit different, but still delicious.
What if I don’t have molasses?
You can substitute with honey or maple syrup, though the flavor will vary slightly.
How can I tell when the bars are done baking?
Look for set edges and a slightly gooey center; a toothpick should come out with a few moist crumbs.
Ready to Cook?
Now that you have all the knowledge to create these delightful Gooey Chocolate Chunk Cookie Butter Bars, it’s time to gather your ingredients and get baking! These bars are bound to become a favorite in your household – perfect for dessert, snacks, or any occasion that calls for something sweet. Enjoy the process and the delicious results!
Gooey Chocolate Chunk Cookie Butter Bars
Ingredients
Equipment
Method
- Step 1: Preheat Your OvenStart by preheating your oven to 350°F (175°C). This ensures that your cookie butter bars bake evenly and become perfectly gooey.
- Step 2: Prepare the Baking PanLine your 9x9-inch baking pan with parchment paper, leaving some overhang on the sides for easy removal later. Lightly grease the parchment to ensure nothing sticks.
- Step 3: Mix the Wet IngredientsIn a large mixing bowl, combine the 1 cup creamy cookie butter, 1/2 cup light brown sugar, 1/3 cup granulated sugar, and 1 tablespoon vanilla extract. Stir until well combined and creamy.
- Step 4: Add the Eggs and MolassesTo the mixture, add 1 large egg, 1 egg yolk, and 1/4 cup molasses. Mix until everything is beautifully blended.
- Step 5: Combine the Dry IngredientsIn a separate bowl, whisk together 1 cup plus 1 tablespoon all-purpose flour, 1 and 1/2 teaspoons ground cinnamon, and 1/2 teaspoon salt.
- Step 6: Mix Dry and Wet IngredientsGradually add the dry mixture to the wet mixture. Using a rubber spatula or wooden spoon, mix until just combined. Be careful not to overmix, as this will affect the texture of your bars.
- Step 7: Fold in the Chocolate ChunksGently fold in 4 ounces of chopped semi-sweet chocolate until evenly distributed throughout the batter.
- Step 8: Spread the Batter in the PanPour the batter into the prepared baking pan, spreading it evenly.
- Step 9: Add ToppingsSprinkle the remaining 2 ounces of chopped chocolate on top of the batter, pressing them gently into the surface. This extra chocolate will melt and create a delicious topping.
- Step 10: BakeBake in your preheated oven for 20-25 minutes. You’ll want the edges to be set while the center remains slightly gooey. A toothpick inserted into the center should come out with a few moist crumbs.
- Step 11: Cool and SprinkleOnce baked, remove from the oven and let it cool in the pan for about 10 minutes. Sprinkle with flaky sea salt for that perfect contrast of flavors.
- Step 12: Slice and ServeUsing the parchment overhang, lift the bars out of the pan and onto a cutting board. Slice into squares or rectangles, and serve warm or at room temperature. Enjoy the gooey goodness!
Notes
- For an extra layer of flavor, consider adding a teaspoon of espresso powder to enhance the chocolate taste.
- Make sure your cookie butter is at room temperature to ensure easy mixing.
- If you prefer a thicker bar, you can bake in an 8x8-inch pan instead.
- These bars can be stored in an airtight container for up to a week, but trust us, they won’t last that long!