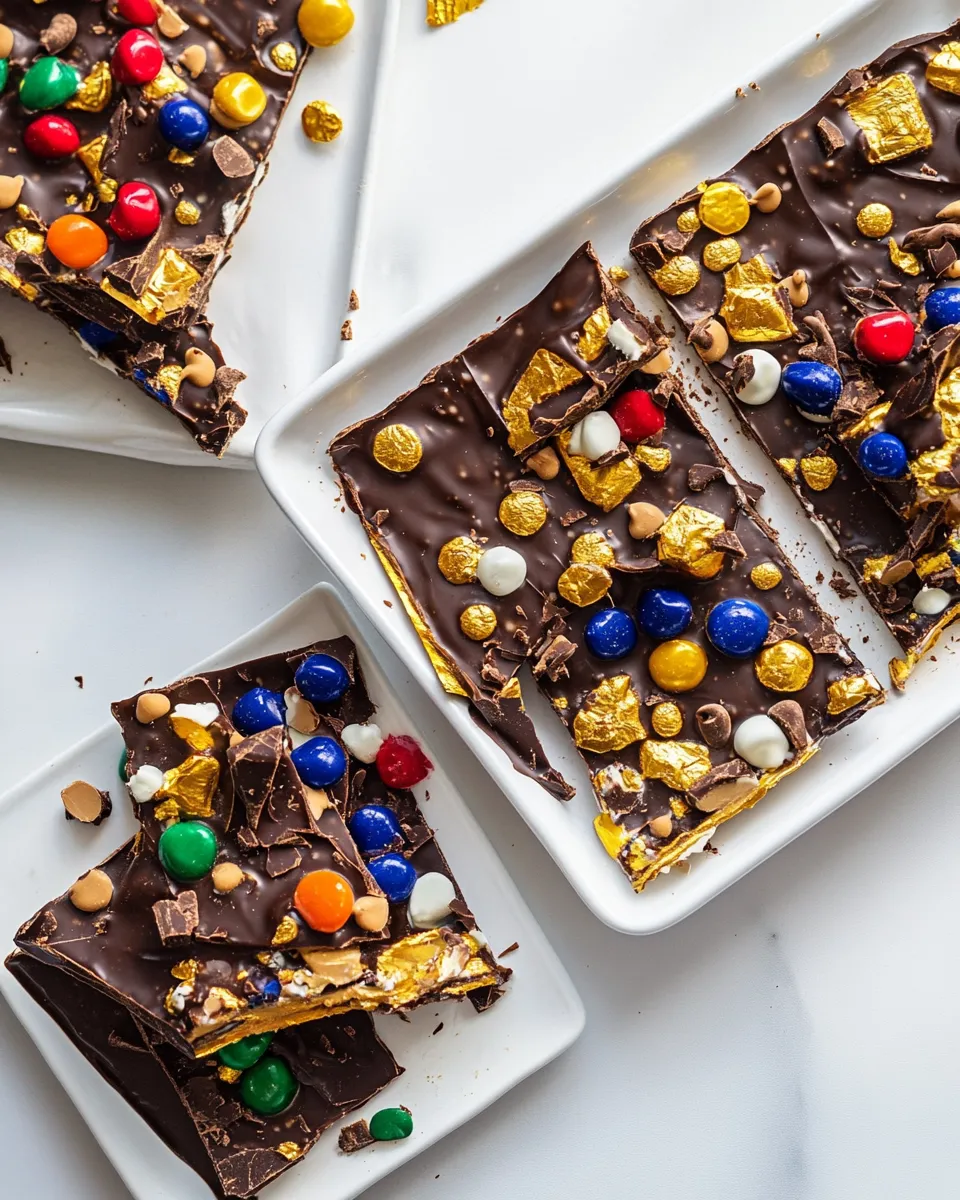
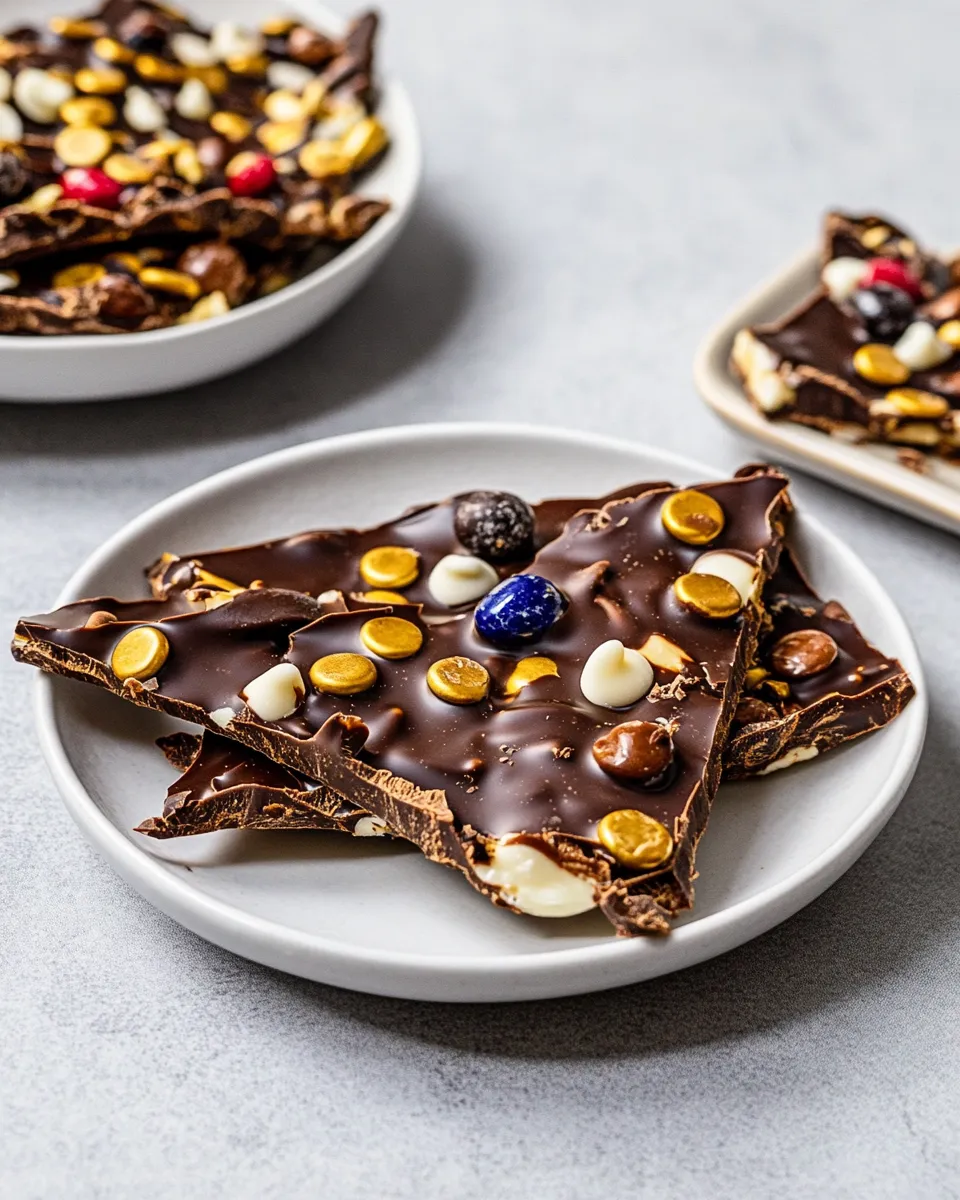
Chocolate Bark
Chocolate bark is an incredibly versatile treat that appeals to both the eyes and the taste buds. With its rich layers of chocolate and delightful toppings, this recipe is a fantastic way to indulge while also showcasing your creativity in the kitchen. Whether you’re preparing for a special occasion or simply looking for a sweet snack, homemade chocolate bark is sure to impress.
The best part? Using Reynolds Wrap Heavy Duty Foil makes the process effortless, ensuring easy clean-up and a beautifully formed bark that breaks perfectly. Let’s dive into the delicious world of chocolate bark and discover how easy it is to create your own masterpiece.
Why This Chocolate Bark Stands Out
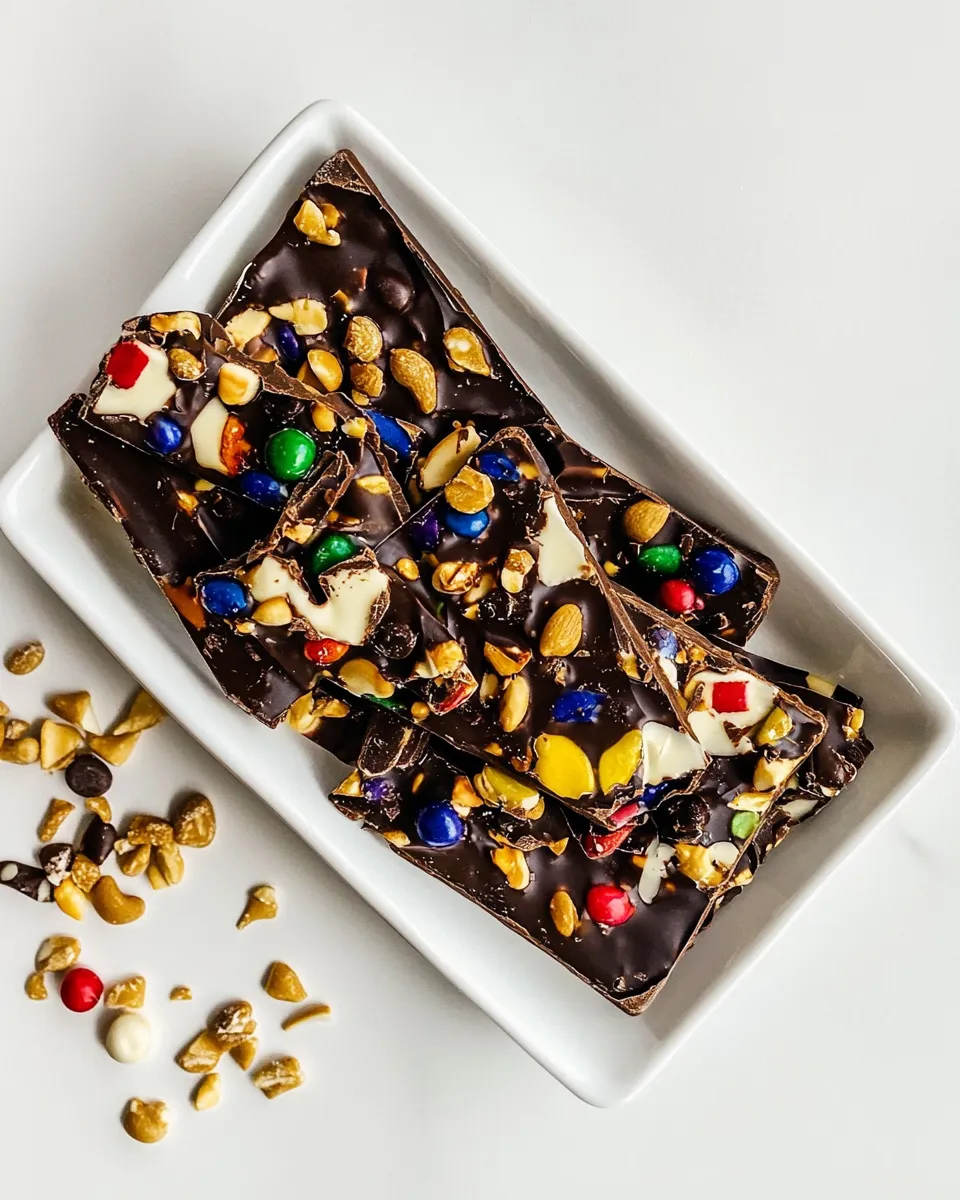
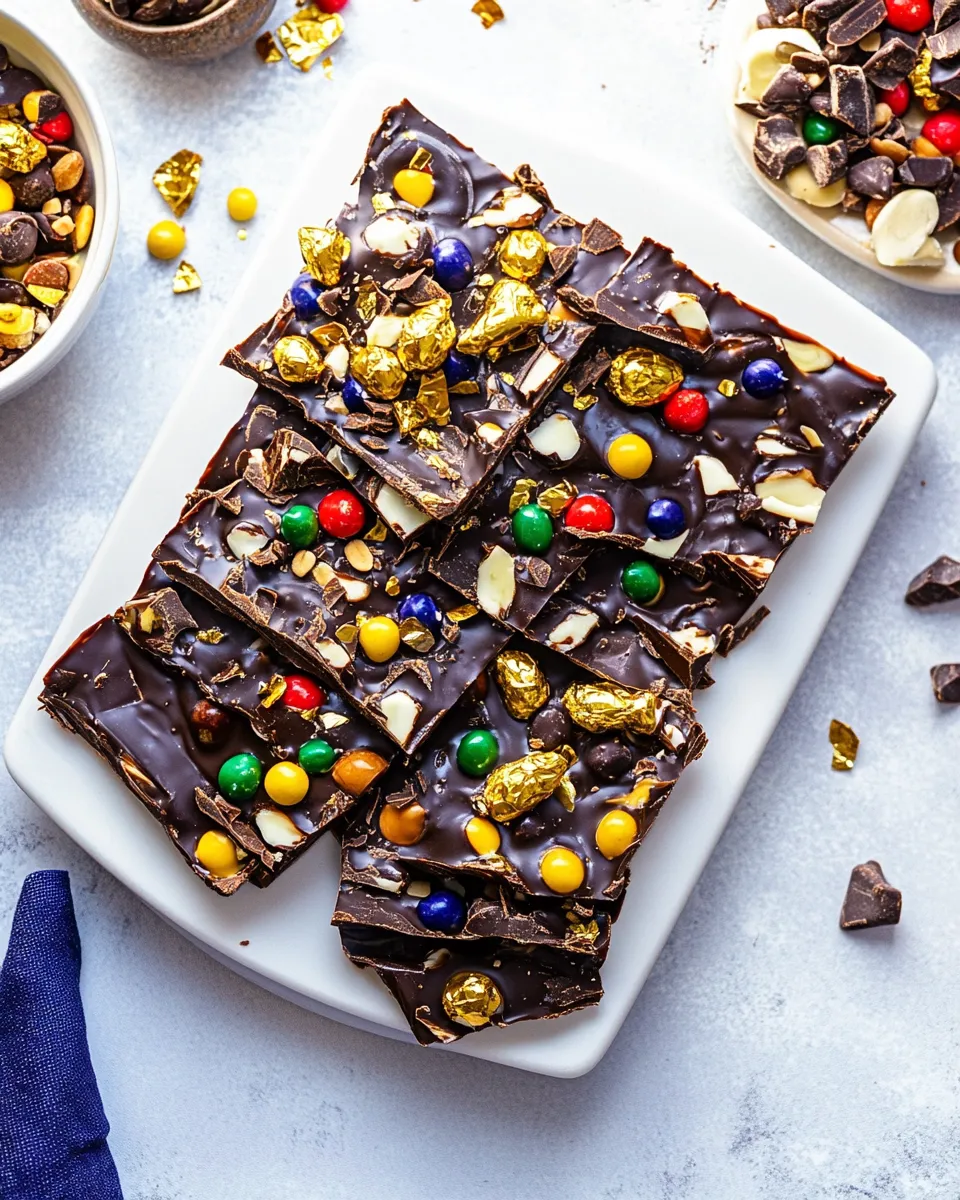
This chocolate bark recipe shines due to its combination of flavors and textures. By layering milk, dark, and white chocolate, you create a stunning visual contrast and a delightful taste experience. Each bite offers a unique blend of sweetness from the chocolate, saltiness from the pretzels, and creaminess from the peanut butter cups. With a variety of toppings like peanuts, pistachios, and freeze-dried strawberries, this bark will cater to every palate. Impressively, it also allows for customization based on personal preferences or seasonal trends.
What You’ll Gather
- Reynolds Wrap Heavy Duty Foil – For easy clean-up and a non-stick surface.
- 10 ounces milk chocolate – The base layer for sweetness.
- Peanut butter cups – For that rich, creamy peanut butter flavor.
- Peanuts – Adds crunch and a salty contrast.
- Peanut butter, melted – Drizzled on top for extra creaminess.
- 10 ounces white chocolate – Offers a sweet, creamy layer.
- M&M’s – Vibrant colors and added crunch.
- Pretzels, broken into pieces – For a salty, crunchy element.
- 10 ounces dark chocolate – Rich and decadent, balancing the sweetness.
- Pistachios, chopped – Nutty and flavorful topping.
- Freeze-dried strawberries – Adds a fruity touch and beautiful color.
- Optional: Nuts, seeds, sea salt, dried fruit, etc. – Customize to your liking!
Prep & Cook Tools
- Baking sheet – To spread the chocolate bark.
- Parchment paper or Reynolds Wrap Heavy Duty Foil – To line your baking sheet for easy removal.
- Microwave-safe bowls – For melting the chocolate.
- Spatula – For spreading the chocolate evenly.
- Knife or pizza cutter – To cut the bark into pieces after it sets.
Step-by-Step: Chocolate Bark
Step 1: Prepare your workspace
Start by lining a baking sheet with Reynolds Wrap Heavy Duty Foil or parchment paper. This will ensure your chocolate bark doesn’t stick and makes for easy clean-up later.
Step 2: Melt the milk chocolate
In a microwave-safe bowl, melt 10 ounces of milk chocolate in 30-second intervals, stirring in between until smooth. Pour the melted chocolate onto the prepared baking sheet and spread it into an even layer.
Step 3: Add toppings to the milk chocolate layer
While the milk chocolate is still warm, sprinkle peanut butter cups and peanuts over the top. Gently press them in to ensure they stick.
Step 4: Melt the white chocolate
Repeat the melting process with 10 ounces of white chocolate. Once smooth, pour it over the milk chocolate layer, ensuring it covers the toppings. Use a spatula to spread it evenly if needed.
Step 5: Top the white chocolate layer
Sprinkle M&M’s and broken pretzel pieces over the white chocolate layer. Press them down slightly to secure.
Step 6: Melt the dark chocolate
Melt 10 ounces of dark chocolate using the same method as before. Once melted, pour it over the entire bark, ensuring it covers the previous layers.
Step 7: Final toppings
Sprinkle chopped pistachios and freeze-dried strawberries on top of the dark chocolate layer, adding a pop of color and flavor.
Step 8: Chill to set
Place the baking sheet in the refrigerator for about 1-2 hours or until the chocolate is completely set.
Step 9: Break the bark
Once set, remove the chocolate bark from the refrigerator. Use a knife or pizza cutter to break the bark into pieces of your desired size.
Seasonal Flavor Boosts
- Add peppermint extract and crushed candy canes for a festive holiday twist.
- Incorporate pumpkin spice and chopped pecans for a cozy autumn flavor.
- Use coconut flakes and almond slivers for a tropical vibe.
- Mix in raspberries or blueberries for a refreshing summer treat.
Insider Tips
For the best results, use high-quality chocolate for melting. It makes a significant difference in taste and texture. If your chocolate seizes while melting, add a small amount of coconut oil to smooth it out. Make sure all your toppings are ready before you start melting the chocolate, as timing is key to ensuring everything sticks well.
- Experiment with different types of chocolates – the combination of flavors can lead to delightful surprises.
- Feel free to customize the bark with your favorite toppings; the possibilities are endless!
- If you prefer a less sweet bark, consider using semi-sweet chocolate instead of milk chocolate.
Storage Pro Tips
Chocolate bark can be stored in an airtight container at room temperature for up to two weeks. If you live in a hot climate, consider refrigerating it to prevent melting. To keep the chocolate bark fresh, separate layers with parchment paper, ensuring they don’t stick together.
- For longer storage, you can freeze the chocolate bark. Just wrap it tightly in foil or place it in a freezer-safe bag.
- Allow the bark to come to room temperature before breaking or serving after refrigeration or freezing.
FAQ
Can I use other types of chocolate for this recipe?
Absolutely! You can use any variety of chocolate, such as white chocolate, semi-sweet, or even flavored chocolates. Make sure to adjust the sweetness according to your preference.
What toppings can I add to my chocolate bark?
The options are endless! You can use nuts, seeds, dried fruits, candies, or even spices to customize your chocolate bark. Just make sure they are evenly distributed for the best results.
How thick should the chocolate layers be?
A thickness of about 1/4 to 1/2 inch works best. This ensures that the chocolate sets properly and breaks apart easily while still being substantial enough to enjoy.
Can I make chocolate bark ahead of time?
Yes! Chocolate bark can be made a week in advance. Just store it in an airtight container, and it will remain delicious and fresh.
Ready to Cook?
Now that you have all the information you need, it’s time to roll up your sleeves and create your own chocolate bark masterpiece! With its beautiful layers and endless topping possibilities, this treat is a delightful way to express your creativity in the kitchen. Gather your ingredients, grab some Reynolds Wrap Heavy Duty Foil, and let your imagination run wild. Happy baking!
Chocolate Bark
Ingredients
Equipment
Method
- Step 1: Prepare your workspace - Line a baking sheet with Reynolds Wrap Heavy Duty Foil or parchment paper for easy clean-up.
- Step 2: Melt the milk chocolate - In a microwave-safe bowl, melt 10 ounces of milk chocolate in 30-second intervals, stirring until smooth. Pour onto the prepared baking sheet and spread evenly.
- Step 3: Add toppings to the milk chocolate layer - While warm, sprinkle peanut butter cups and peanuts over the milk chocolate. Press them in gently.
- Step 4: Melt the white chocolate - Repeat melting with 10 ounces of white chocolate. Pour over the milk chocolate layer and spread evenly.
- Step 5: Top the white chocolate layer - Sprinkle M&M's and broken pretzel pieces over the white chocolate. Press down slightly.
- Step 6: Melt the dark chocolate - Melt 10 ounces of dark chocolate as before. Pour over the entire bark, covering previous layers.
- Step 7: Final toppings - Sprinkle chopped pistachios and freeze-dried strawberries on top of the dark chocolate layer.
- Step 8: Chill to set - Place in the refrigerator for 1-2 hours or until set.
- Step 9: Break the bark - Once set, remove from the refrigerator and use a knife or pizza cutter to break into pieces.
Notes
- Use high-quality chocolate for the best flavor and texture.
- Have all toppings ready before melting chocolate to ensure they stick well.
- Store in an airtight container at room temperature for up to two weeks.