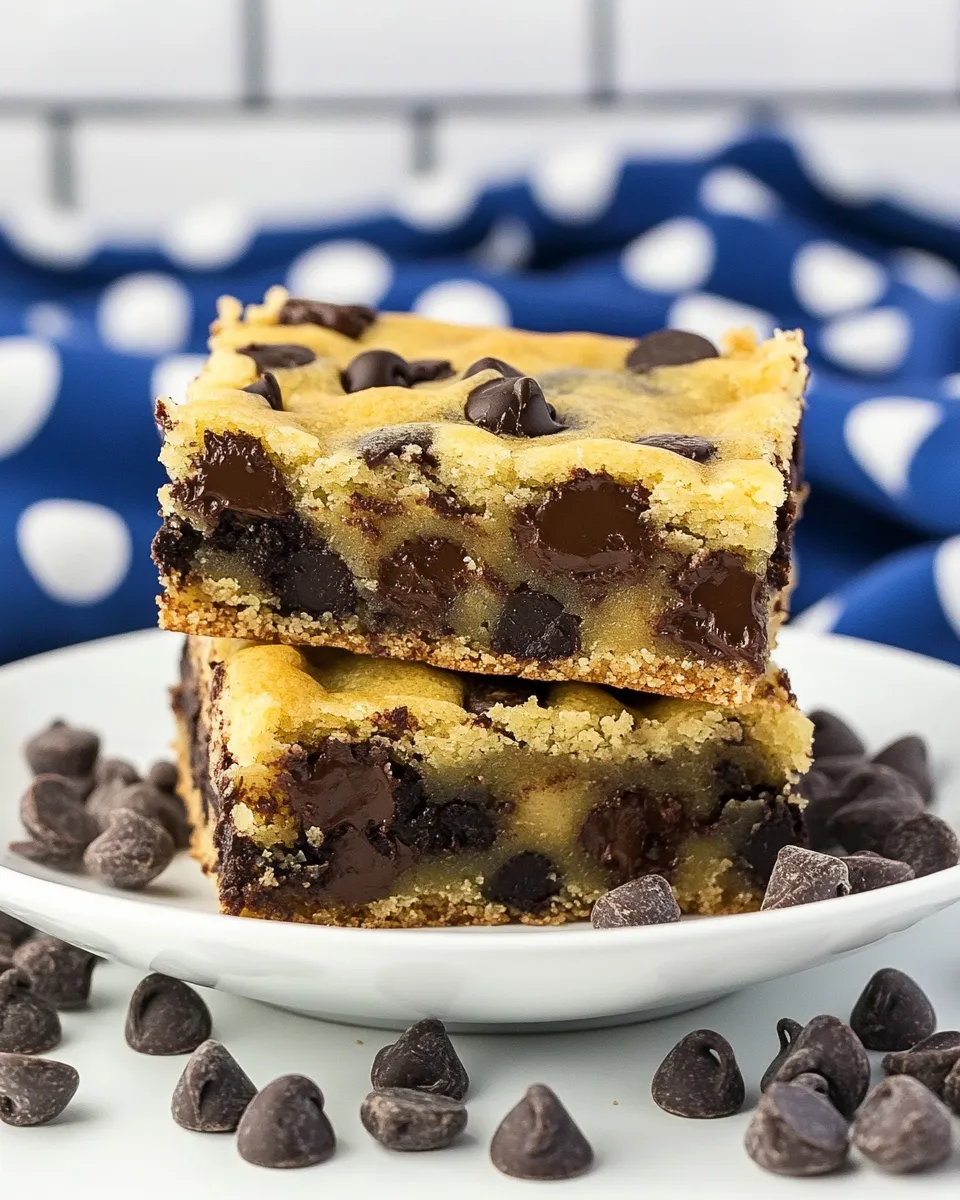
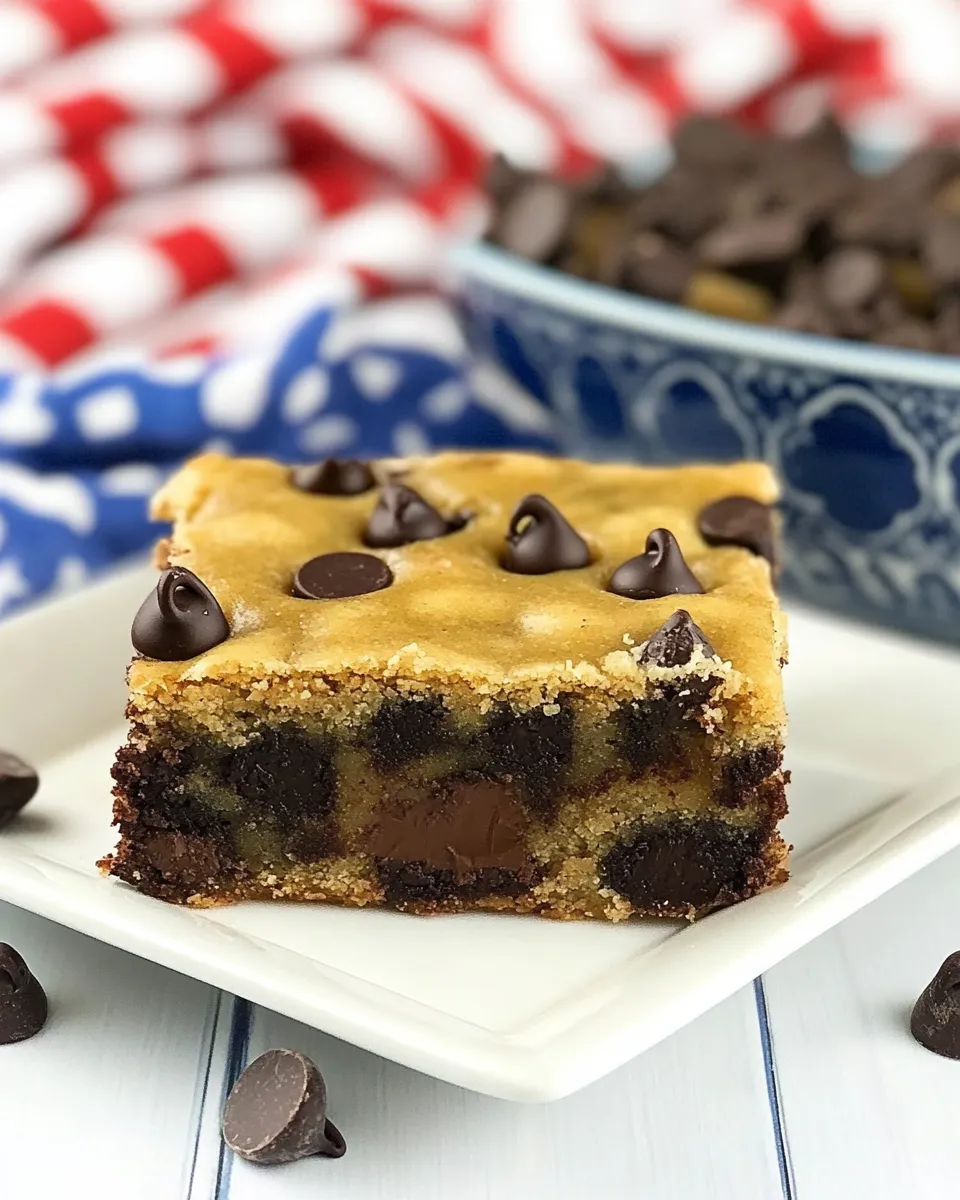
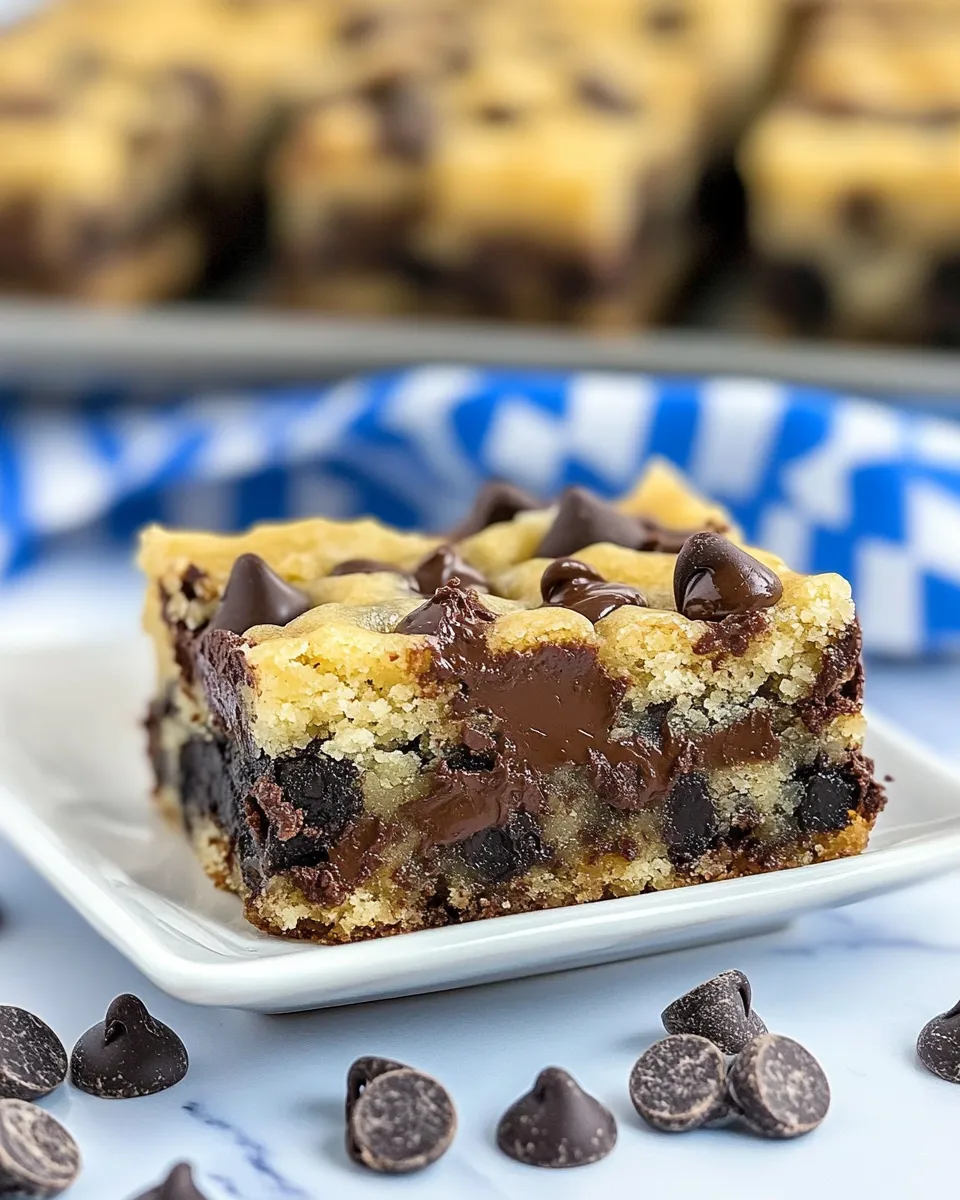
Chocolate Chip Gooey Cake Bars
If you’re on the hunt for a dessert that perfectly balances chewy, gooey, and chocolatey goodness, then look no further than these Chocolate Chip Gooey Cake Bars. This recipe combines the comforting flavors of yellow cake with a rich layer of chocolate chips, creating a treat that is sure to evoke feelings of nostalgia and delight. Whether you’re baking for a special occasion, a potluck, or just to satisfy a sweet craving, these bars are a guaranteed crowd-pleaser. With minimal effort and a handful of simple ingredients, you can whip up a batch that everyone will rave about.
Why This Recipe Works
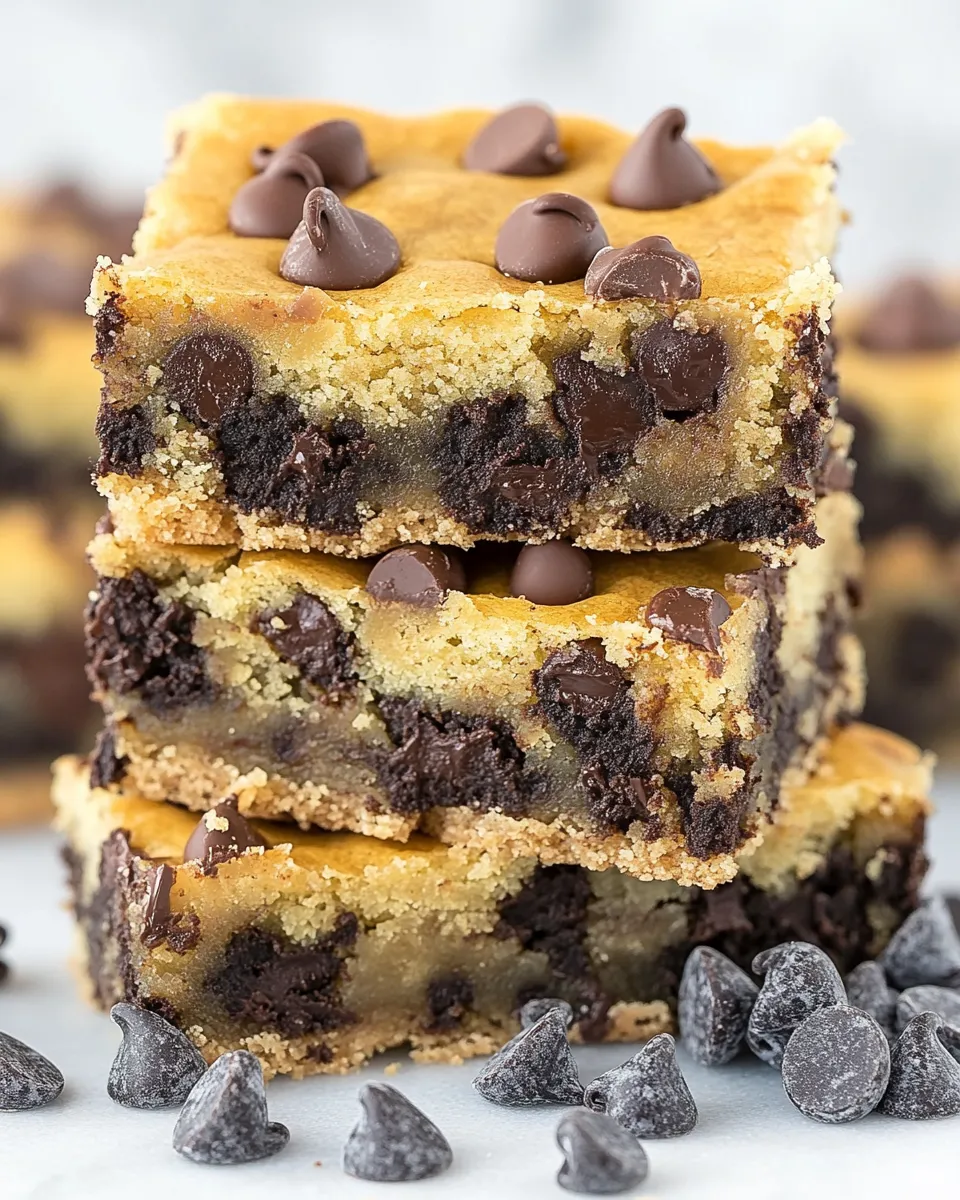
The magic of Chocolate Chip Gooey Cake Bars lies in their impressive texture and flavor profile. The base, made from yellow cake mix, provides a soft and tender crumb that serves as the perfect foundation. The addition of sweetened condensed milk not only adds moisture but also creates that signature gooey layer that makes each bite feel indulgent. Lastly, the generous amount of chocolate chips provides bursts of rich chocolate flavor, complementing the cake beautifully.
Ingredients at a Glance
- 1 (15-ounce) box yellow cake mix
- 1/2 cup (113g) unsalted butter, softened
- 1 large egg
- 1 (14-ounce) can sweetened condensed milk
- 2 cups (340g) chocolate chips
Before You Start: Equipment
- Mixing bowl: For combining your ingredients.
- 9×13 inch baking pan: To bake the bars to perfection.
- Spatula: For spreading the batter evenly in the pan.
- Measuring cups and spoons: To ensure accurate ingredient measurements.
- Oven: Preheated to the right temperature for baking.
Chocolate Chip Gooey Cake Bars Made Stepwise
Step 1: Preheat the Oven
Begin by preheating your oven to 350°F (175°C). This ensures that your cake bars bake evenly.
Step 2: Prepare the Baking Pan
Grease a 9×13 inch baking pan with butter or line it with parchment paper for easy removal later.
Step 3: Mix the Base
In a large mixing bowl, combine the yellow cake mix, softened butter, and egg. Mix until well combined and the batter is smooth.
Step 4: Spread the Batter
Pour half of the batter into the prepared baking pan and spread it evenly across the bottom. This will serve as the base layer.
Step 5: Add the Chocolate Chips
Sprinkle 1 cup of chocolate chips evenly over the batter in the pan. This will create a deliciously melty, chocolatey filling.
Step 6: Prepare the Gooey Layer
In a separate bowl, pour the sweetened condensed milk and mix in the remaining batter until well combined. The mixture will be thick and gooey.
Step 7: Pour the Gooey Layer
Carefully pour the gooey mixture over the chocolate chips in the pan. Use a spatula to spread it gently to cover the chocolate chips as evenly as possible.
Step 8: Top with Remaining Chocolate Chips
Sprinkle the remaining 1 cup of chocolate chips on top of the gooey layer, ensuring they are evenly distributed.
Step 9: Bake
Place the pan in the preheated oven and bake for 25-30 minutes, or until the edges are golden brown and the center is set but still slightly gooey.
Step 10: Cool and Serve
Once baked, remove the pan from the oven and let it cool in the pan for about 10-15 minutes. Then, cut into squares and serve warm or at room temperature.
Holiday & Seasonal Touches
- For a festive touch, add a sprinkle of cinnamon to the batter.
- During the holidays, consider incorporating crushed peppermint candies or holiday-themed sprinkles.
- For a fall-inspired variation, swap out the chocolate chips for butterscotch or pumpkin spice chips.
- In the summer, fresh berries can be mixed into the batter for a fruity twist.
Troubleshooting Tips
- If your bars are too gooey in the center, bake them for a few extra minutes, checking for doneness.
- For firmer bars, allow them to cool completely before cutting.
- If you find the top is browning too quickly, cover the pan loosely with aluminum foil during baking.
- Ensure that your oven is properly calibrated for accurate baking times.
Storing, Freezing & Reheating
These Chocolate Chip Gooey Cake Bars can be stored in an airtight container at room temperature for up to 3 days. If you want to keep them longer, they can be frozen for up to 2 months. Wrap the bars tightly in plastic wrap and then place them in a freezer-safe bag. To reheat, simply thaw at room temperature or warm in the microwave for a few seconds until just heated through.
Your Questions, Answered
Can I use a different cake mix flavor?
Absolutely! While yellow cake mix is traditional, you can experiment with chocolate, vanilla, or even spice cake mixes for unique flavor variations.
What if I don’t have sweetened condensed milk?
If you don’t have sweetened condensed milk on hand, you can make a substitute using evaporated milk and sugar. For each cup of sweetened condensed milk, combine 1 cup of evaporated milk with 1 1/4 cups of sugar, heat until dissolved, and let cool.
Can I add nuts to the recipe?
Yes! Chopped nuts such as walnuts or pecans can be added for an extra crunch. Just fold them in with the chocolate chips for a delightful texture contrast.
How do I know when the cake bars are done baking?
The edges should be golden brown, and the center should be set but still slightly soft. A toothpick inserted into the center should come out with a few moist crumbs, indicating that they are perfectly gooey.
The Takeaway
These Chocolate Chip Gooey Cake Bars are a delightful treat that combines the best of cake and cookie worlds. With their rich, gooey texture and chocolatey flavor, they make for the perfect dessert for any occasion. Whether you’re enjoying them fresh out of the oven or a few days later, these bars will bring joy to your taste buds and smiles to your loved ones. So gather your ingredients, roll up your sleeves, and treat yourself to this easy and delicious dessert that’s sure to become a staple in your baking repertoire. Enjoy every gooey, chocolatey bite!