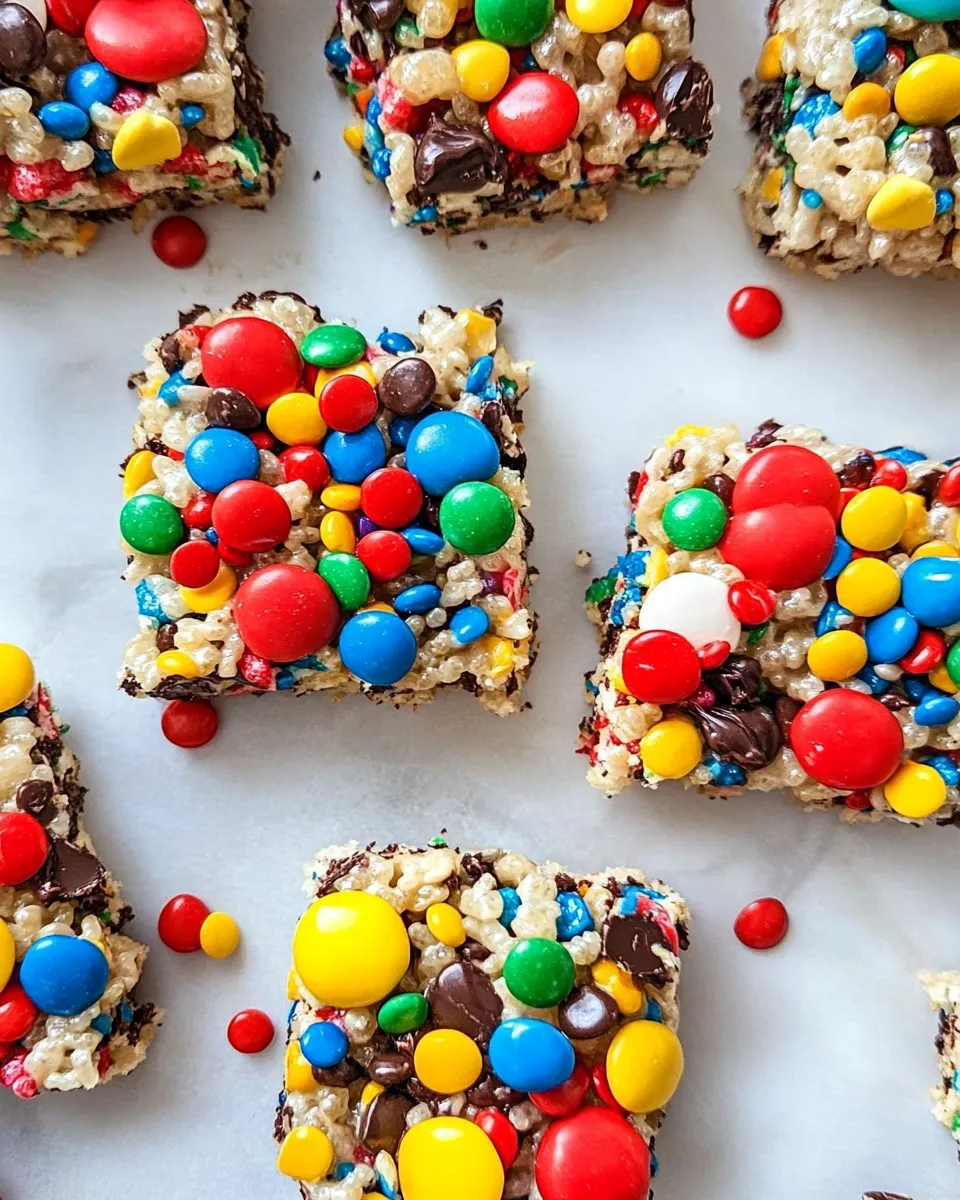
Disney Rice Krispie Treats
There’s something truly magical about Disney Rice Krispie Treats that brings back fond memories of childhood and family trips to the happiest place on earth. These delightful snacks are not only fun to make but are also a hit at any gathering, whether you’re hosting a birthday party, a Disney-themed movie night, or simply want to indulge your sweet tooth. With their crispy texture, gooey marshmallow goodness, and colorful M&M’s, they are sure to bring smiles to faces big and small. Let’s dive into how to create these enchanting treats in your very own kitchen!
Why This Recipe Belongs in Your Rotation
Disney Rice Krispie Treats are not just a treat; they are an experience! This recipe is incredibly simple, making it perfect for bakers of all skill levels. The combination of crispy cereal, gooey marshmallows, and vibrant chocolate candies creates a delightful contrast in textures and flavors. Plus, they’re customizable! You can easily adapt the colors and toppings for any occasion, from holidays to themed parties. Whether you are reminiscing about a Disney vacation or looking for a sweet snack, these treats will satisfy your cravings and brighten your day.
Ingredient Notes
- 9 cups (237g) Rice Krispies Cereal: The base of your treats. This cereal provides the perfect crunch and texture.
- 20 ounces (566g) mini marshmallows, divided: These marshmallows are the magic ingredient that binds everything together. Use a combination of melted and whole marshmallows for extra gooeyness.
- 8 tablespoons (113g) unsalted butter: Adds richness and flavor. Make sure to use unsalted to control the saltiness of your treats.
- 1 teaspoon (15ml) vanilla extract: Enhances the overall flavor, making your treats taste even more delicious.
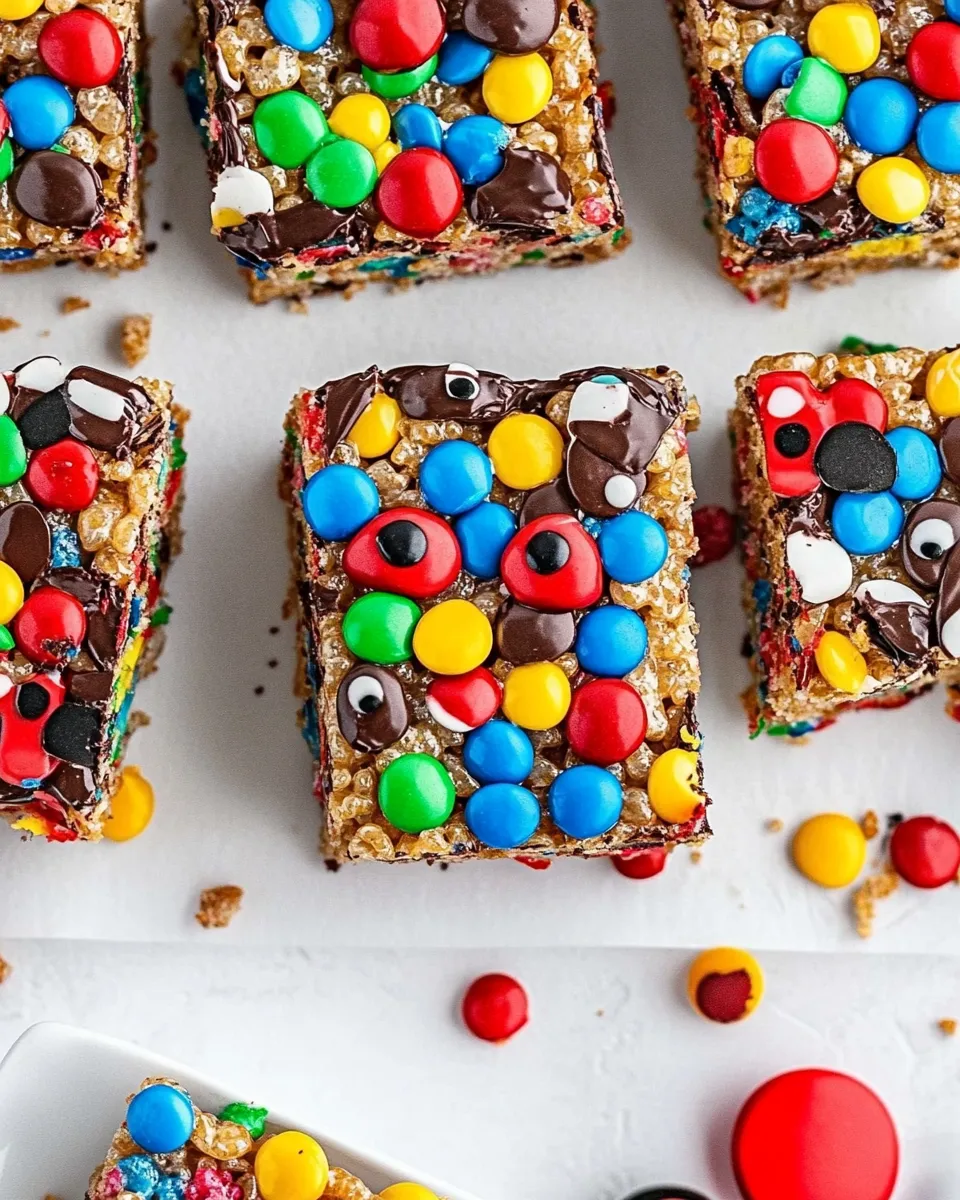
- 8 ounces chocolate candy melts: These provide a delightful coating and additional flavor. Choose your favorite colors for a fun touch.
- 1 family size bag (16.9 ounces) Mini M&Ms: These add a pop of color and a crunchy bite. They’re perfect for decorating and making your treats visually appealing.
Must-Have Equipment
- Large mixing bowl: To combine your ingredients easily.
- Spatula: A silicone spatula works best for mixing your marshmallows and cereal without sticking.
- 9×13 inch baking pan: This is the perfect size for holding your mixture and forming the treats.
- Microwave-safe bowl: For melting the butter and marshmallows, a microwave-safe bowl is essential.
- Parchment paper: Lining your baking pan with parchment will help with easy removal of the treats.
Method: Disney Rice Krispie Treats

Step 1: Prepare Your Baking Pan
Start by lining a 9×13 inch baking pan with parchment paper. This will make removing the treats much easier later on.
Step 2: Melt the Butter and Marshmallows
In a large microwave-safe bowl, combine 8 tablespoons of unsalted butter and 10 ounces of mini marshmallows. Microwave on high for about 1 minute, then stir. Continue to heat in 30-second increments until the mixture is melted and smooth. Stir in 1 teaspoon of vanilla extract.
Step 3: Combine with Rice Krispies
Once your butter and marshmallow mixture is smooth, pour it over 9 cups of Rice Krispies cereal in a large mixing bowl. Gently fold the cereal into the marshmallow mixture using a spatula until well coated.
Step 4: Add More Marshmallows
To make your treats extra gooey, fold in the remaining 10 ounces of mini marshmallows. This will create delightful pockets of marshmallow throughout your treats.
Step 5: Transfer to the Baking Pan
Pour the mixture into the prepared baking pan. Using a spatula, press the mixture evenly into the pan. Be careful not to pack it too tightly, as you want your treats to remain soft and chewy.
Step 6: Melt the Chocolate Candy Melts
In a separate microwave-safe bowl, melt the 8 ounces of chocolate candy melts according to package instructions. Stir until smooth.
Step 7: Drizzle the Chocolate
Once the Rice Krispie mixture is set (about 30 minutes), drizzle the melted chocolate over the top. Use a spoon or piping bag for a more decorative drizzle.
Step 8: Add the M&Ms
While the chocolate is still warm, sprinkle the Mini M&Ms over the top. Press them gently into the chocolate to ensure they stick.
Step 9: Let Set and Cut
Allow the chocolate to cool and set completely before cutting into squares. This usually takes about an hour at room temperature. Once set, cut into squares and enjoy your Disney Rice Krispie Treats!
Substitutions by Diet
- Dairy-free: Substitute the unsalted butter with a dairy-free butter alternative and ensure the chocolate candy melts are dairy-free.
- Gluten-free: Rice Krispies are generally gluten-free, but always check the packaging to be sure.
- Vegan: Use vegan butter and dairy-free chocolate melts to make this a vegan-friendly treat.
- Nut-free: This recipe is naturally nut-free, but always double-check your ingredients for cross-contamination.
Common Errors (and Fixes)
- Too Hard or Dry Treats: This usually happens when you pack the mixture too tightly or overcook the marshmallows. Be gentle when pressing the mixture into the pan.
- Marshmallows Not Melting: If your marshmallows aren’t melting smoothly, try adding a little extra butter or heating them in smaller intervals.
- Chocolate Not Drizzling Properly: If the chocolate is too thick, add a teaspoon of coconut oil to thin it out for easier drizzling.
- Sticking to the Pan: Make sure to line your pan with parchment paper and grease it lightly to prevent sticking.
Prep Ahead & Store
You can prepare Disney Rice Krispie Treats ahead of time. They can be made a day in advance and stored at room temperature. To keep them fresh, place them in an airtight container. If you prefer, you can also freeze them. Just wrap them in plastic wrap and then place them in a freezer-safe bag. They will last for up to three months in the freezer. When ready to enjoy, simply thaw at room temperature.
Ask & Learn
Can I use regular marshmallows instead of mini marshmallows?
Yes, you can! Just use the same weight of regular marshmallows. However, mini marshmallows tend to melt more easily and mix better into the cereal.
How do I know when my chocolate is melted correctly?
Your chocolate should be smooth and pourable. If it’s clumpy or grainy, it may have been overheated. Always melt chocolate in short intervals and stir frequently.
Can I add other toppings to my treats?
Absolutely! Feel free to get creative. You can use sprinkles, different types of chocolate, or even nuts for added flavor and texture.
How long do these treats last?
Disney Rice Krispie Treats can last up to a week at room temperature if stored properly in an airtight container. If refrigerated, they may last slightly longer but could become a bit firmer.
Make It Tonight
Now that you have this delightful recipe for Disney Rice Krispie Treats, it’s time to gather your ingredients and start creating your own magical treats. With just a few simple steps, you’ll have a batch of these delicious snacks ready to share with family and friends. Whether you’re celebrating a special occasion or just indulging in a sweet treat, these Disney Rice Krispie Treats are the perfect choice. Enjoy the process of making them as much as you will enjoy devouring them, and let the smiles begin!

Disney Rice Krispie Treats
Ingredients
Equipment
Method
- Start by lining a 9x13 inch baking pan with parchment paper.
- In a large microwave-safe bowl, combine 8 tablespoons of unsalted butter and 10 ounces of mini marshmallows. Microwave on high for about 1 minute, then stir. Continue to heat in 30-second increments until the mixture is melted and smooth. Stir in 1 teaspoon of vanilla extract.
- Pour the melted mixture over 9 cups of Rice Krispies cereal in a large mixing bowl. Gently fold the cereal into the marshmallow mixture using a spatula until well coated.
- Fold in the remaining 10 ounces of mini marshmallows.
- Pour the mixture into the prepared baking pan. Using a spatula, press the mixture evenly into the pan.
- In a separate microwave-safe bowl, melt the 8 ounces of chocolate candy melts according to package instructions. Stir until smooth.
- Once the Rice Krispie mixture is set (about 30 minutes), drizzle the melted chocolate over the top.
- While the chocolate is still warm, sprinkle the Mini M&Ms over the top. Press them gently into the chocolate.
- Allow the chocolate to cool and set completely before cutting into squares.
Notes
- Store in an airtight container to keep them fresh.
- You can freeze these treats for up to three months.
- Feel free to customize with different toppings.