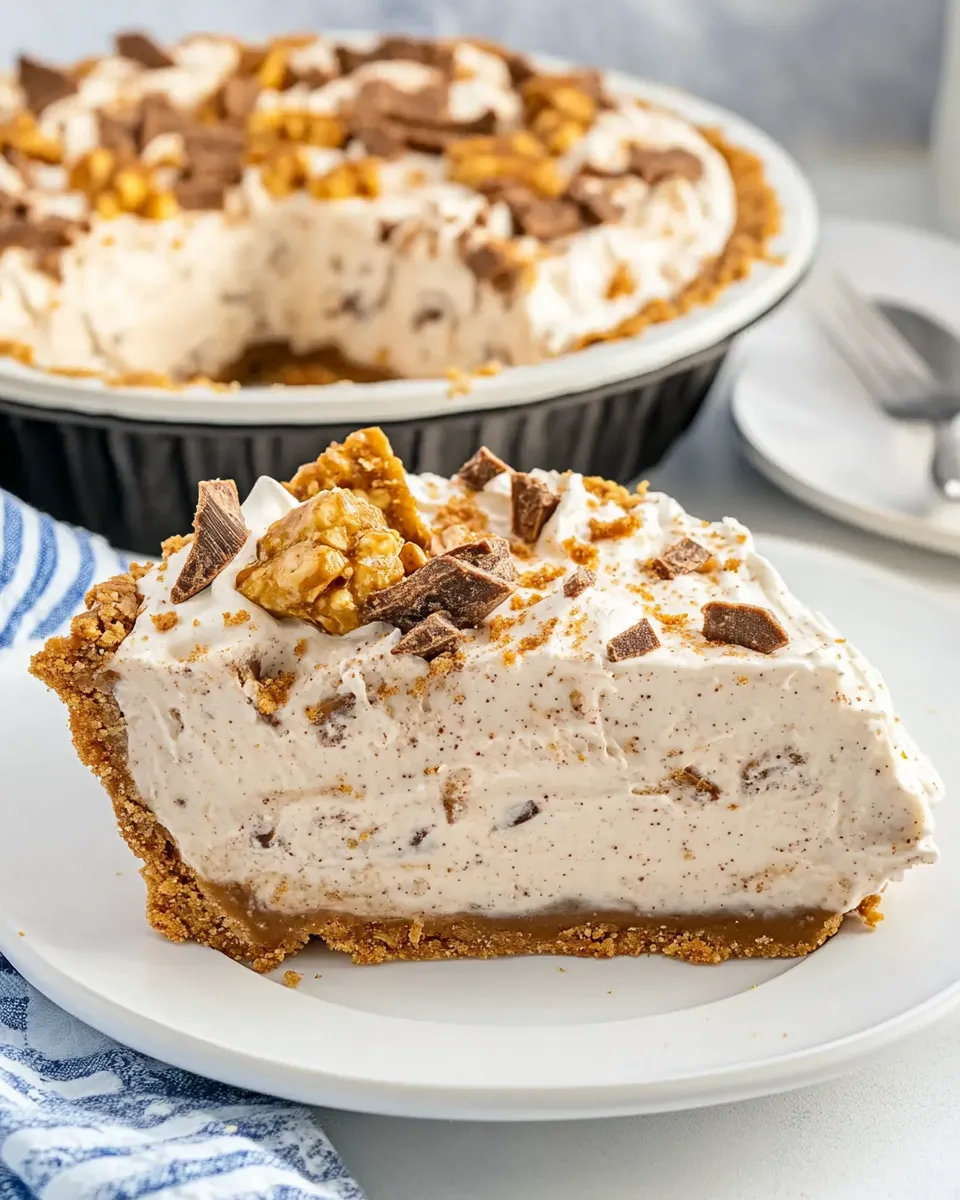
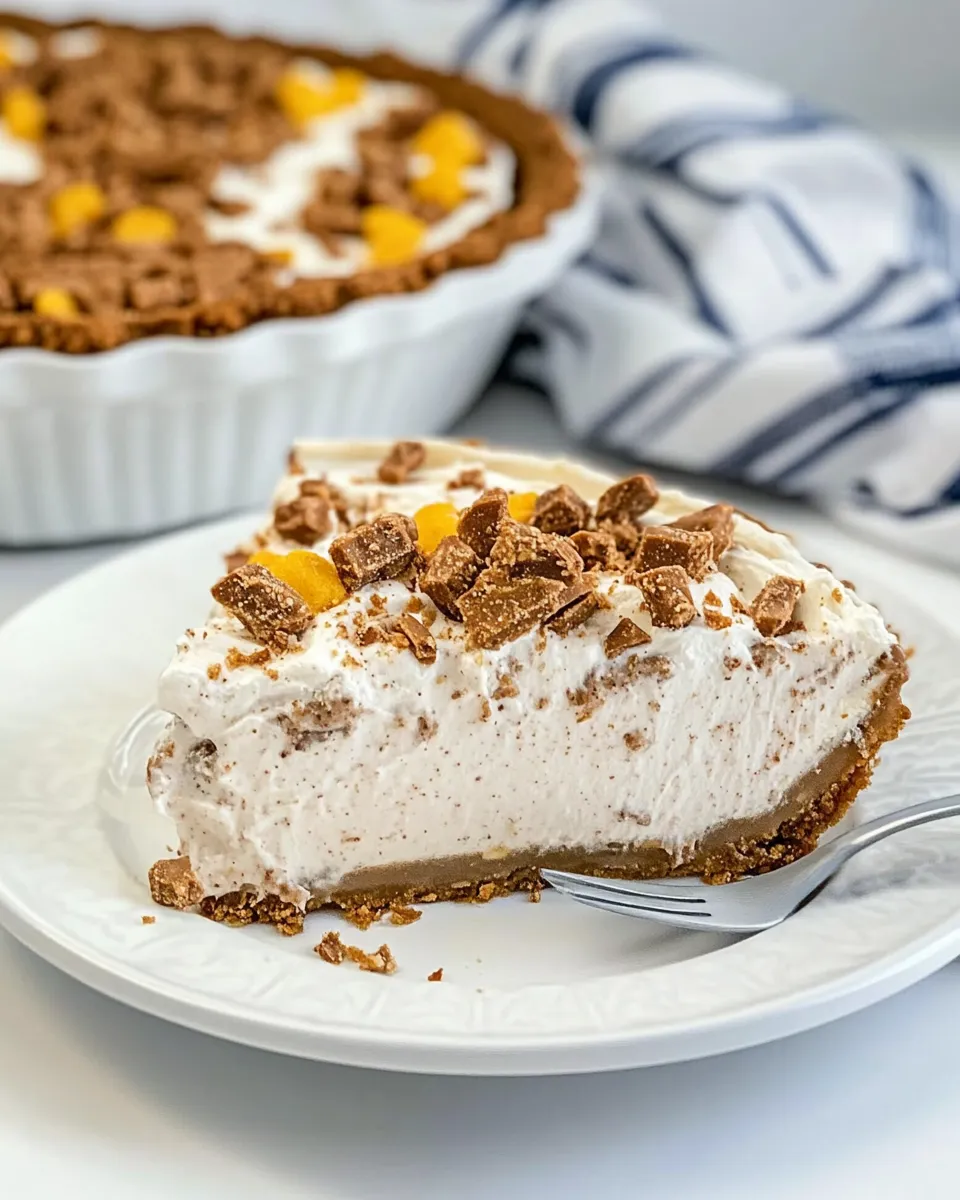
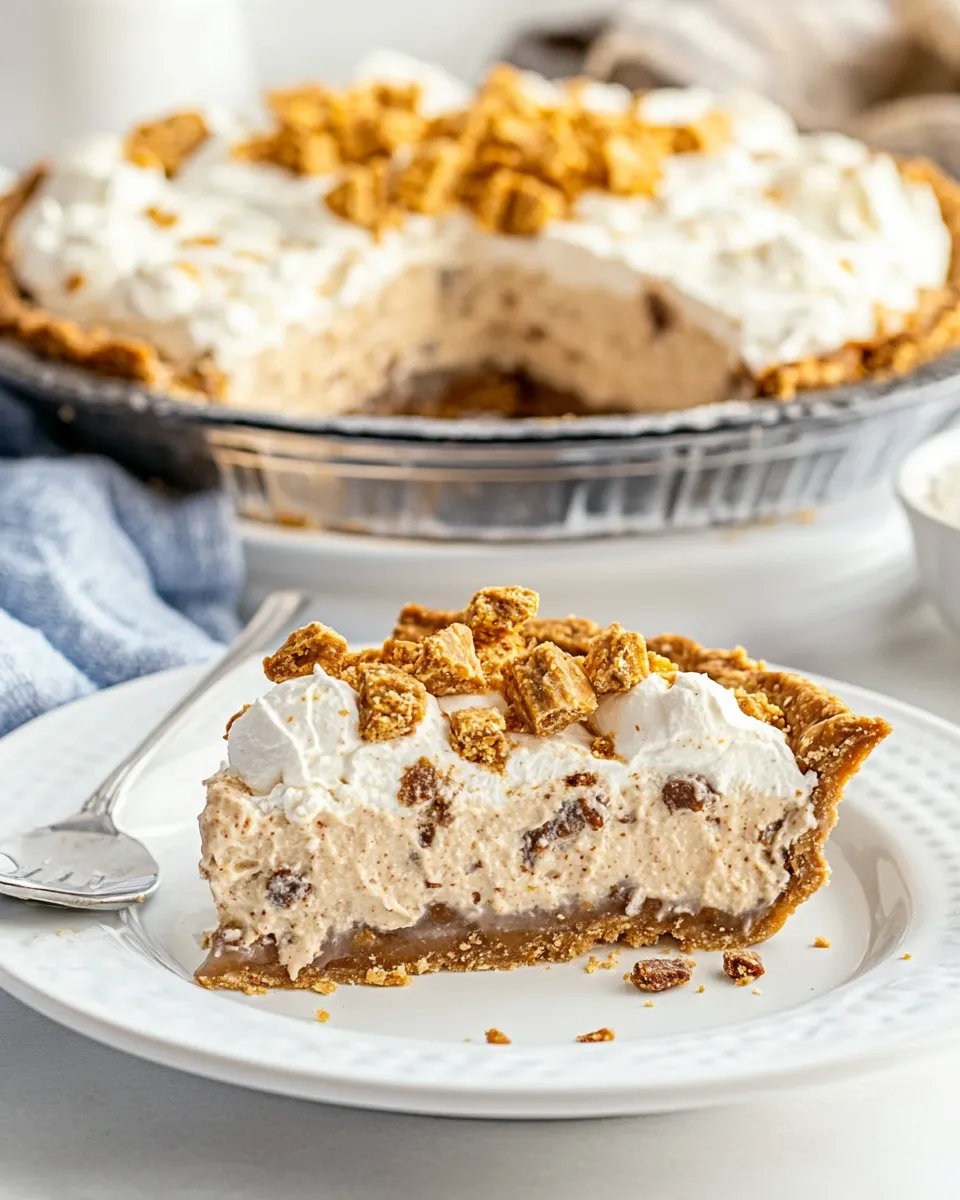
Easy Butterfinger Pie Recipe
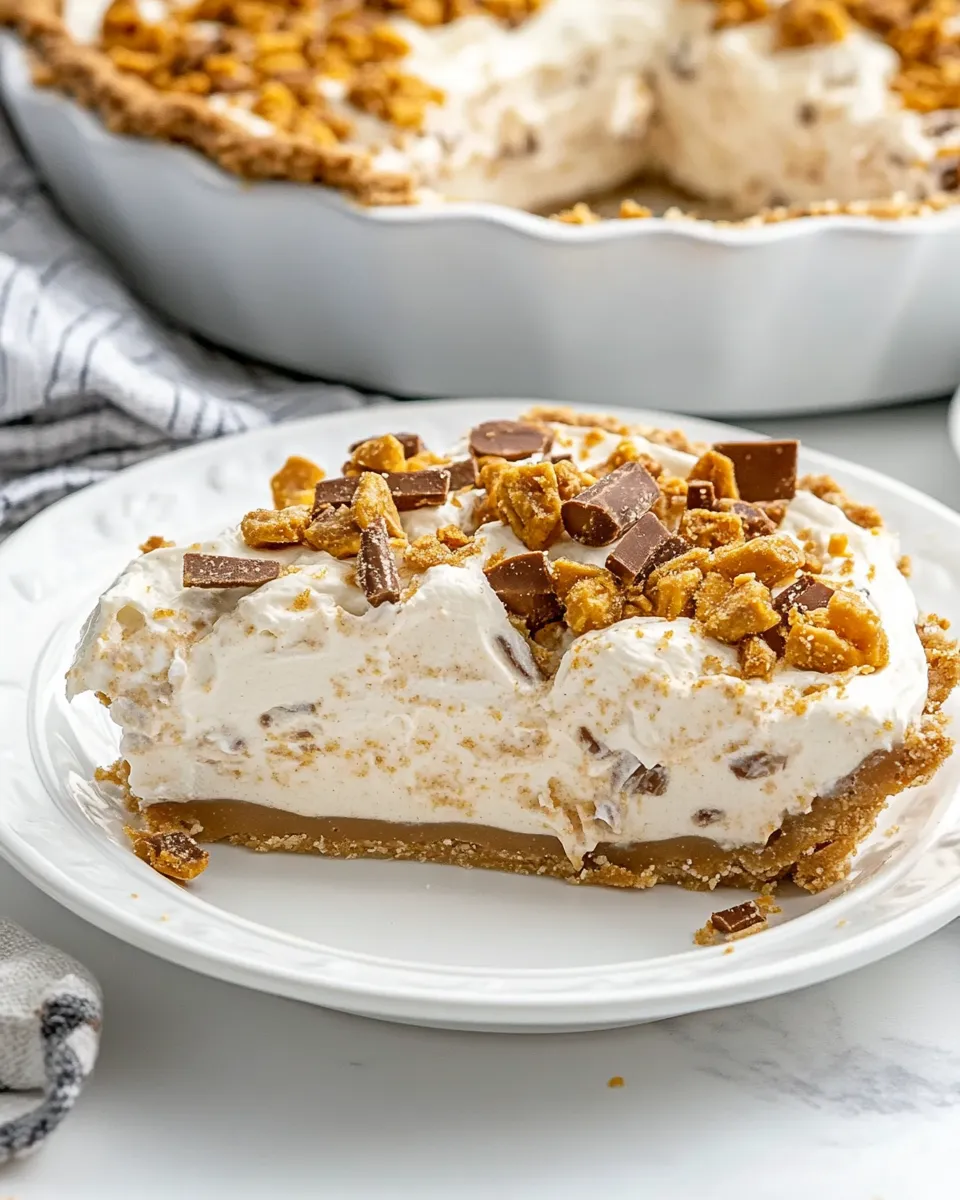
When it comes to no-bake desserts, few can compete with the creamy, crunchy goodness of an Easy Butterfinger Pie. This delightful treat combines the rich flavors of cream cheese, peanut butter, and Cool Whip, all beautifully complemented by the irresistible crunch of Butterfinger candy bars. Perfect for parties, potlucks, or simply a sweet craving, this pie is as easy to make as it is to devour. Let’s dive into why this Easy Butterfinger Pie Recipe deserves a spot in your dessert rotation.
Why This Recipe is a Keeper
This Easy Butterfinger Pie is a winner on multiple fronts. Firstly, it’s a no-bake recipe, which means you can whip it up in no time without needing to turn on the oven. Secondly, it brings together the nostalgic flavor of Butterfinger candy bars with a creamy filling that is simply irresistible. Lastly, it’s incredibly versatile; you can customize it with different toppings or variations to suit your taste. Once you try it, you’ll understand why this recipe is a keeper!
Gather These Ingredients
To prepare this Easy Butterfinger Pie, you’ll need the following ingredients:
- 1 recipe pie crust (see note)
- 8 ounces (226g) cream cheese, softened
- ½ cup (133g) peanut butter
- ½ cup (50g) sugar
- 1 teaspoon vanilla extract
- 1 (8 ounce/226g) container Cool Whip (or about 3 cups freshly whipped cream)
- 1 ½ cups (182g) chopped Butterfinger candy bars
Gear Up: What to Grab
Before you start, make sure you have the following tools handy:
- Mixing bowl – for combining all the creamy ingredients.
- Electric mixer – to beat the cream cheese and peanut butter until smooth.
- Spatula – for folding in the Cool Whip and Butterfingers.
- Pie dish – to hold your beautiful pie.
- Knife – for chopping the Butterfinger bars.
Easy Butterfinger Pie Recipe Made Stepwise
Step 1: Prepare Your Pie Crust
If you’re using a store-bought pie crust, simply follow the instructions on the package. If you’re making your own, ensure that it is fully cooled before proceeding.
Step 2: Beat the Cream Cheese
In a mixing bowl, add the softened cream cheese. Using an electric mixer, beat it until it’s creamy and free of lumps. This should take about 2 minutes on medium speed.
Step 3: Add Peanut Butter, Sugar, and Vanilla
Next, add in the peanut butter, sugar, and vanilla extract to the cream cheese. Mix well until all ingredients are combined and the mixture is smooth.
Step 4: Fold in the Cool Whip
Gently fold in the Cool Whip using a spatula. Be careful not to deflate the mixture; you want to keep it light and airy.
Step 5: Add Butterfingers
Once the Cool Whip is fully incorporated, fold in the chopped Butterfinger candy bars. This adds that delightful crunch and flavor to your pie.
Step 6: Fill the Pie Crust
Spoon the filling into your prepared pie crust, spreading it evenly with a spatula.
Step 7: Chill
Cover the pie with plastic wrap and refrigerate for at least 4 hours, or overnight if possible. This allows the flavors to meld beautifully.
Step 8: Serve and Enjoy
When you’re ready to serve, slice the pie into wedges and enjoy the creamy, crunchy goodness!
Vegan & Vegetarian Swaps
If you’re looking to make this pie vegan or vegetarian, here are some substitutions:
- Crust: Use a vegan pie crust or make your own with crushed vegan cookies and coconut oil.
- Cream Cheese: Substitute with vegan cream cheese.
- Cool Whip: Replace with a coconut whipped cream or other non-dairy whipped topping.
- Butterfingers: Use a vegan chocolate bar with a crunchy texture, or make your own candy bars to use instead.
Author’s Commentary
This Easy Butterfinger Pie is one of those rare recipes that’s both simple and a showstopper. The combination of peanut butter and Butterfinger brings back childhood memories while satisfying adult cravings for something sweet and indulgent. I love how you can make this pie ahead of time—perfect for busy days or impromptu gatherings. Plus, it’s a total crowd-pleaser! Don’t be surprised if you find yourself making it again and again.
Make Ahead Like a Pro
This Easy Butterfinger Pie can be made up to two days in advance, making it an ideal dessert for parties or family gatherings. Just keep it covered in the refrigerator until you’re ready to serve. The longer it sits, the more the flavors meld together, enhancing the overall taste of the pie. Just make sure to let your guests know that this pie is in the fridge; they might be tempted to sneak a slice early!
Easy Butterfinger Pie Recipe Q&A
Can I use homemade whipped cream instead of Cool Whip?
Absolutely! If you prefer homemade whipped cream, feel free to use about 3 cups of freshly whipped cream in place of the Cool Whip. Just make sure to sweeten it slightly to match the flavor profile!
Can I use other candy bars instead of Butterfingers?
Yes! This recipe is versatile, and you can swap in other candy bars like Snickers, Reese’s, or even crushed Oreos for different flavor profiles. Just keep the texture in mind for the best results.
How long will this pie last in the fridge?
The Easy Butterfinger Pie will last about 3-4 days in the refrigerator if properly covered. However, for the best taste and texture, it’s recommended to enjoy it within the first couple of days.
Can I freeze this pie?
While you can freeze the pie, it’s best enjoyed fresh. Freezing may change the texture of the whipped topping. If you do freeze it, let it thaw in the fridge before serving for a few hours.
Save & Share
If you loved this Easy Butterfinger Pie Recipe, don’t keep it to yourself! Share it with friends and family who appreciate a good dessert. You can also save it to your favorite recipe collection for easy access later. Trust me, they’ll thank you for introducing them to this delicious treat!
There’s nothing quite like the satisfaction of serving up a slice of this Easy Butterfinger Pie. It’s creamy, crunchy, and simply delightful. Whether you’re hosting a gathering or just treating yourself, this pie is sure to be a hit. Get ready to dig in and enjoy every bite!
Easy Butterfinger Pie Recipe
Ingredients
Equipment
Method
- If you’re using a store-bought pie crust, simply follow the instructions on the package. If you’re making your own, ensure that it is fully cooled before proceeding.
- In a mixing bowl, add the softened cream cheese. Using an electric mixer, beat it until it’s creamy and free of lumps. This should take about 2 minutes on medium speed.
- Next, add in the peanut butter, sugar, and vanilla extract to the cream cheese. Mix well until all ingredients are combined and the mixture is smooth.
- Gently fold in the Cool Whip using a spatula. Be careful not to deflate the mixture; you want to keep it light and airy.
- Once the Cool Whip is fully incorporated, fold in the chopped Butterfinger candy bars. This adds that delightful crunch and flavor to your pie.
- Spoon the filling into your prepared pie crust, spreading it evenly with a spatula.
- Cover the pie with plastic wrap and refrigerate for at least 4 hours, or overnight if possible. This allows the flavors to meld beautifully.
- When you're ready to serve, slice the pie into wedges and enjoy the creamy, crunchy goodness!
Notes
- This pie can be made up to two days in advance for convenience.
- For a vegan version, substitute with vegan cream cheese and whipped topping.
- Use different candy bars for unique flavor variations.