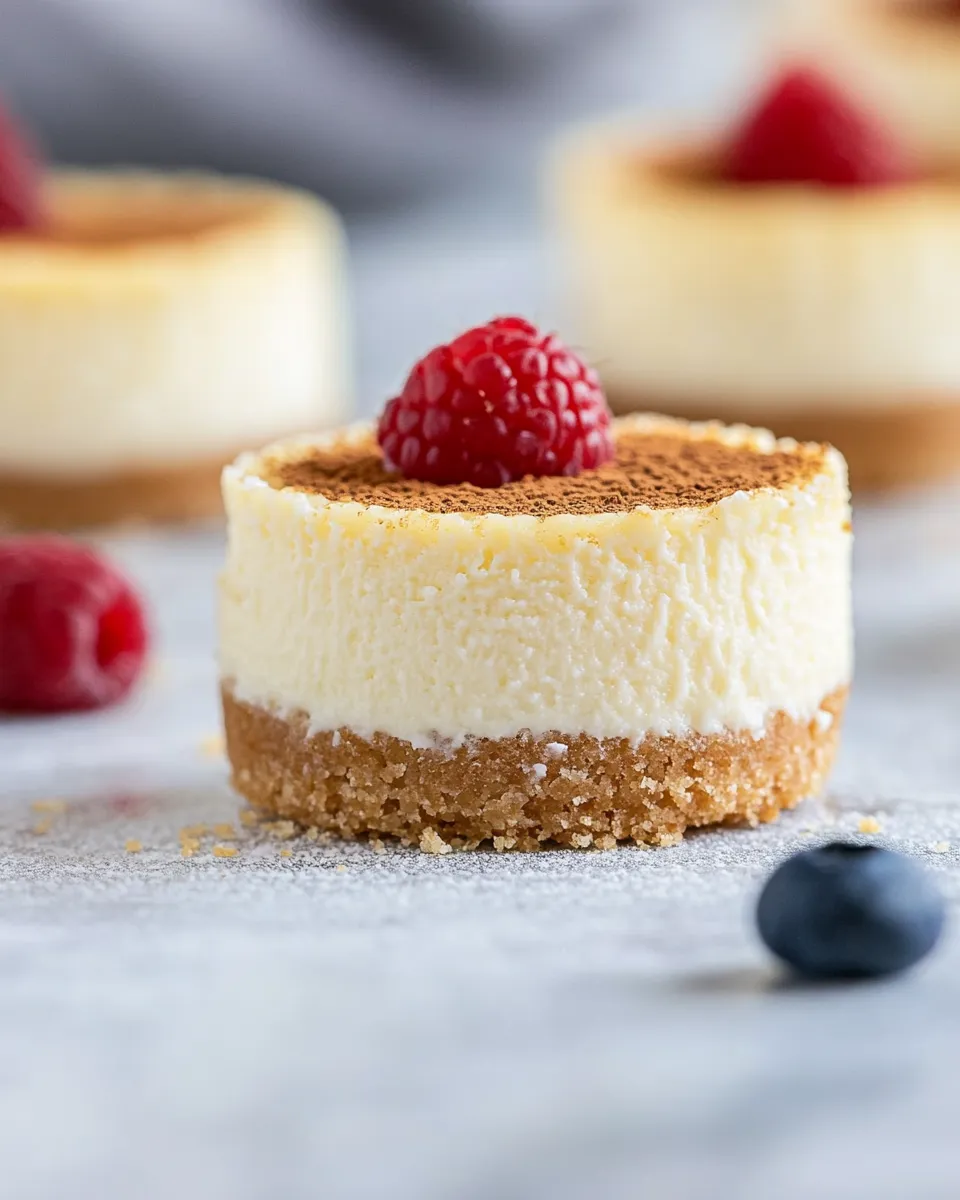
Mini Ricotta Cheesecakes
If you’re looking for a divine dessert that combines creamy richness with a delightful crunch, look no further than these Mini Ricotta Cheesecakes. They are perfectly portioned, making them ideal for gatherings, celebrations, or even a sweet treat just for yourself. The balance of smooth ricotta and cream cheese creates a unique texture that is sure to impress your friends and family. Plus, they’re surprisingly simple to make, which means you can enjoy your time in the kitchen without any fuss!
Why Mini Ricotta Cheesecakes is Worth Your Time
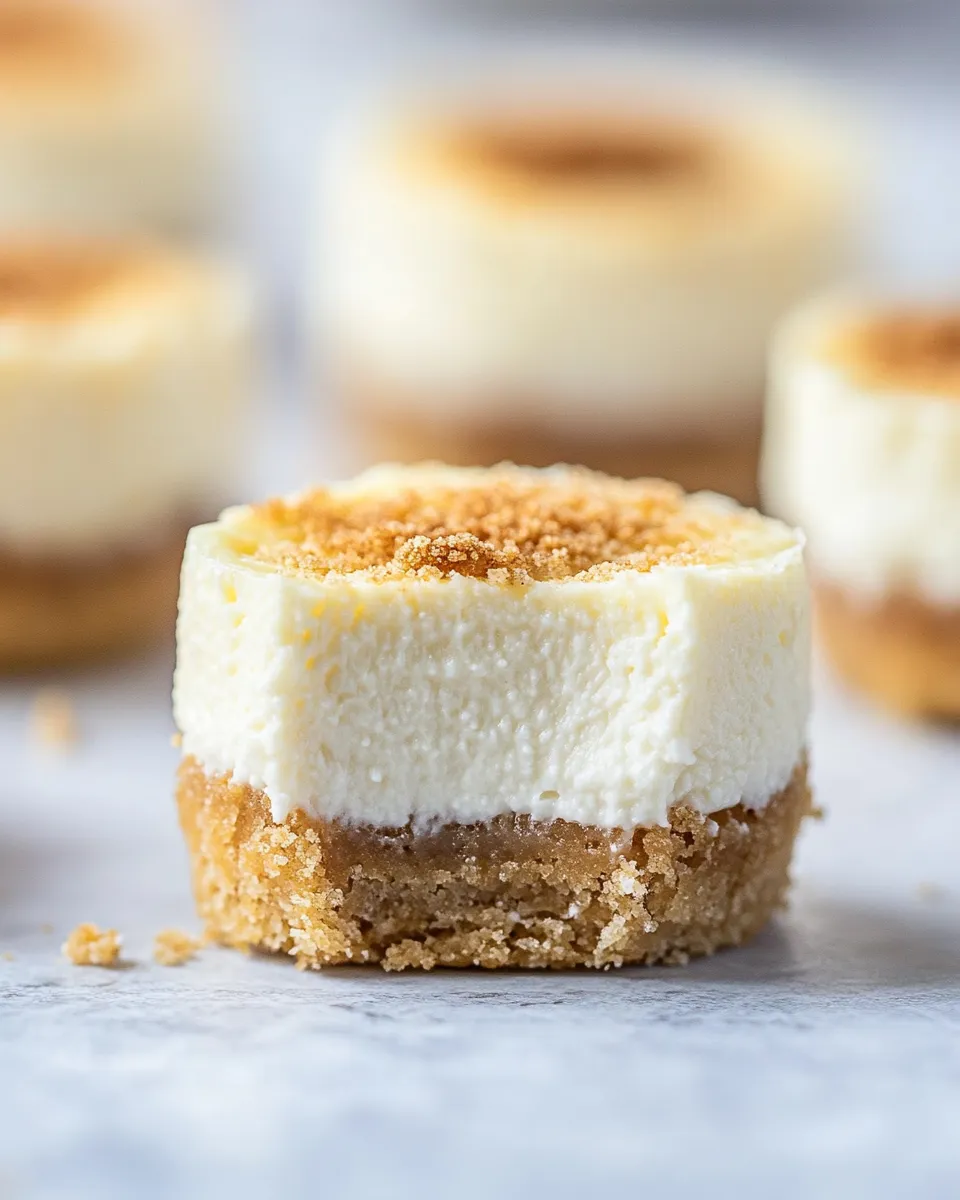
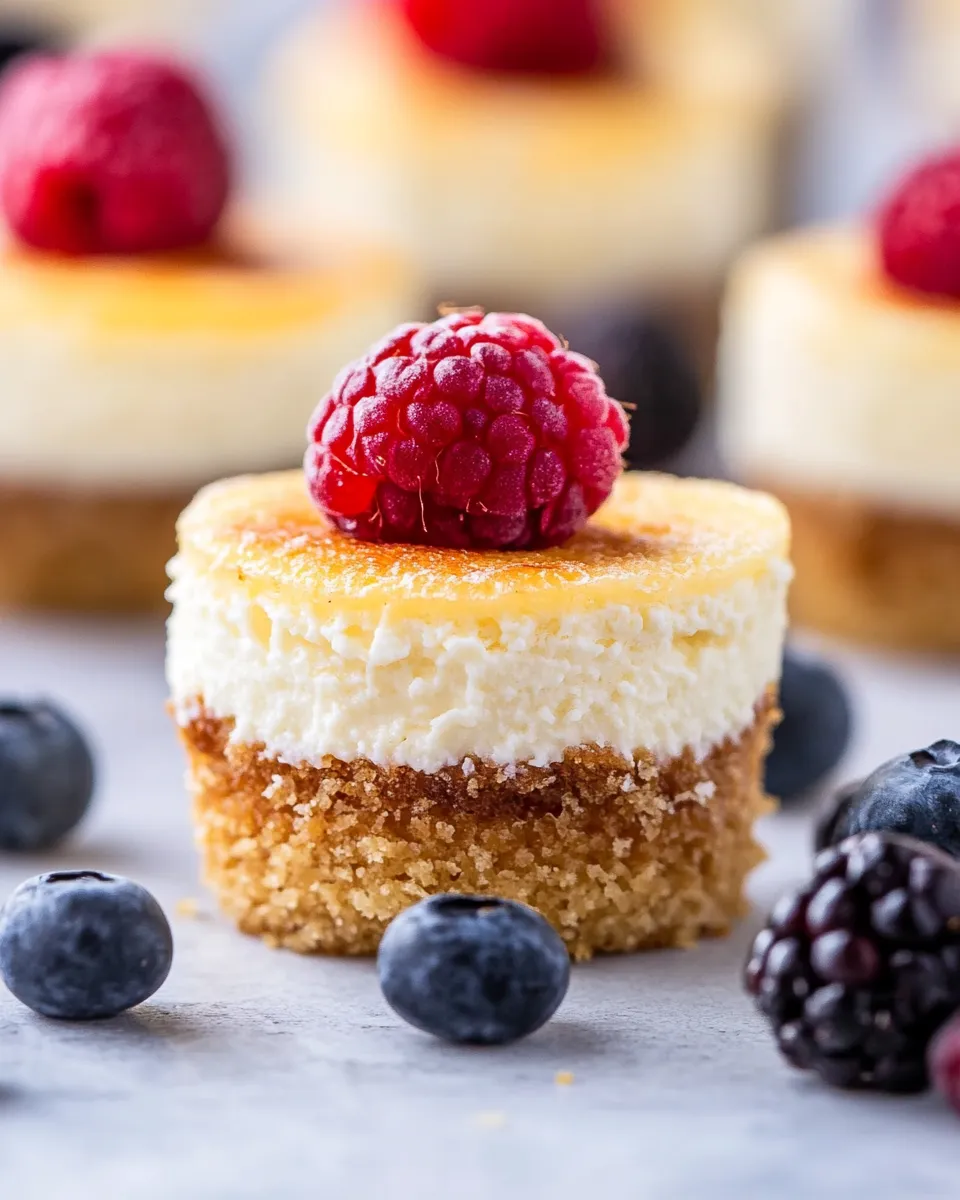
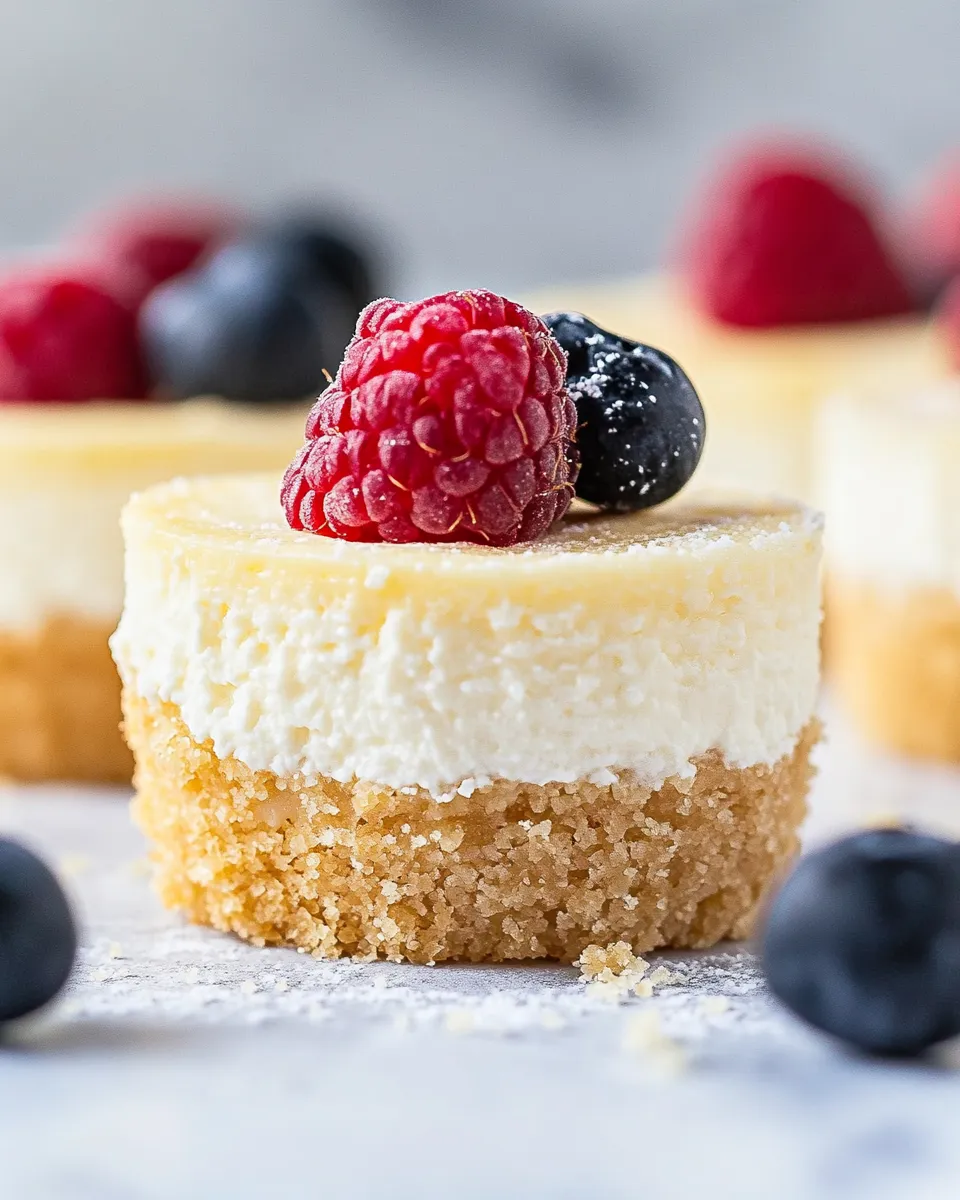
These Mini Ricotta Cheesecakes are not just delicious; they are also versatile and customizable. You can experiment with different toppings, from fresh fruits to chocolate drizzle, making them adaptable to any occasion. The individual servings ensure that everyone gets their fair share of this creamy delight, and the graham cracker crust adds a satisfying crunch that contrasts beautifully with the silky filling. Whether you’re a seasoned baker or a novice, these cheesecakes promise a rewarding experience with every bite.
What We’re Using
To create these delectable Mini Ricotta Cheesecakes, you’ll need the following ingredients:
- 1 cup Graham Crackers, pulsed into crumbs
- 3 tablespoons Granulated Sugar
- 1/4 teaspoon Kosher Salt
- 3 and 1/2 Tablespoons Unsalted Butter, melted
- 12 ounces Full-Fat Cream Cheese, very soft (use brick-style cream cheese for best results)
- 1/2 cup Whole Milk Ricotta Cheese, at room temperature
- 3/4 cup Granulated Sugar
- 1 teaspoon Vanilla Extract
- 2 large Eggs plus 1 Egg Yolk, at room temperature
- 1/3 cup Heavy Cream
Setup & Equipment
Before diving into the baking process, gather the following equipment:
- Mini muffin tin or standard muffin tin
- Mixing bowls (one large and one medium)
- Whisk or electric mixer
- Spatula
- Measuring cups and spoons
- Food processor (for graham cracker crumbs)
Cooking Mini Ricotta Cheesecakes: The Process
Creating these Mini Ricotta Cheesecakes is a straightforward process that will have your kitchen smelling heavenly. Follow these steps:
Step 1: Prepare the Crust
In a medium mixing bowl, combine the pulsed graham cracker crumbs, 3 tablespoons of granulated sugar, and kosher salt. Mix well. Add the melted unsalted butter and stir until the mixture resembles wet sand.
Step 2: Form the Crust
Preheat your oven to 325°F (160°C). Grease your mini muffin tin with cooking spray or butter. Press about 1 tablespoon of the crust mixture into the bottom of each muffin cup, ensuring it is tightly packed. Bake for 8-10 minutes, or until lightly golden. Remove from the oven and let cool.
Step 3: Make the Filling
In a large mixing bowl, combine the softened cream cheese and ricotta cheese. Using a whisk or electric mixer, beat until smooth and creamy. Add in the 3/4 cup of granulated sugar and vanilla extract, mixing until fully incorporated.
Step 4: Add the Eggs
Add the two large eggs and one egg yolk to the cream cheese mixture, beating well after each addition. Make sure everything is well combined and smooth.
Step 5: Incorporate the Heavy Cream
Finally, pour in the heavy cream and mix until the filling is light and airy. Be careful not to overmix; you want a smooth texture.
Step 6: Fill the Muffin Tin
Pour the cheesecake filling into each muffin cup over the crust, filling them about 3/4 full. This allows room for them to puff up slightly during baking.
Step 7: Bake
Bake the cheesecakes in your preheated oven for 20-25 minutes, or until the edges are set but the centers still have a slight jiggle. This is key to achieving that creamy texture.
Step 8: Cool and Chill
Once baked, remove the cheesecakes from the oven and allow them to cool in the pan for about 10 minutes. Then, transfer them to a wire rack to cool completely before chilling in the refrigerator for at least 4 hours or overnight for best results.
Low-Carb/Keto Alternatives
If you’re looking to adapt this recipe to a low-carb or keto-friendly version, consider the following substitutions:
- Use almond flour or crushed nuts instead of graham cracker crumbs for the crust.
- Replace granulated sugar with a keto-friendly sweetener like erythritol or stevia.
- Opt for full-fat cream cheese and heavy cream, as they fit well within keto guidelines.
- Ensure that your vanilla extract is sugar-free if possible.
Cook’s Commentary
- For a burst of flavor, consider adding citrus zest to the filling, such as lemon or orange, which complements the creaminess beautifully.
- Toppings can vary widely; fresh berries, chocolate shavings, or a drizzle of caramel or chocolate sauce can elevate these Mini Ricotta Cheesecakes even further.
- If you prefer a denser cheesecake, bake a little longer, but keep an eye on them to avoid over-baking.
- Experiment with flavored extracts like almond or coconut for a unique twist on the classic.
Make-Ahead & Storage
These Mini Ricotta Cheesecakes are perfect for preparing ahead of time. Once fully cooled and chilled, they can be stored in an airtight container in the refrigerator for up to five days. You can also freeze them for up to two months. Just ensure they are well-wrapped to prevent freezer burn. To serve, simply thaw in the refrigerator overnight and enjoy!
Mini Ricotta Cheesecakes Q&A
Can I use low-fat cream cheese?
While you can use low-fat cream cheese, it may affect the creaminess and overall texture of the Mini Ricotta Cheesecakes. Full-fat cream cheese yields the best results.
How do I know when they are done baking?
The cheesecakes are done when the edges are set but the center still has a slight jiggle. They will continue to set as they cool.
Can I add fruit to the filling?
Yes! You can fold in small pieces of fresh fruit, such as blueberries or strawberries, into the filling before baking for added flavor and color.
What’s the best way to serve these cheesecakes?
These Mini Ricotta Cheesecakes are delightful on their own, but you can elevate them with toppings such as whipped cream, fresh fruit, or a drizzle of chocolate sauce. Serve them chilled for the best experience.
Hungry for More?
If you enjoyed these Mini Ricotta Cheesecakes, be sure to explore other delightful desserts that celebrate the same creamy texture and rich flavors. Consider trying chocolate mousse cups, berry parfaits, or even a classic tiramisu. Baking is all about experimentation, so don’t hesitate to get creative in the kitchen!
Indulging in these Mini Ricotta Cheesecakes is an experience that combines simplicity with sophistication. With their luscious texture and delectable flavor, they are sure to become a favorite in your dessert repertoire. Happy baking!
Mini Ricotta Cheesecakes
Ingredients
Equipment
Method
- Step 1: Prepare the Crust - In a medium mixing bowl, combine the pulsed graham cracker crumbs, 3 tablespoons of granulated sugar, and kosher salt. Mix well. Add the melted unsalted butter and stir until the mixture resembles wet sand.
- Step 2: Form the Crust - Preheat your oven to 325°F (160°C). Grease your mini muffin tin with cooking spray or butter. Press about 1 tablespoon of the crust mixture into the bottom of each muffin cup, ensuring it is tightly packed. Bake for 8-10 minutes, or until lightly golden. Remove from the oven and let cool.
- Step 3: Make the Filling - In a large mixing bowl, combine the softened cream cheese and ricotta cheese. Using a whisk or electric mixer, beat until smooth and creamy. Add in the 3/4 cup of granulated sugar and vanilla extract, mixing until fully incorporated.
- Step 4: Add the Eggs - Add the two large eggs and one egg yolk to the cream cheese mixture, beating well after each addition. Make sure everything is well combined and smooth.
- Step 5: Incorporate the Heavy Cream - Finally, pour in the heavy cream and mix until the filling is light and airy. Be careful not to overmix; you want a smooth texture.
- Step 6: Fill the Muffin Tin - Pour the cheesecake filling into each muffin cup over the crust, filling them about 3/4 full. This allows room for them to puff up slightly during baking.
- Step 7: Bake - Bake the cheesecakes in your preheated oven for 20-25 minutes, or until the edges are set but the centers still have a slight jiggle. This is key to achieving that creamy texture.
- Step 8: Cool and Chill - Once baked, remove the cheesecakes from the oven and allow them to cool in the pan for about 10 minutes. Then, transfer them to a wire rack to cool completely before chilling in the refrigerator for at least 4 hours or overnight for best results.
Notes
- These cheesecakes can be made ahead of time and stored in the refrigerator for up to five days.
- For a low-carb version, substitute graham cracker crumbs with almond flour.
- Experiment with toppings like fresh fruits or chocolate for added flavor.