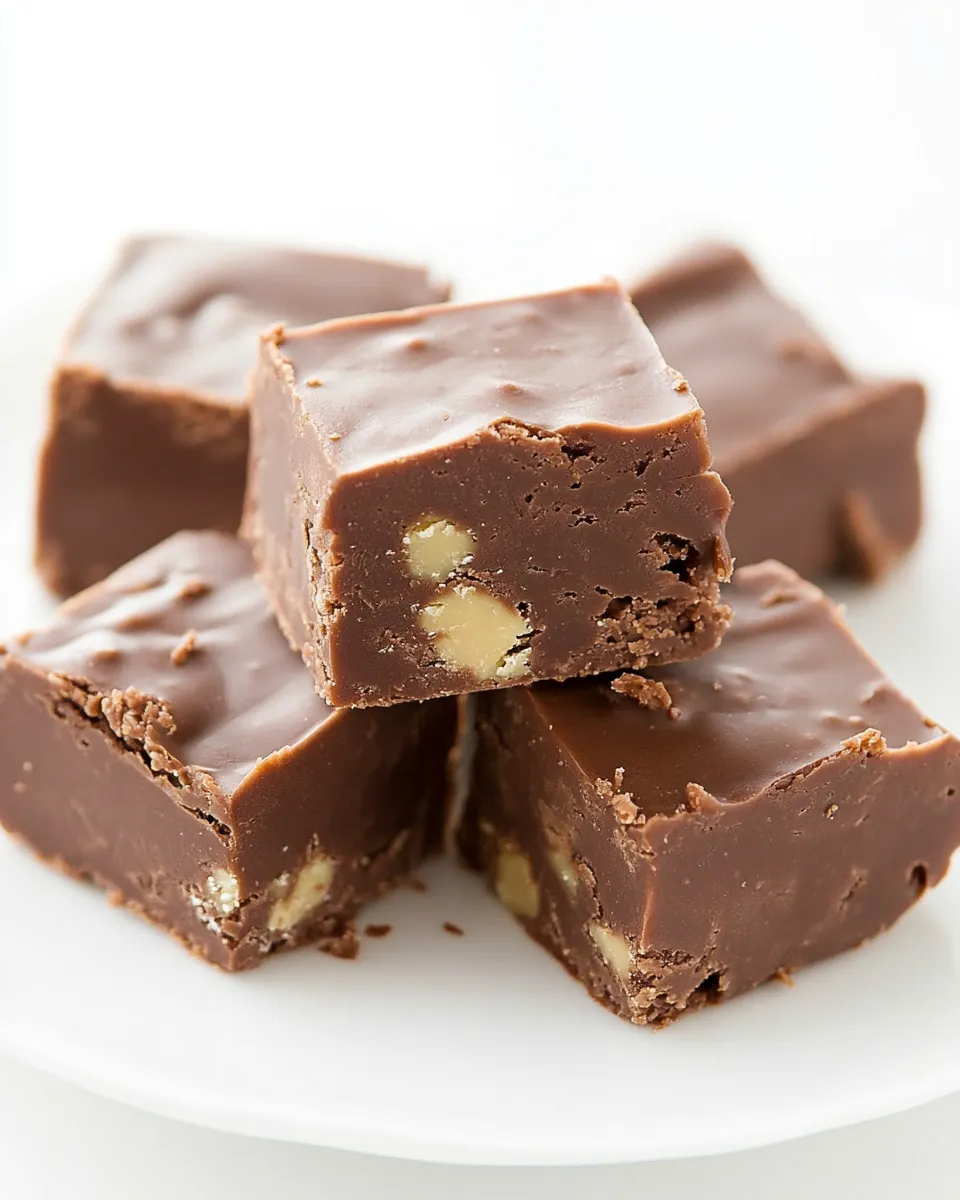
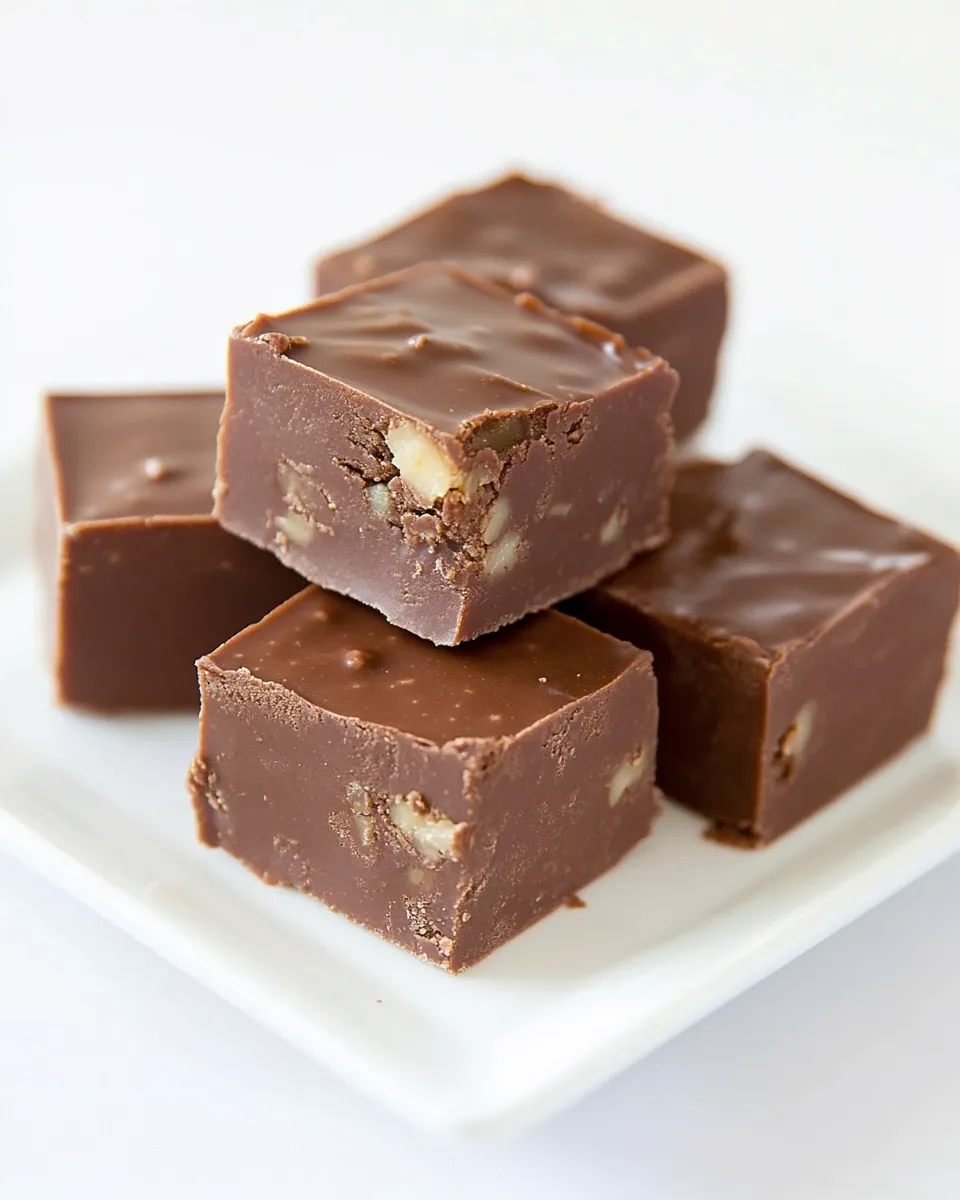
Original Fantasy Fudge Recipe
When it comes to holiday treats or sweet indulgences, nothing quite compares to the creamy, dreamy texture of homemade fudge. The Original Fantasy Fudge Recipe is a classic that combines rich chocolate flavors with a hint of nostalgia. Whether you’re treating yourself or sharing with friends and family, this recipe is sure to delight with its smooth consistency and delightful crunch from walnuts.
Imagine a melt-in-your-mouth experience that transports you back to your childhood—this fudge is not just a dessert, it’s an experience. With just a few simple ingredients, you can whip up a batch that’s perfect for gift-giving or cozy nights in. Let’s dive into what makes this recipe a true delight.
What Makes This Recipe Special
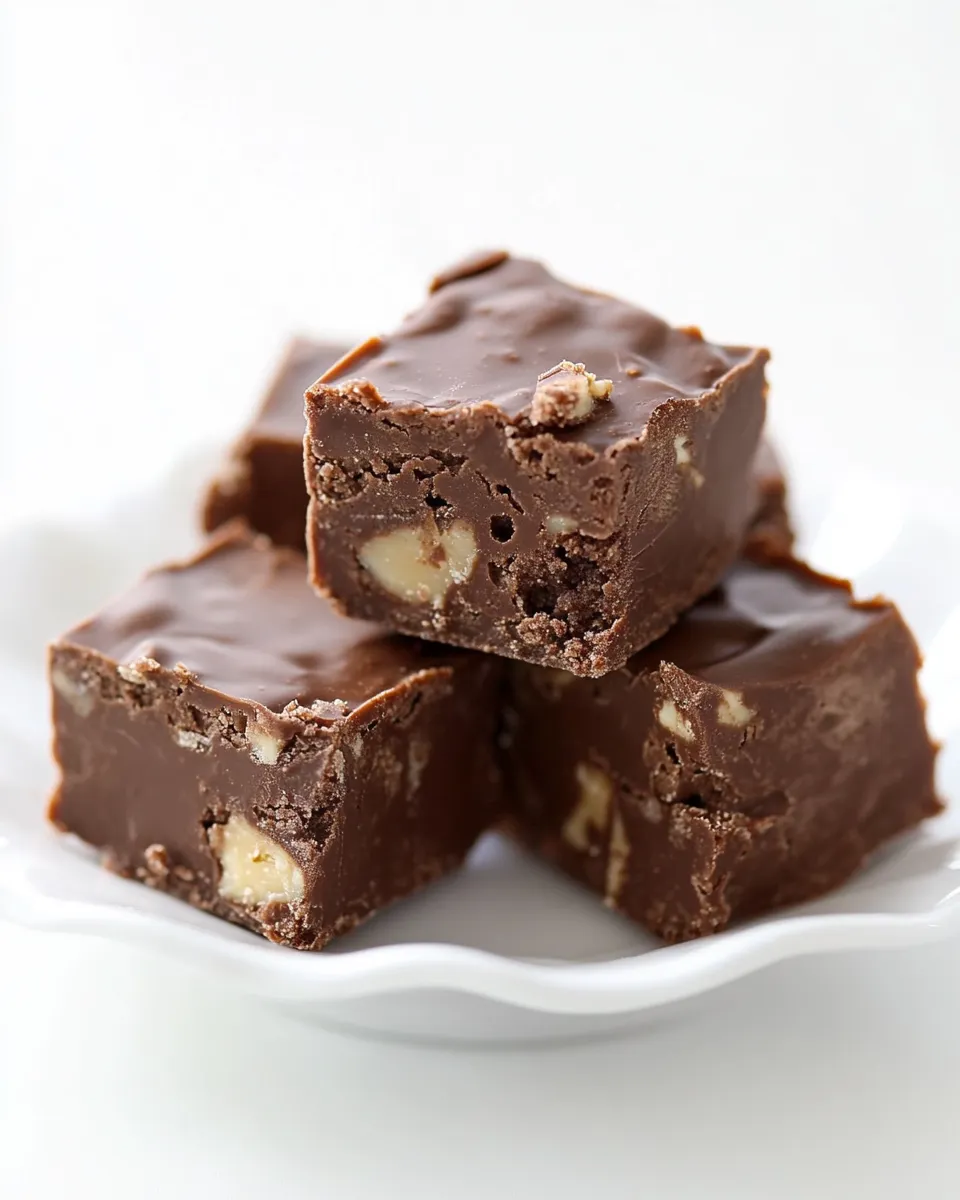
The beauty of the Original Fantasy Fudge Recipe lies in its simplicity and the nostalgia it evokes. This recipe is not just about combining ingredients; it’s a celebration of flavors and textures. The use of chocolate chips provides a rich chocolatey base, while the marshmallow fluff gives it a unique and creamy texture that is hard to resist. The addition of chopped walnuts adds a delightful crunch, making every bite an unexpected surprise. Plus, it’s incredibly easy to make, making it an ideal choice for both novice and experienced bakers alike.
Ingredient Breakdown
- 3 cups granulated sugar – This is the base of your fudge. It provides sweetness and structure.
- 2 cups salted butter – This adds richness and a creamy mouthfeel. Make sure to use the proper amount.
- 1 cup evaporated milk – This gives the fudge its smooth texture and contributes to the creaminess.
- 2 cups chocolate chips – Semi-sweet chocolate chips are perfect for that rich flavor, but feel free to use milk chocolate if you prefer a sweeter fudge.
- 1 jar marshmallow fluff (7 ounces) – This is the secret ingredient that makes the fudge creamy and adds a touch of sweetness.
- 1 cup chopped walnuts – These add a lovely crunch and nutty flavor. You can omit them if you prefer a nut-free version.
- 1 teaspoon vanilla extract – A splash of vanilla enhances the overall flavor profile.
Cook’s Kit
- Heavy-bottomed saucepan – Essential for even heat distribution while cooking the fudge.
- Wooden spoon or silicone spatula – For stirring the ingredients together smoothly.
- 9×13 inch baking pan – This is the perfect size for setting and cutting your fudge.
- Parchment paper – For easy removal of the fudge from the pan.
- Cooking thermometer – Optional, but helpful for ensuring you reach the right temperature.
Step-by-Step: Original Fantasy Fudge Recipe
Step 1: Prepare Your Baking Dish
Begin by lining your 9×13 inch baking pan with parchment paper, leaving some overhang for easy removal later. This step is crucial for ensuring your fudge comes out easily and maintains its shape.
Step 2: Combine the Ingredients
In a heavy-bottomed saucepan, combine the granulated sugar, salted butter, and evaporated milk. Stir these ingredients together over medium heat until the butter has melted completely.
Step 3: Bring to a Boil
Once the butter has melted, increase the heat and bring the mixture to a full boil. Allow it to boil for exactly 4-5 minutes without stirring. This is where the magic happens—cooking the mixture for the right amount of time is essential for achieving that perfect fudge texture.
Step 4: Add the Chocolate Chips and Marshmallow Fluff
Remove the saucepan from the heat and quickly stir in the chocolate chips, marshmallow fluff, and vanilla extract. Stir vigorously until everything is well combined and smooth. This is the point where you can really enjoy the aroma of chocolate filling your kitchen.
Step 5: Fold in the Walnuts
Gently fold in the chopped walnuts until evenly distributed throughout the fudge mixture. If you’re making a nut-free version, feel free to skip this step completely.
Step 6: Pour and Set
Pour the fudge mixture into the prepared baking pan and spread it evenly with your spatula. Let it sit at room temperature until it sets, which typically takes about 2-3 hours. For quicker setting, you can place it in the refrigerator.
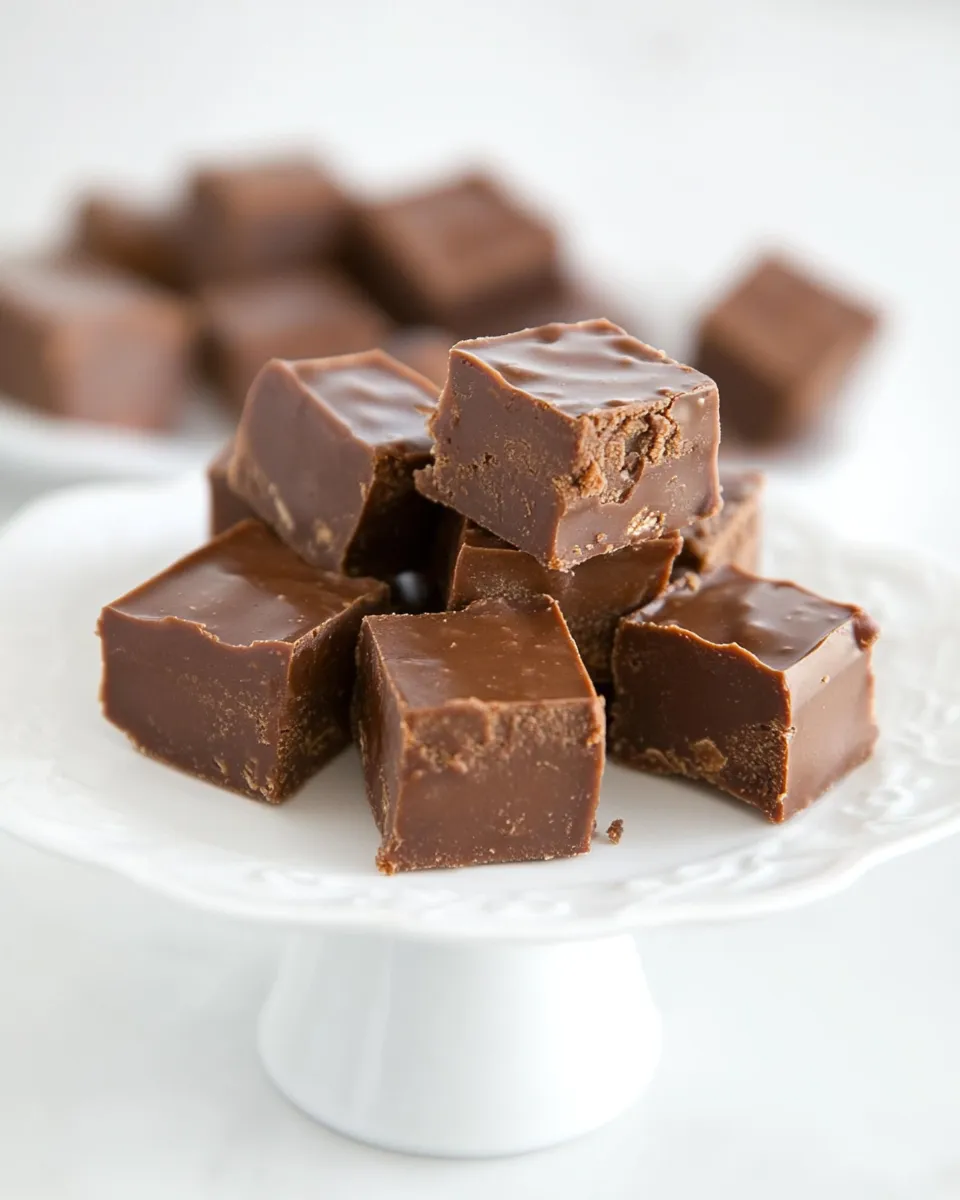
Step 7: Cut and Enjoy
Once the fudge has completely set, lift it out of the pan using the parchment paper overhang. Cut into squares and indulge in the deliciousness of your homemade Original Fantasy Fudge!
Ingredient Flex Options
- Nut Alternatives – Try using pecans or almonds instead of walnuts for a different flavor.
- Chocolate Variations – Use dark chocolate chips for a richer flavor or white chocolate chips for a sweeter twist.
- Flavor Additions – Add a pinch of sea salt on top for a salted caramel effect or a dash of espresso powder for a mocha flavor.
- Vegan Option – Substitute butter with a plant-based alternative and use dairy-free chocolate chips.
Avoid These Mistakes
- Not Boiling Long Enough – Under-cooking the fudge can lead to a soft texture that doesn’t set properly.
- Stirring Too Much – Avoid stirring the mixture while it’s boiling; this can cause crystallization.
- Skipping the Parchment Paper – Not using parchment can make it difficult to remove the fudge from the pan.
- Using Low-Quality Ingredients – The quality of your chocolate and butter will significantly affect the taste of your fudge.
Freezer-Friendly Notes
The Original Fantasy Fudge Recipe is perfect for making ahead of time and storing for later. Once cut into squares, you can place the fudge in an airtight container and freeze it for up to 3 months. Simply thaw at room temperature for a few hours before enjoying. This makes it a great option for holiday gifting or when you want a sweet treat on hand without the hassle of making it fresh every time.
Reader Q&A
Can I use sweetened condensed milk instead of evaporated milk?
While you can use sweetened condensed milk, keep in mind that it will alter the sweetness of the fudge. You may want to reduce the amount of sugar in the recipe accordingly.
How do I know when my fudge is done cooking?
The fudge is done when it has boiled for 4-5 minutes and has reached a temperature of about 234°F (112°C) on a candy thermometer. You can also perform the soft ball test by dropping a small amount into cold water; if it forms a soft ball, it’s ready.
Can I add flavor extracts other than vanilla?
Absolutely! Feel free to experiment with other extracts like almond, peppermint, or even orange for a unique flavor twist.
What’s the best way to store leftover fudge?
Store leftover fudge in an airtight container at room temperature for up to one week, or in the refrigerator for longer freshness. Just make sure to separate layers with parchment paper to prevent sticking.
The Takeaway
The Original Fantasy Fudge Recipe is a timeless classic that captures the essence of homemade treats with ease and elegance. With its rich chocolate flavor and velvety texture, it’s a delightful addition to any dessert table or a thoughtful homemade gift. Whether you’re baking for the holidays or simply indulging in a sweet craving, this fudge is sure to impress. Remember, the key to success lies in the cooking time and the quality of your ingredients, so don’t rush the process. Enjoy every moment of creating this delicious treat!
Original Fantasy Fudge Recipe
Ingredients
Equipment
Method
- Step 1: Prepare Your Baking Dish - Line your 9x13 inch baking pan with parchment paper, leaving some overhang for easy removal later.
- Step 2: Combine the Ingredients - In a heavy-bottomed saucepan, combine the granulated sugar, salted butter, and evaporated milk. Stir over medium heat until the butter has melted completely.
- Step 3: Bring to a Boil - Increase the heat and bring the mixture to a full boil. Allow it to boil for exactly 4-5 minutes without stirring.
- Step 4: Add the Chocolate Chips and Marshmallow Fluff - Remove from heat and stir in the chocolate chips, marshmallow fluff, and vanilla extract until well combined and smooth.
- Step 5: Fold in the Walnuts - Gently fold in the chopped walnuts until evenly distributed throughout the fudge mixture.
- Step 6: Pour and Set - Pour the fudge mixture into the prepared baking pan and spread evenly. Let it sit at room temperature until it sets, about 2-3 hours.
- Step 7: Cut and Enjoy - Once set, lift the fudge out of the pan using the parchment paper overhang. Cut into squares and enjoy!
Notes
- For nut-free fudge, simply omit the walnuts.
- Store leftover fudge in an airtight container at room temperature for up to one week.
- Fudge can be frozen for up to 3 months; thaw at room temperature before serving.