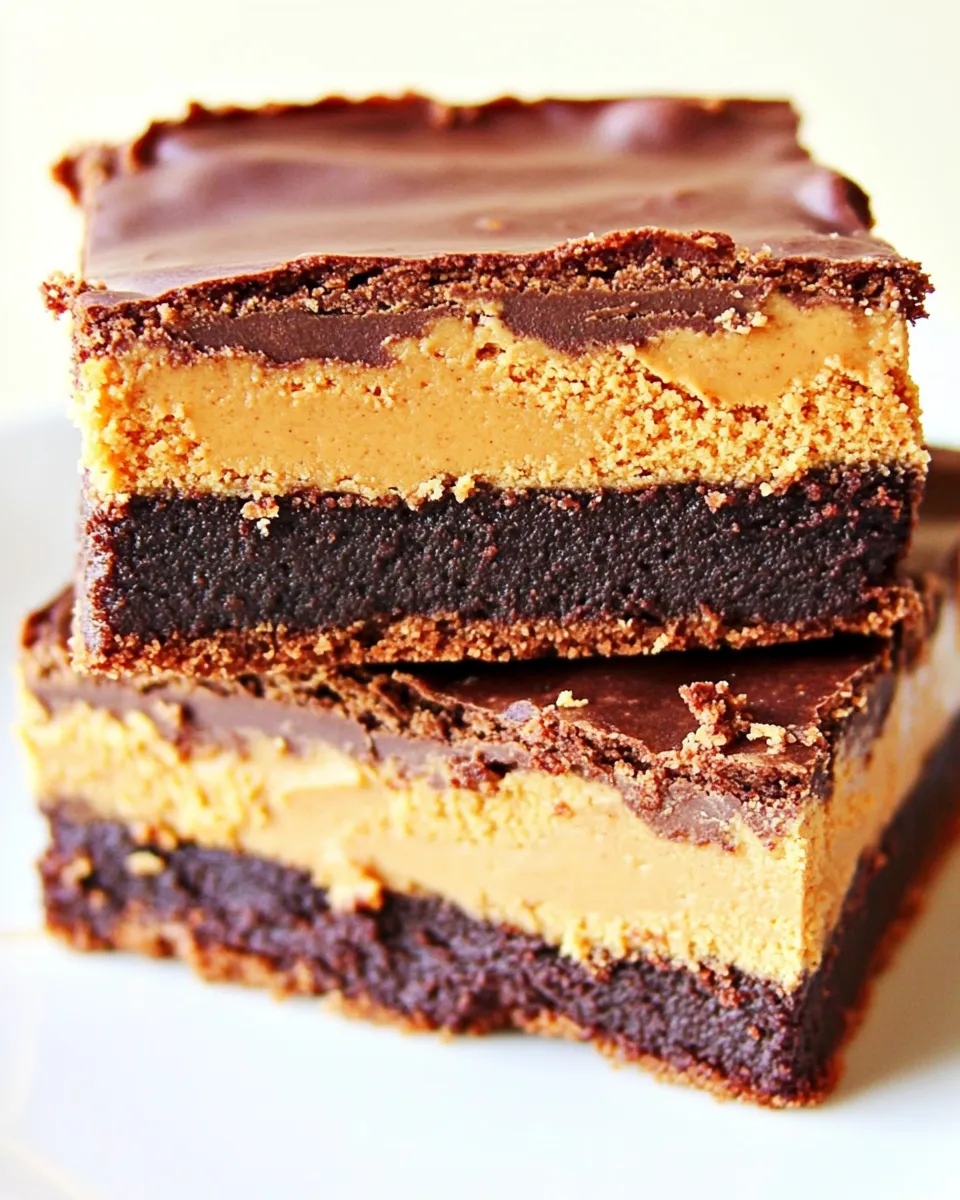
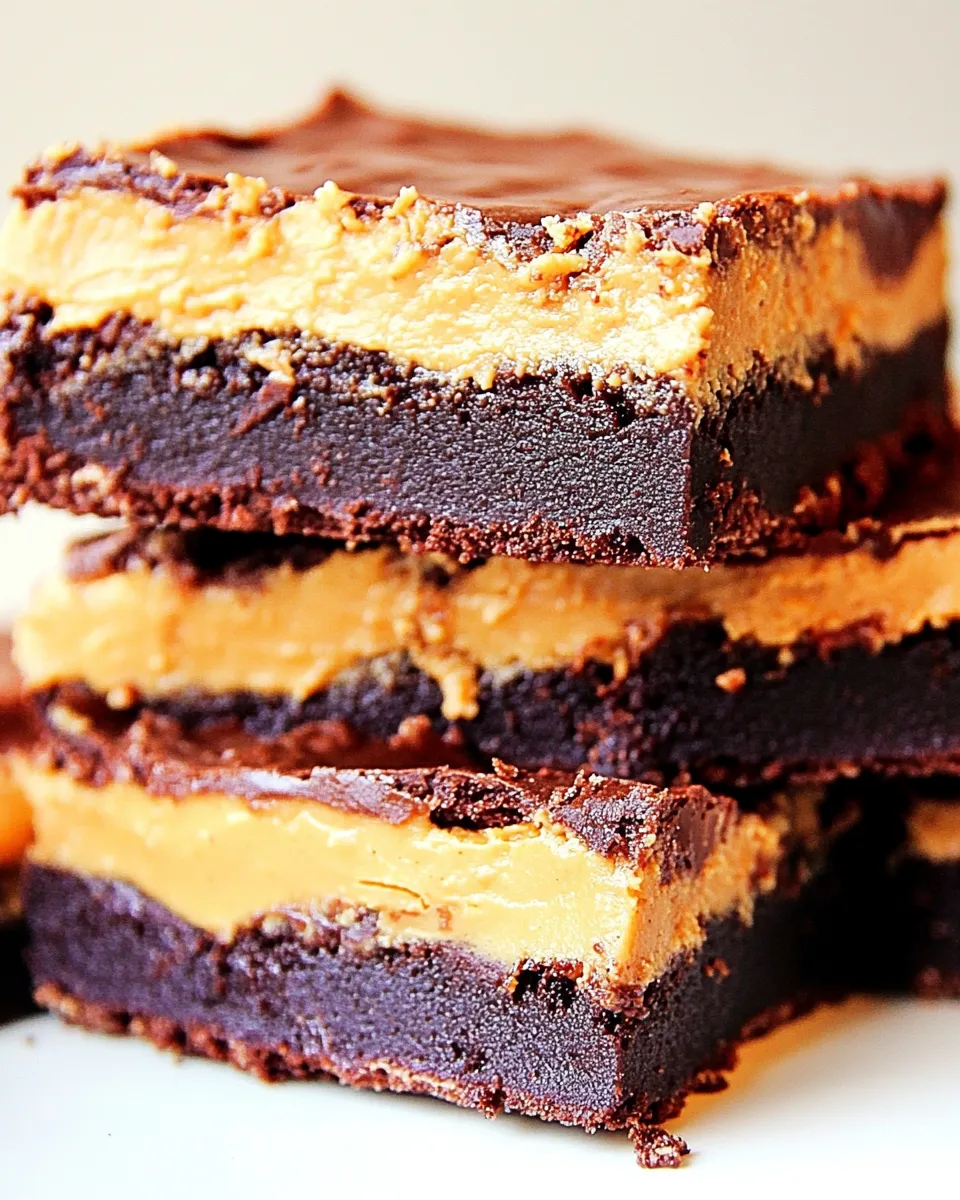
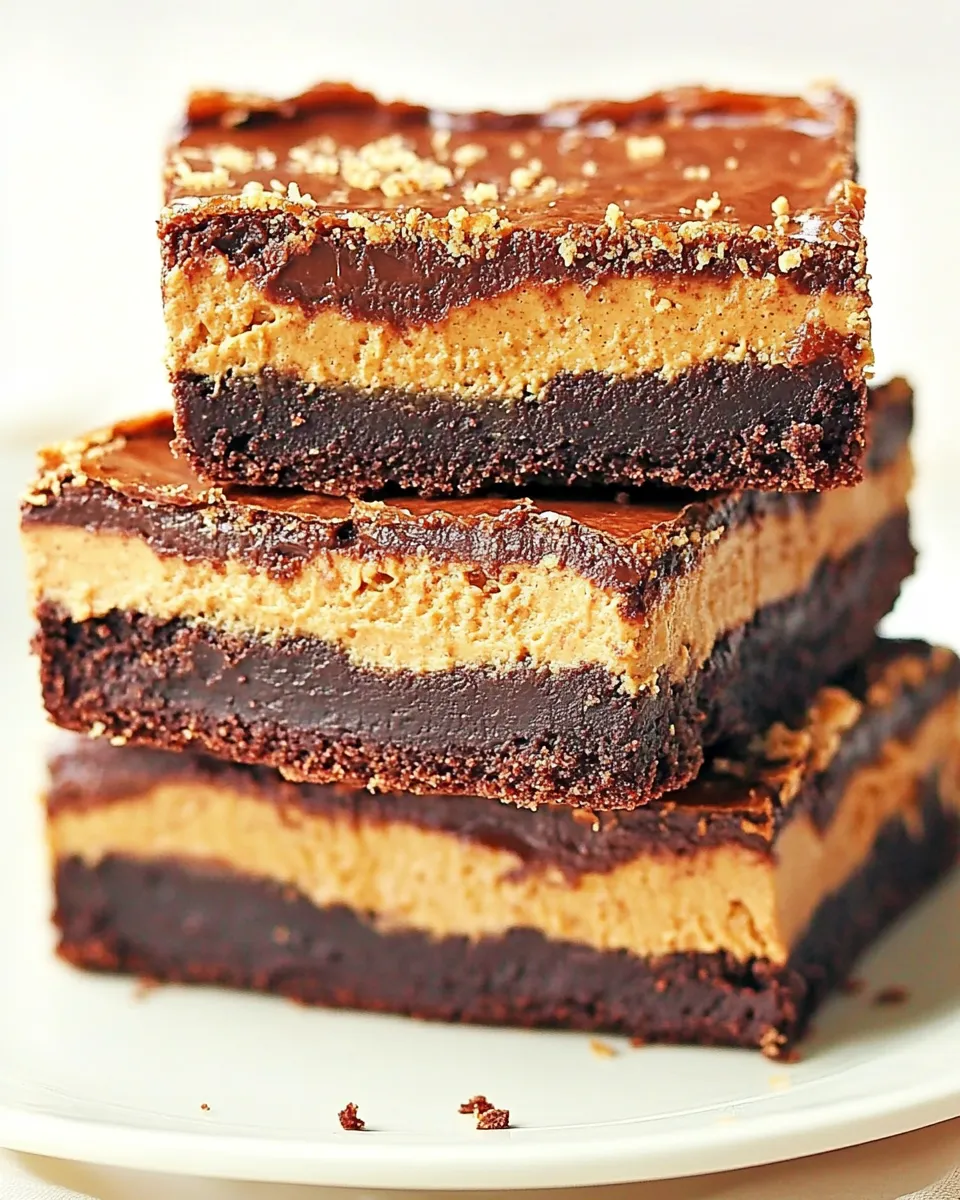
Peanut Butter Brownie Truffle Bars Recipe
There’s something undeniably comforting about a rich, fudgy brownie paired with the creamy goodness of peanut butter. When you combine these two favorites into one delectable dessert, you create a blissful harmony that will make your taste buds sing. Introducing the Peanut Butter Brownie Truffle Bars Recipe, a delightful treat that’s perfect for gatherings, snack time, or simply indulging yourself.
These truffle bars are easy to make, and each bite is a perfect balance of chocolate and peanut butter. The addition of Rice Krispies adds a delightful crunch, making each mouthful more interesting. Whether you’re a seasoned baker or a kitchen newbie, these bars are sure to impress.
Why It Works Every Time
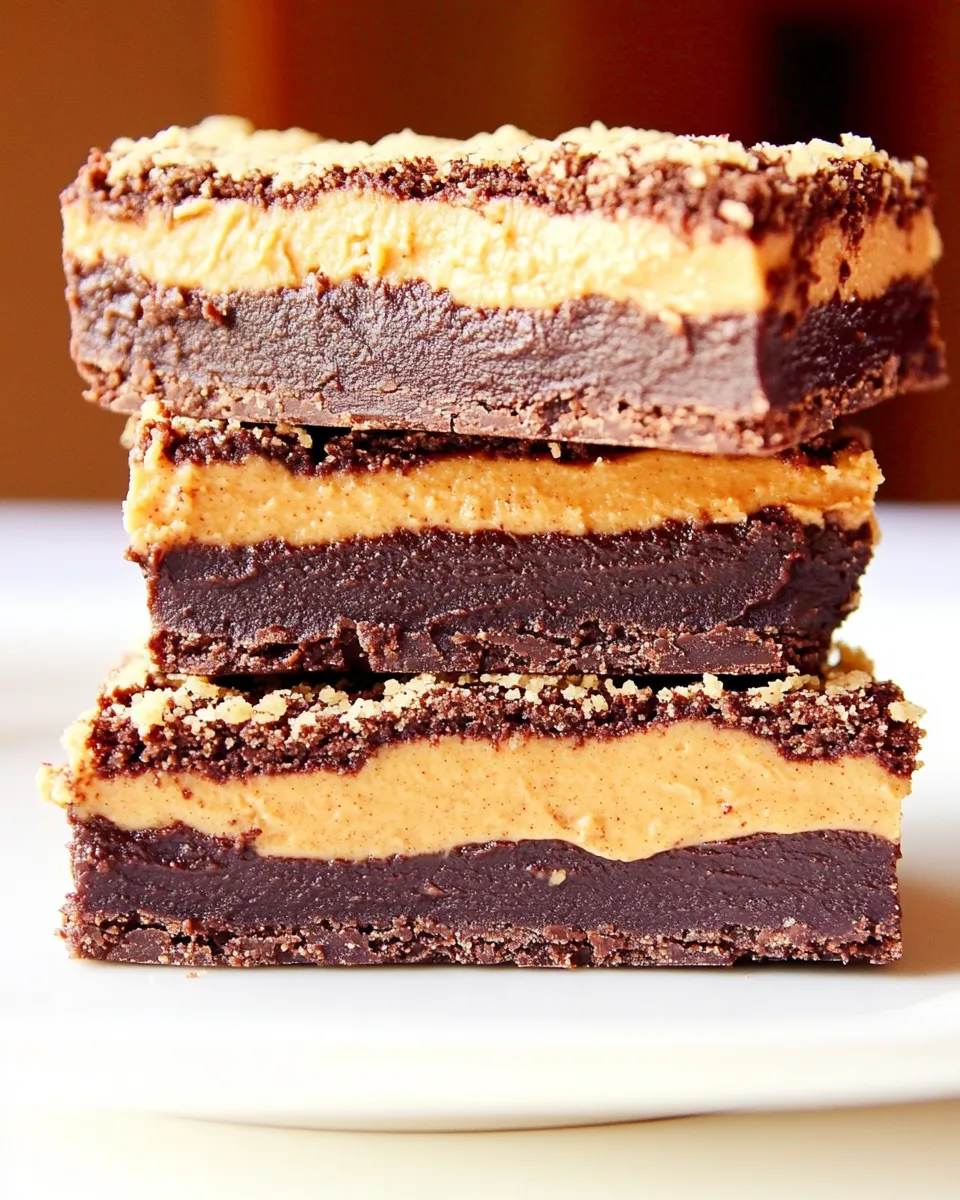
This Peanut Butter Brownie Truffle Bars Recipe is foolproof, thanks to its straightforward ingredients and method. The combination of cocoa powder and sugars creates a rich brownie base that’s both fudgy and satisfying. The creamy peanut butter not only adds flavor but also enhances the texture, while the Rice Krispies provide an unexpected crunch that pairs beautifully with the smooth chocolate. Plus, the chocolate coating on top seals in all the deliciousness, making these bars irresistible.
Ingredient Rundown
To get started, let’s break down the ingredients you’ll need for this recipe:
- 1 cup unsweetened cocoa powder – This gives the brownies their rich chocolate flavor.
- 1 cup granulated sugar – Adds sweetness and balances the cocoa’s bitterness.
- 1 cup packed light brown sugar – Provides moisture and a hint of caramel flavor.
- Dash of salt – Enhances the flavor of the chocolate and balances sweetness.
- 1 cup all-purpose flour – Forms the structure of the brownies.
- 1 teaspoon vanilla extract – Adds depth of flavor to the bars.
- 6 tablespoons unsalted butter, melted – Binds the ingredients together and adds richness.
- 1 cup creamy peanut butter – The star ingredient that brings creaminess and flavor.
- 1 cup Rice Krispies cereal – Adds a delightful crunch to the texture.
- 1 cup powdered sugar – Sweetens the peanut butter filling and adds a smooth texture.
- 1 teaspoon vanilla extract – This is for the peanut butter layer, enhancing its flavor.
- 3 tablespoons unsalted butter – Used in the filling to keep it creamy and spreadable.
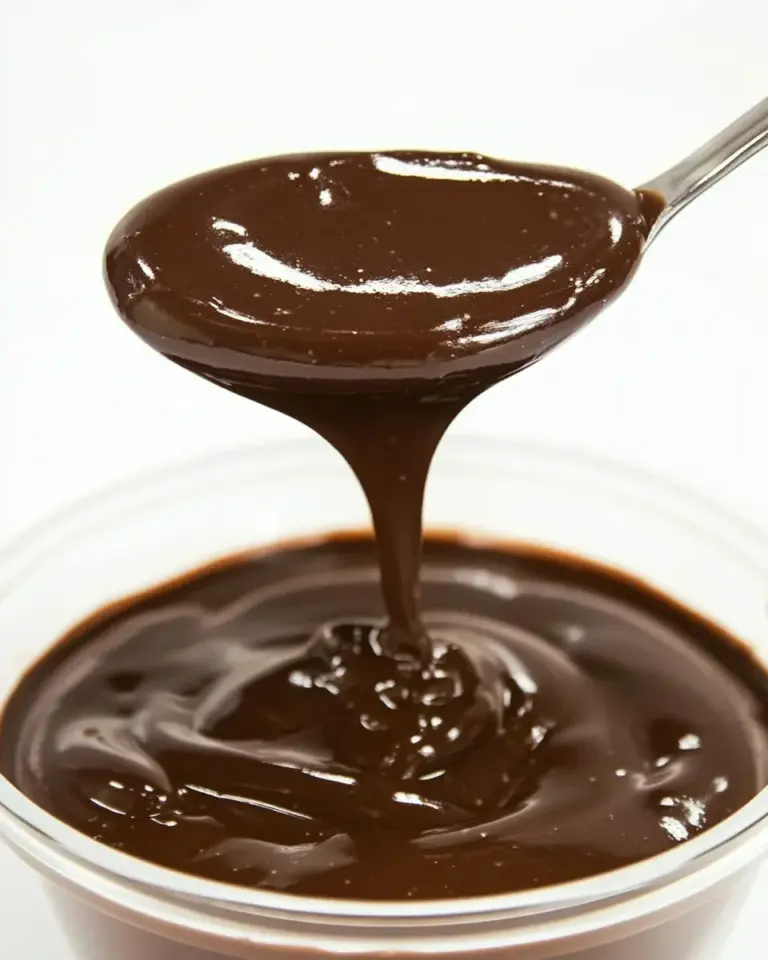
- 1 cup semi-sweet chocolate chips or chocolate candy coating – For the decadent chocolate coating on top.
Tools of the Trade
Before you start baking, gather the following tools:
- Mixing bowls – For combining ingredients.
- Whisk – Essential for mixing the dry ingredients and ensuring a smooth batter.
- Spatula – Useful for folding in ingredients and spreading the batter.
- 9×9 inch baking pan – The perfect size for these truffle bars.
- Parchment paper – Helps with easy removal of the bars from the pan.
- Microwave-safe bowl – For melting the chocolate coating.
Peanut Butter Brownie Truffle Bars Recipe: Step-by-Step Guide
Creating these Peanut Butter Brownie Truffle Bars is a straightforward process. Follow these steps for success:
Step 1: Preheat the Oven
Begin by preheating your oven to 350°F (175°C). This ensures your brownies will bake evenly.
Step 2: Prepare the Baking Pan
Line a 9×9 inch baking pan with parchment paper, allowing some overhang for easy removal later.
Step 3: Mix the Brownie Batter
In a large mixing bowl, combine the unsweetened cocoa powder, granulated sugar, light brown sugar, and a dash of salt. Whisk these dry ingredients together until well blended.
Step 4: Add Wet Ingredients
Stir in the melted unsalted butter and vanilla extract into the dry mixture. Mix until combined. Then, gently fold in the all-purpose flour until just incorporated, being careful not to overmix.
Step 5: Bake the Brownies
Pour the brownie batter into the prepared pan, spreading it evenly. Bake for 20-25 minutes or until a toothpick inserted in the center comes out with a few moist crumbs. Remove from the oven and let it cool completely.
Step 6: Prepare the Peanut Butter Filling
In a separate bowl, combine the creamy peanut butter, powdered sugar, melted unsalted butter, and vanilla extract. Mix until smooth and creamy.
Step 7: Add Crunch
Gently fold in the Rice Krispies cereal into the peanut butter mixture, ensuring they’re evenly coated.
Step 8: Assemble the Bars
Once the brownie layer has cooled, spread the peanut butter mixture evenly over the top.
Step 9: Make the Chocolate Coating
In a microwave-safe bowl, melt the semi-sweet chocolate chips or chocolate candy coating in 30-second intervals, stirring in between until fully melted and smooth.
Step 10: Coat the Bars
Pour the melted chocolate over the peanut butter layer, spreading it evenly to cover the entire surface.
Step 11: Chill and Set
Refrigerate the bars for at least 2 hours or until the chocolate coating is completely set.
Step 12: Slice and Serve
Once set, lift the bars out of the pan using the parchment paper overhang and cut them into squares. Serve and enjoy!
Allergy-Friendly Swaps
If you have dietary restrictions or allergies, consider these swaps:
- Gluten-free option: Substitute all-purpose flour with a gluten-free flour blend.
- Vegan option: Use coconut oil instead of butter and a dairy-free chocolate for the coating.
- Peanut-free option: Replace peanut butter with almond butter or sunflower seed butter.
Little Things that Matter
Here are some tips to ensure your Peanut Butter Brownie Truffle Bars are perfect:
- Let the brownies cool completely before adding the peanut butter layer to prevent melting.
- Use quality chocolate for the coating, as it significantly impacts the flavor.
- For best results, refrigerate the bars overnight for flavors to meld.
Keep It Fresh: Storage Guide
To keep your Peanut Butter Brownie Truffle Bars fresh, store them in an airtight container. They can be kept at room temperature for up to 3 days or in the refrigerator for up to a week. For longer storage, you can freeze them for up to 3 months. Just ensure they are well-wrapped to prevent freezer burn.
Popular Questions
Can I use natural peanut butter for the filling?
Yes, you can use natural peanut butter, but it may result in a slightly different texture. Natural peanut butter tends to be thinner, so you might need to adjust the powdered sugar to achieve the right consistency.
Can I make these bars ahead of time?
Absolutely! These bars can be made in advance and stored in the fridge or freezer. Just make sure to let them come to room temperature before serving for the best flavor and texture.
What can I substitute for the Rice Krispies?
If you don’t have Rice Krispies, you can use any crispy cereal or even crushed graham crackers for a different texture and flavor.
How do I know when the brownies are done baking?
The brownies are done when a toothpick inserted into the center comes out with a few moist crumbs. If it comes out clean, they may be overbaked.
Next Steps
Now that you have the detailed steps and tips for making the Peanut Butter Brownie Truffle Bars Recipe, it’s time to gather your ingredients and get baking! These bars are perfect for any occasion, and they are sure to please both kids and adults alike.
Enjoy the process, and don’t forget to share your creations with family and friends. Happy baking!
Peanut Butter Brownie Truffle Bars Recipe
Ingredients
Equipment
Method
- Step 1: Preheat the Oven - Begin by preheating your oven to 350°F (175°C).
- Step 2: Prepare the Baking Pan - Line a 9x9 inch baking pan with parchment paper.
- Step 3: Mix the Brownie Batter - In a large mixing bowl, combine cocoa powder, granulated sugar, light brown sugar, and salt. Whisk together.
- Step 4: Add Wet Ingredients - Stir in melted butter and vanilla extract, then fold in flour until just incorporated.
- Step 5: Bake the Brownies - Pour the batter into the pan and bake for 20-25 minutes. Let cool completely.
- Step 6: Prepare the Peanut Butter Filling - In a bowl, combine peanut butter, powdered sugar, melted butter, and vanilla extract. Mix until smooth.
- Step 7: Add Crunch - Fold in Rice Krispies into the peanut butter mixture.
- Step 8: Assemble the Bars - Spread the peanut butter mixture over the cooled brownie layer.
- Step 9: Make the Chocolate Coating - Melt chocolate chips in a microwave-safe bowl.
- Step 10: Coat the Bars - Pour melted chocolate over the peanut butter layer.
- Step 11: Chill and Set - Refrigerate for at least 2 hours until set.
- Step 12: Slice and Serve - Lift out of the pan, slice into squares, and enjoy!
Notes
- Let the brownies cool completely before adding the peanut butter layer.
- Use quality chocolate for the coating for better flavor.
- Refrigerate overnight for the best flavor and texture.