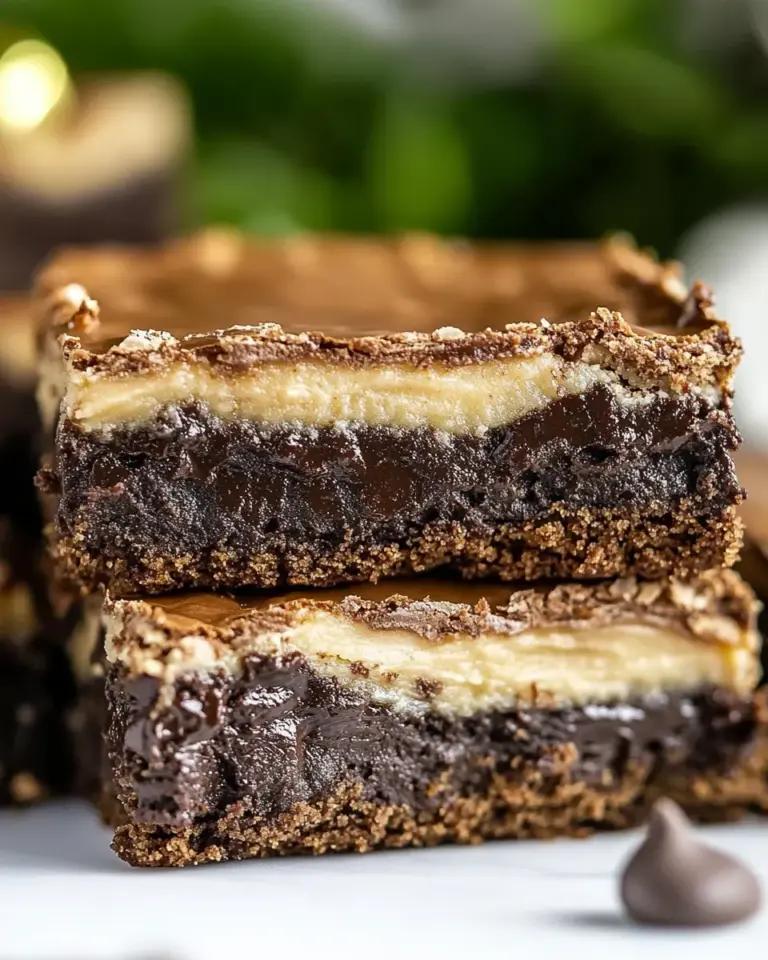
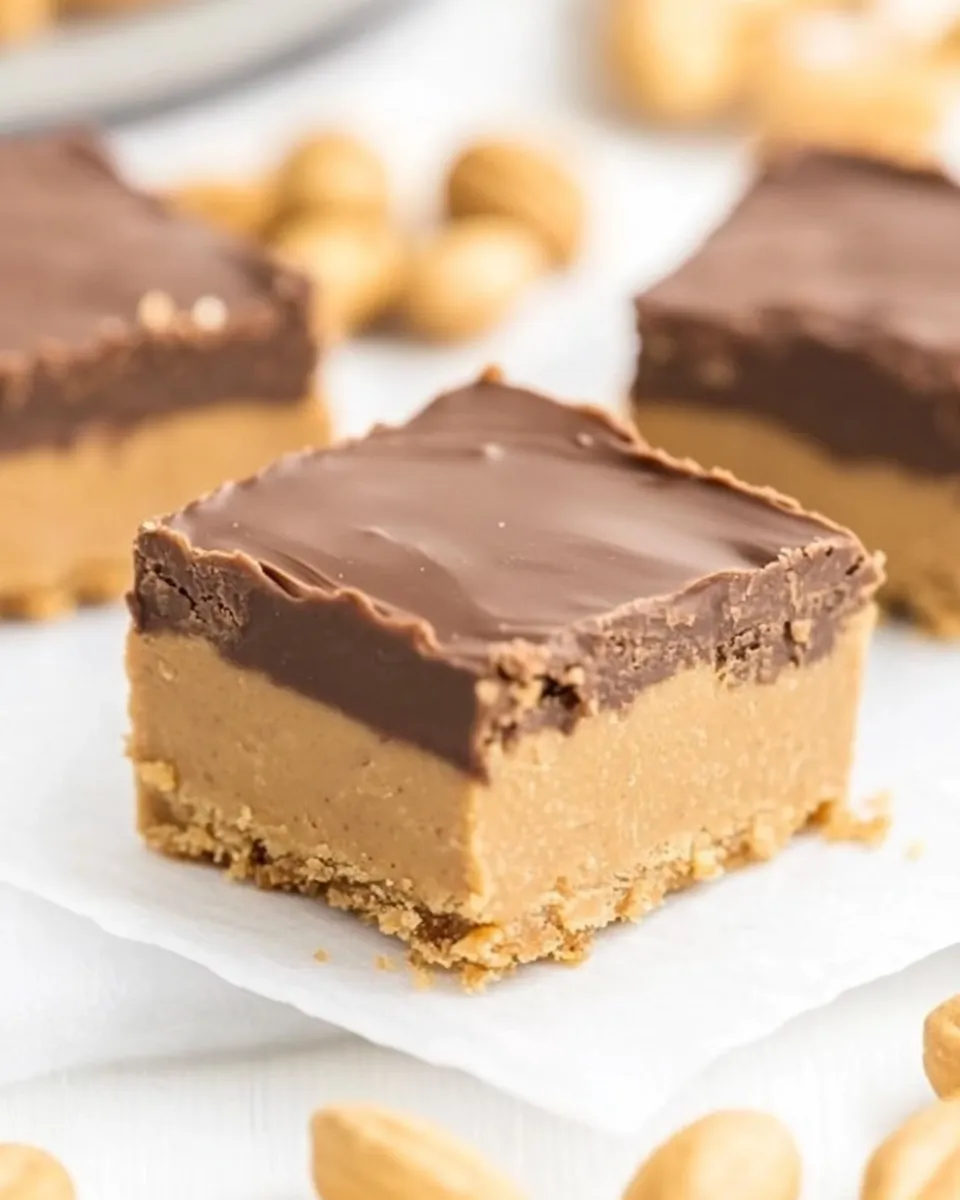
Peanut Butter Squares
There’s something incredibly satisfying about a treat that combines the creamy richness of peanut butter with the sweet crunch of graham crackers. These Peanut Butter Squares are a no-bake delight, perfect for satisfying your sweet tooth or impressing guests at your next gathering. With layers of deliciousness and minimal effort, these squares will quickly become a family favorite.
The Upside of Peanut Butter Squares
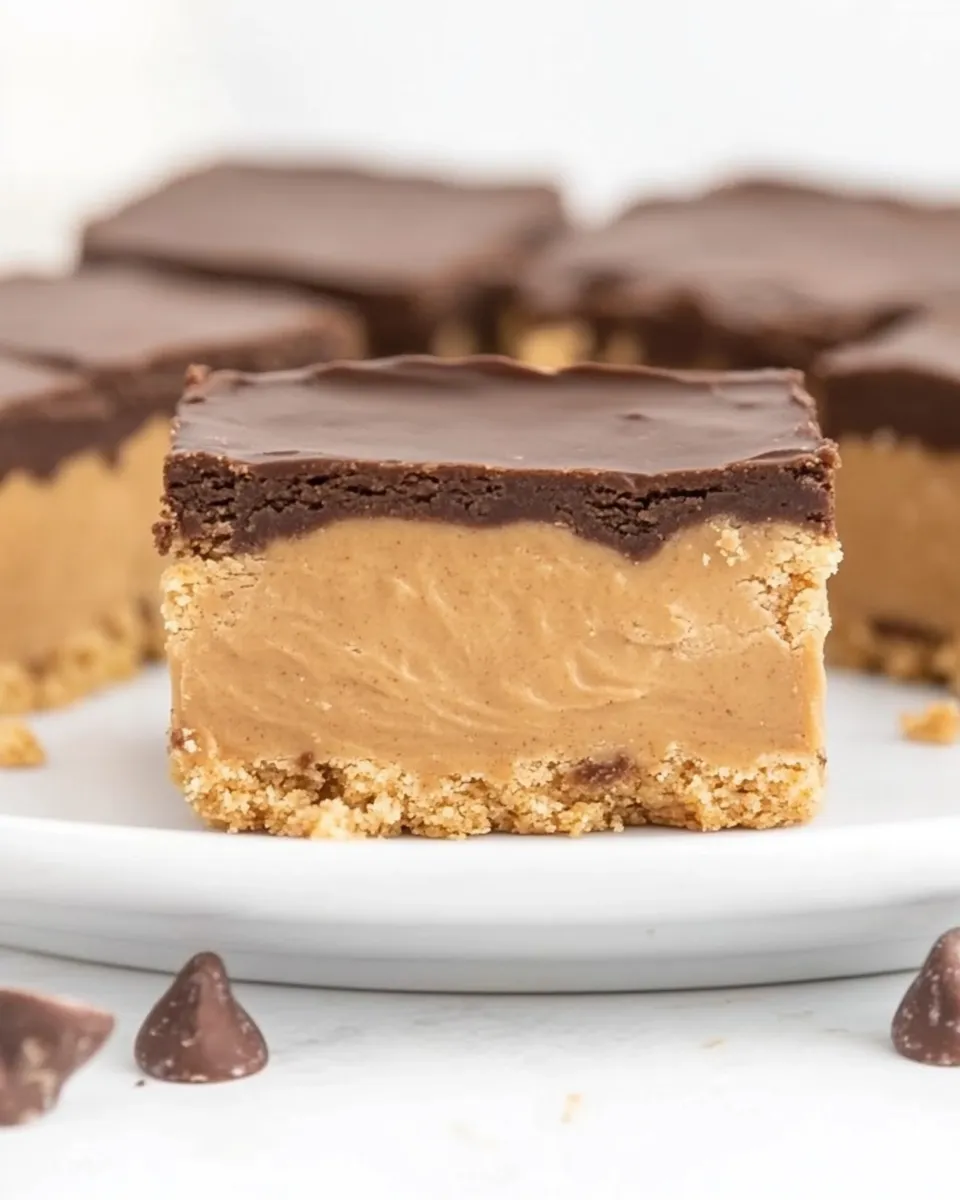
Peanut Butter Squares are not just tasty; they are incredibly versatile and easy to make. They make for the perfect dessert for any occasion, from casual family dinners to festive celebrations. The combination of peanut butter and chocolate is a classic that never goes out of style, and the graham cracker base adds a lovely texture that complements the creaminess of the filling. Plus, they are no-bake, meaning you can whip them up in no time without the hassle of turning on the oven.
What’s in the Bowl
To create these delectable Peanut Butter Squares, you will need the following ingredients:
- 1/2 cup melted butter
- 2 cups graham cracker crumbs (about 18 long rectangular crackers, equals 2 1/3 cup crumbs)
- 1 3/4 cups peanut butter, divided
- 2 cups powdered sugar (also known as confectioners’ sugar)
- 1 1/2 cups semi-sweet chocolate chips
Each ingredient plays a crucial role in achieving the perfect flavor and texture. The melted butter binds the graham cracker crumbs together, while the peanut butter lends a creamy richness that is simply irresistible.
Hardware & Gadgets
Before we dive into the preparation, let’s gather the necessary tools to make our Peanut Butter Squares:
- Mixing Bowl: A large bowl to combine the ingredients smoothly.
- 9×13-inch Baking Dish: To form and set your squares.
- Spatula: For spreading and mixing the ingredients efficiently.
- Microwave-Safe Bowl: To melt the chocolate chips easily.
- Measuring Cups: For accurate ingredient measurements.
Having the right tools on hand will make the process a breeze, allowing you to focus on creating these delicious squares.
How to Prepare Peanut Butter Squares
Ready to dive in? Let’s get started on creating these Peanut Butter Squares in just a few simple steps.
Step 1: Prepare the Base
In a large mixing bowl, combine the melted butter and graham cracker crumbs. Mix until the crumbs are fully coated and the mixture resembles wet sand. Press this mixture firmly into the bottom of a 9×13-inch baking dish to create a solid layer.
Step 2: Mix the Peanut Butter Filling
In the same bowl (no need to wash it!), add 1 1/2 cups of peanut butter and the powdered sugar. Using a spatula, mix until smooth and creamy. This filling should be thick and spreadable.
Step 3: Layer the Filling
Spread the peanut butter mixture evenly over the graham cracker base, smoothing it out with the spatula. Make sure to reach the edges for an even layer.
Step 4: Melt the Chocolate
In a microwave-safe bowl, add the remaining 1/4 cup of peanut butter and the chocolate chips. Heat in the microwave in 30-second intervals, stirring after each interval until the mixture is smooth and fully melted.
Step 5: Pour the Chocolate Layer
Once melted, pour the chocolate mixture over the peanut butter layer. Use the spatula to spread it evenly, ensuring every inch is covered in chocolatey goodness.
Step 6: Chill and Set
Refrigerate the baking dish for at least 2 hours, or until the layers are firm and set. This step is crucial for achieving perfect squares that hold their shape when cut.
Step 7: Cut and Serve
Once set, remove the dish from the fridge and cut into squares or rectangles, depending on your preference. Serve chilled or at room temperature for a delightful treat!
Quick Replacement Ideas

If you don’t have all the ingredients on hand, here are some quick replacements that work well in this recipe:
- Use almond butter instead of peanut butter for a nut-free option.
- Replace graham cracker crumbs with crushed digestive biscuits or vanilla wafers.
- Use coconut oil instead of butter for a dairy-free version.
- Opt for dark chocolate chips for a richer chocolate flavor.
These alternatives can help you customize the Peanut Butter Squares to fit your dietary needs or preferences without sacrificing flavor.
Things That Go Wrong
Even the most seasoned bakers can encounter challenges. Here are a few common issues you might face when making Peanut Butter Squares and how to troubleshoot them:
- Base Crumbles: If the graham cracker base crumbles when cut, try adding a bit more melted butter next time to help bind the crumbs better.
- Filling Too Runny: If the peanut butter filling is too soft, ensure you’re using powdered sugar, which helps thicken it. You can also chill it longer to firm it up.
- Chocolate Not Melting Smoothly: Be cautious when melting chocolate; overheating can cause it to seize. Always melt in short intervals and stir frequently.
- Squares Sticking to the Dish: To prevent sticking, line the baking dish with parchment paper before adding the crust and filling.
Being aware of these potential pitfalls can help you achieve the best results with your Peanut Butter Squares.
Keep It Fresh: Storage Guide
To enjoy your Peanut Butter Squares at their best, proper storage is key:
- Refrigeration: Store leftovers in an airtight container in the refrigerator for up to a week.
- Freezing: You can freeze the squares for up to three months. Just wrap them tightly in plastic wrap and then place them in a freezer-safe container.
- Thawing: When ready to enjoy, thaw in the refrigerator overnight.
By following these storage tips, you can ensure your Peanut Butter Squares remain fresh and delicious.
Your Questions, Answered
Can I make these Peanut Butter Squares vegan?
Yes, you can easily make these squares vegan by using a plant-based butter alternative, replacing the peanut butter with almond or sunflower butter, and ensuring your chocolate chips are dairy-free.
How can I make these Peanut Butter Squares healthier?
To make a healthier version, consider using natural peanut butter with no added sugar, reducing the amount of powdered sugar, or using a sugar substitute. You can also add ground flaxseed or chia seeds for added nutrition.
Can I use natural peanut butter instead of regular peanut butter?
Yes, natural peanut butter can be used, but it may result in a slightly different texture. Natural peanut butter is typically thinner and may require less powdered sugar to achieve the desired consistency.
What is the best way to cut the squares neatly?
For clean cuts, use a sharp knife that has been warmed under hot water and dried before slicing. This will help the knife glide through the layers without tearing them apart.
That’s a Wrap
These Peanut Butter Squares are not only a treat for your taste buds but also a delight to make. With a combination of simple ingredients and straightforward steps, they offer a gratifying experience for bakers of all levels. The next time you’re in need of a quick dessert or a sweet snack, remember this easy recipe that brings the classic flavors of peanut butter and chocolate together in a fun and delicious way.
Now that you know how to make these Peanut Butter Squares, gather your ingredients and get ready to indulge in a sweet treat that everyone will love. Enjoy!
Peanut Butter Squares
Ingredients
Equipment
Method
- In a large mixing bowl, combine the melted butter and graham cracker crumbs. Mix until the crumbs are fully coated and the mixture resembles wet sand. Press this mixture firmly into the bottom of a 9x13-inch baking dish to create a solid layer.
- In the same bowl, add 1 1/2 cups of peanut butter and the powdered sugar. Using a spatula, mix until smooth and creamy. This filling should be thick and spreadable.
- Spread the peanut butter mixture evenly over the graham cracker base, smoothing it out with the spatula. Make sure to reach the edges for an even layer.
- In a microwave-safe bowl, add the remaining 1/4 cup of peanut butter and the chocolate chips. Heat in the microwave in 30-second intervals, stirring after each interval until the mixture is smooth and fully melted.
- Once melted, pour the chocolate mixture over the peanut butter layer. Use the spatula to spread it evenly, ensuring every inch is covered in chocolatey goodness.
- Refrigerate the baking dish for at least 2 hours, or until the layers are firm and set. This step is crucial for achieving perfect squares that hold their shape when cut.
- Once set, remove the dish from the fridge and cut into squares or rectangles, depending on your preference. Serve chilled or at room temperature for a delightful treat!
Notes
- Use almond butter instead of peanut butter for a nut-free option.
- Store leftovers in an airtight container in the refrigerator for up to a week.
- For clean cuts, use a sharp knife warmed under hot water before slicing.