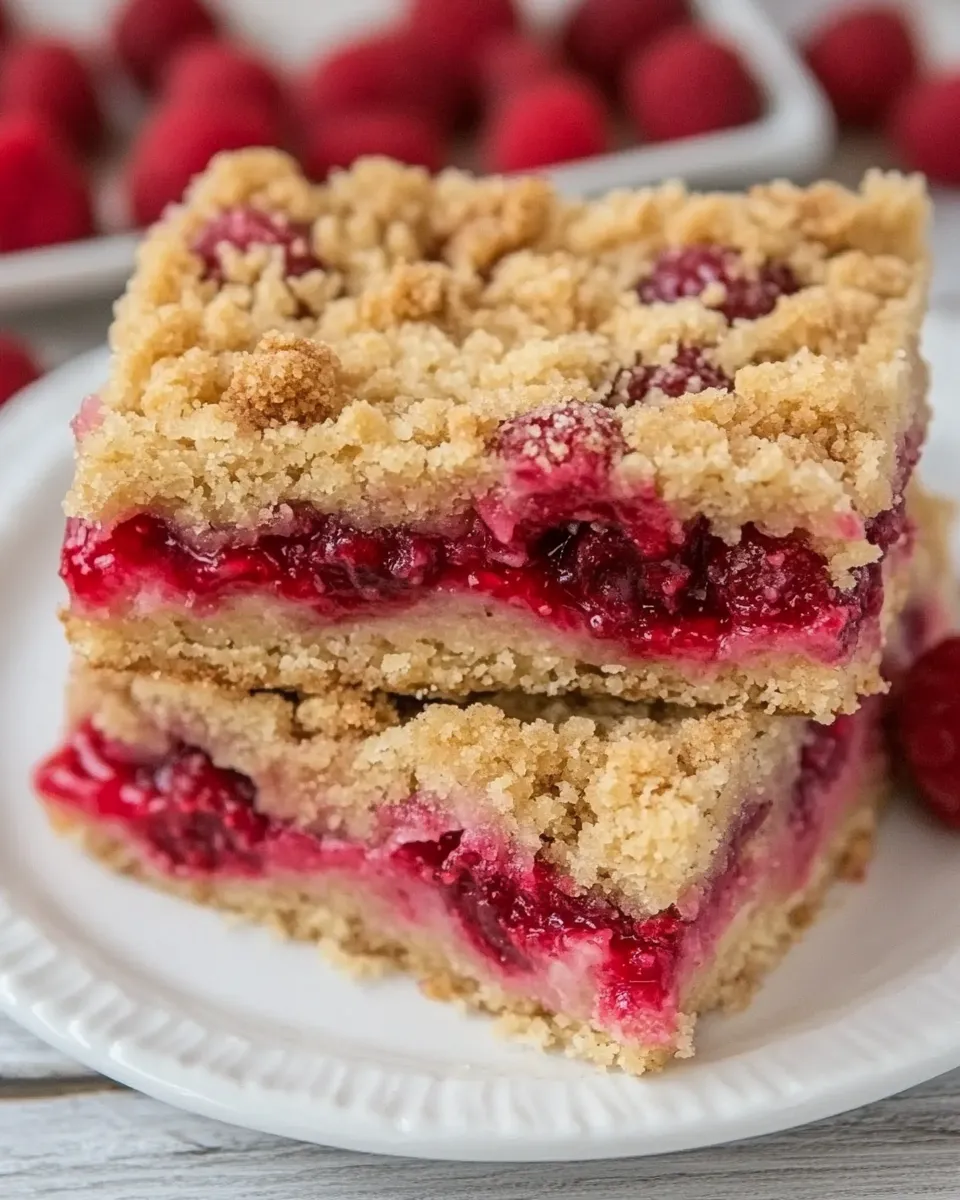
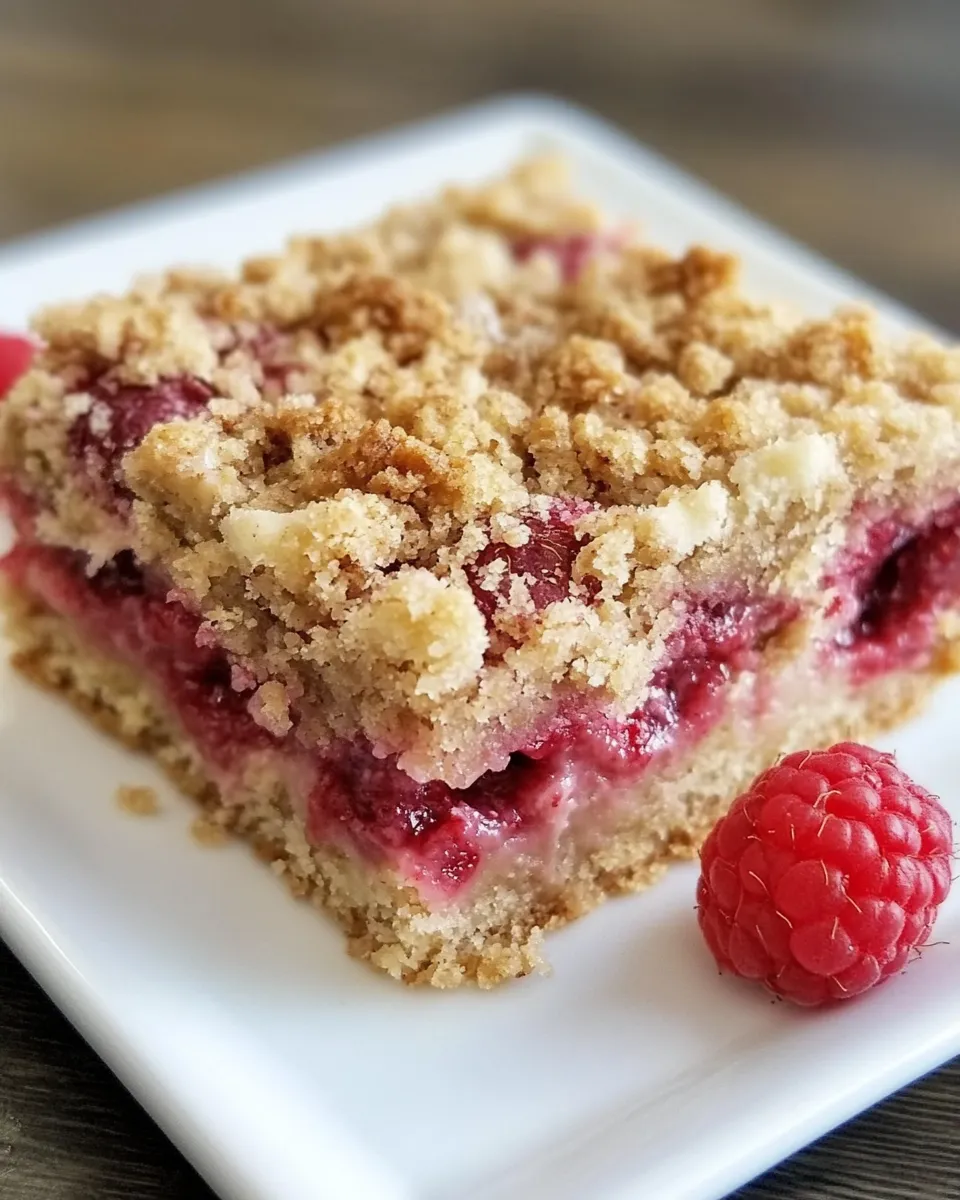
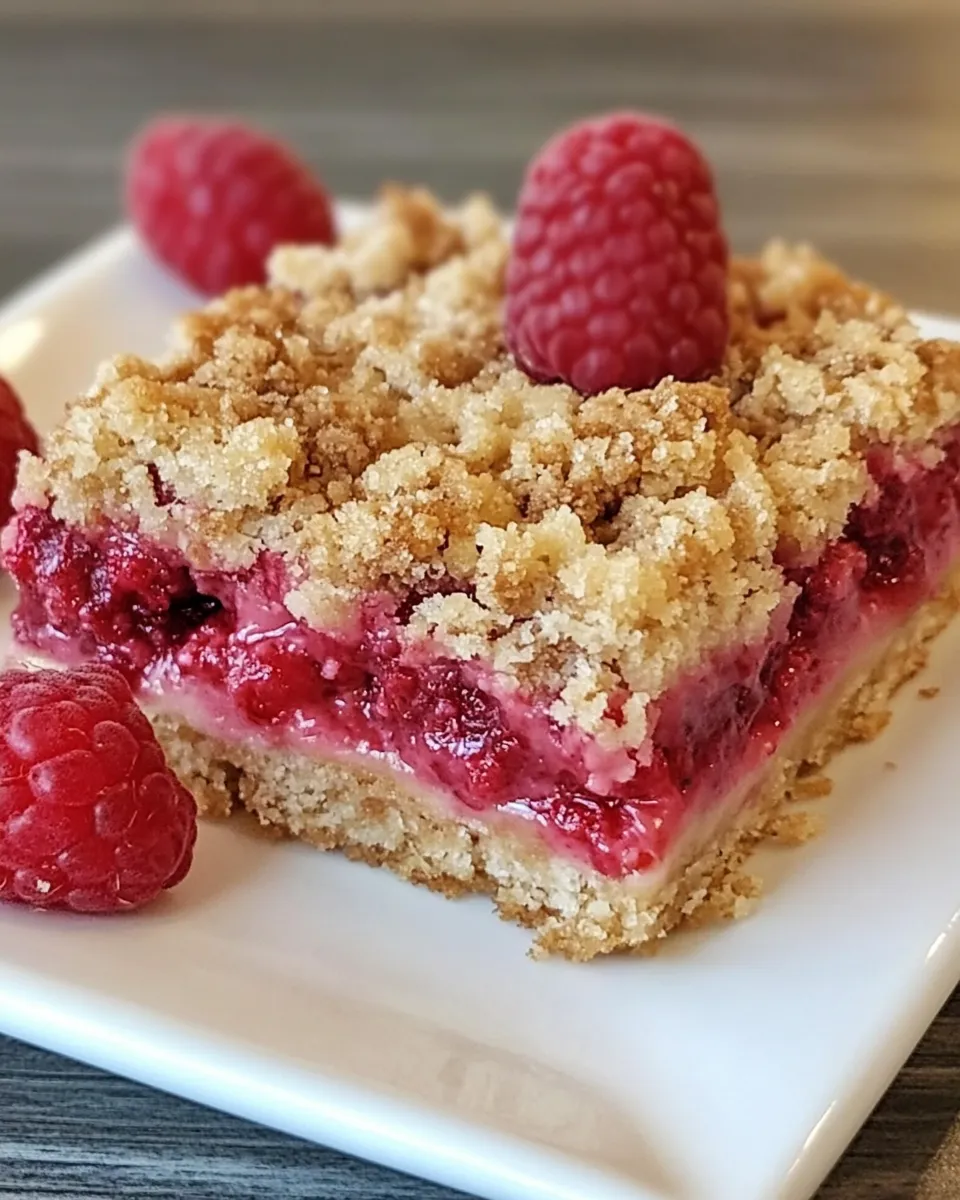
Streusel Topped Raspberry Squares
Delight in the sweet and tangy goodness of these Streusel Topped Raspberry Squares, a perfect combination of buttery crust, luscious raspberry filling, and crunchy streusel topping. Whether you’re hosting a gathering, enjoying a cozy afternoon at home, or simply indulging in a sweet treat, these squares are sure to impress. They’re easy to make and even easier to eat, making them an instant favorite in any dessert repertoire.
Why This Recipe Belongs in Your Rotation
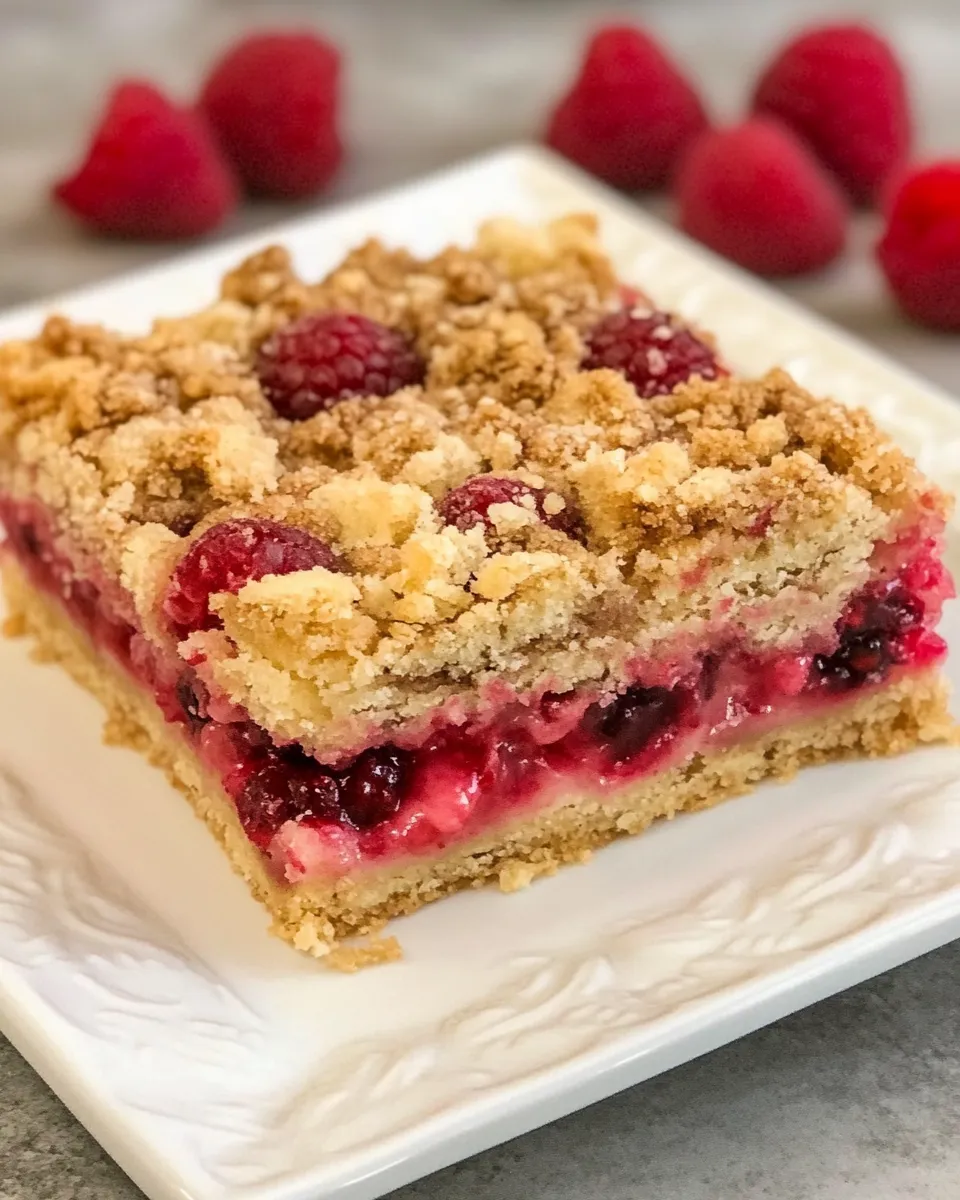
Streusel Topped Raspberry Squares are not just a dessert; they’re a celebration of flavors and textures. The buttery crust provides a sturdy base, while the sweet and tart raspberry filling adds a burst of freshness that brightens up every bite. Topped with a crunchy streusel, these squares are irresistible. They can be served warm, at room temperature, or chilled, making them versatile for any occasion. Plus, they are simple enough for a beginner baker yet impressive enough for seasoned pros. Once you try them, you’ll find yourself reaching for this recipe time and time again.
Ingredient Rundown
To create these mouthwatering squares, you’ll need the following ingredients:
- 1 cup flour – All-purpose flour works best for a tender crust.
- 1/2 cup powdered sugar – Adds sweetness and creates a delicate texture.
- Dash of salt – Enhances the overall flavor.
- 6 tablespoons butter, cold and cut into pieces – Provides richness and flakiness to the crust.
- 1 cup fresh or frozen raspberries – The star of the show, offering vibrant flavor.
Equipment at a Glance
Before you start baking, gather the following equipment:
- 9-inch square baking pan – Perfect for evenly baking your squares.
- Mixing bowls – For combining your dry ingredients and making the streusel.
- Whisk – To blend the ingredients smoothly.
- Spatula – For spreading the raspberry filling and the streusel topping evenly.
- Measuring cups and spoons – Essential for accurate ingredient measurements.
Build Streusel Topped Raspberry Squares Step by Step
Step 1: Prepare Your Baking Pan
Start by preheating your oven to 350°F (175°C). Grease your 9-inch square baking pan lightly with butter or line it with parchment paper for easy removal later.
Step 2: Make the Crust
In a mixing bowl, combine the flour, powdered sugar, and a dash of salt. Add the cold butter pieces to the dry ingredients. Using a pastry cutter or your fingertips, work the butter into the flour mixture until it resembles coarse crumbs. This will create a flaky texture for your crust.
Step 3: Press the Crust into the Pan
Take about two-thirds of the crumb mixture and press it firmly into the bottom of the prepared baking pan. Use your fingers or the bottom of a glass to ensure it’s even.
Step 4: Add the Raspberry Filling
Spread the raspberries evenly over the crust. If you’re using frozen raspberries, there’s no need to thaw them; just scatter them directly on top.
Step 5: Create the Streusel Topping
With the remaining crumb mixture, sprinkle it generously over the raspberries. This will form a delightful crumbly topping as the squares bake.
Step 6: Bake to Perfection
Place the baking pan in the preheated oven and bake for 30-35 minutes, or until the topping is golden brown and the raspberries are bubbly. Your kitchen will smell heavenly!
Step 7: Cool and Slice
Once baked, allow the squares to cool in the pan for about 10 minutes. Then, carefully lift them out using the parchment paper (if used) and let them cool completely on a wire rack. Once cooled, slice into squares and serve.
Variations by Season
These Streusel Topped Raspberry Squares can easily adapt to seasonal ingredients. Here are some delicious variations:
- Spring: Substitute raspberries with fresh strawberries for a sweet twist.
- Summer: Use peaches or cherries for a juicy, summery flavor.
- Fall: Replace raspberries with diced apples and add cinnamon for a cozy autumn treat.
- Winter: Try cranberries for a tart, festive dessert perfect for holiday gatherings.
Notes from the Test Kitchen
To ensure the best possible results, keep these tips in mind:
- For a more intense raspberry flavor, consider mashing some of the raspberries before spreading them on the crust.
- Be careful not to overwork the butter into the flour; you want to maintain that crumbly texture.
- If using frozen raspberries, they may release more juice during baking, so adjust the baking time slightly if needed.
- Feel free to add a splash of vanilla extract to the crust for an extra layer of flavor.
Meal Prep & Storage Notes
These squares are perfect for meal prep and can be stored in several ways:
- Store uneaten squares in an airtight container at room temperature for up to 3 days.
- For longer storage, refrigerate them for up to a week.
- You can also freeze the squares. Wrap them tightly in plastic wrap and aluminum foil before placing them in a freezer-safe container. They will keep well for up to 3 months.
- To enjoy frozen squares, simply thaw them in the refrigerator overnight before serving.
Quick Q&A
Can I use other berries besides raspberries?
Absolutely! You can substitute with blueberries, blackberries, or even mixed berries for a delightful twist.
How do I prevent the crust from getting soggy?
Make sure to bake the crust until it’s lightly golden before adding the raspberries. This will help create a barrier against moisture.
Can I make these squares gluten-free?
Yes! Simply substitute the all-purpose flour with a gluten-free flour blend. The texture may vary slightly, but they will still be delicious.
Is there a way to make the squares vegan?
To make these squares vegan, you can replace the butter with a plant-based alternative and use a flax egg or applesauce in place of the egg, if needed for binding.
Time to Try It
Now that you have all the details, it’s time to get baking! These Streusel Topped Raspberry Squares are calling your name, and your friends and family will thank you for sharing this decadent treat. Baking is not just about making food; it’s about creating memories and experiences. Enjoy the process as much as the delicious outcome!
Indulge in these sweet, tangy, and perfectly crumbly squares that are sure to become a staple in your dessert lineup. Happy baking!
Streusel Topped Raspberry Squares
Ingredients
Equipment
Method
- Step 1: Prepare Your Baking Pan - Start by preheating your oven to 350°F (175°C). Grease your 9-inch square baking pan lightly with butter or line it with parchment paper for easy removal later.
- Step 2: Make the Crust - In a mixing bowl, combine the flour, powdered sugar, and a dash of salt. Add the cold butter pieces to the dry ingredients. Using a pastry cutter or your fingertips, work the butter into the flour mixture until it resembles coarse crumbs.
- Step 3: Press the Crust into the Pan - Take about two-thirds of the crumb mixture and press it firmly into the bottom of the prepared baking pan.
- Step 4: Add the Raspberry Filling - Spread the raspberries evenly over the crust.
- Step 5: Create the Streusel Topping - With the remaining crumb mixture, sprinkle it generously over the raspberries.
- Step 6: Bake to Perfection - Place the baking pan in the preheated oven and bake for 30-35 minutes, or until the topping is golden brown and the raspberries are bubbly.
- Step 7: Cool and Slice - Once baked, allow the squares to cool in the pan for about 10 minutes, then carefully lift them out and let them cool completely on a wire rack.
Notes
- For a more intense raspberry flavor, consider mashing some of the raspberries before spreading them on the crust.
- Be careful not to overwork the butter into the flour; you want to maintain that crumbly texture.
- If using frozen raspberries, they may release more juice during baking, so adjust the baking time slightly if needed.