Stuffed Peanut Butter Rice Krispie Treats
If you love classic Rice Krispie treats, then you are in for a delightful twist! These Stuffed Peanut Butter Rice Krispie Treats are not only easy to make but also add a mouthwatering surprise in the center. Imagine biting into a chewy, buttery treat only to find a pocket of creamy peanut butter and chocolate goodness waiting for you. This recipe takes the beloved childhood snack to a whole new level, making it perfect for parties, snacks, or just indulging yourself. Let’s dive into the details of creating this simple yet impressive dessert!
Why It Works Every Time
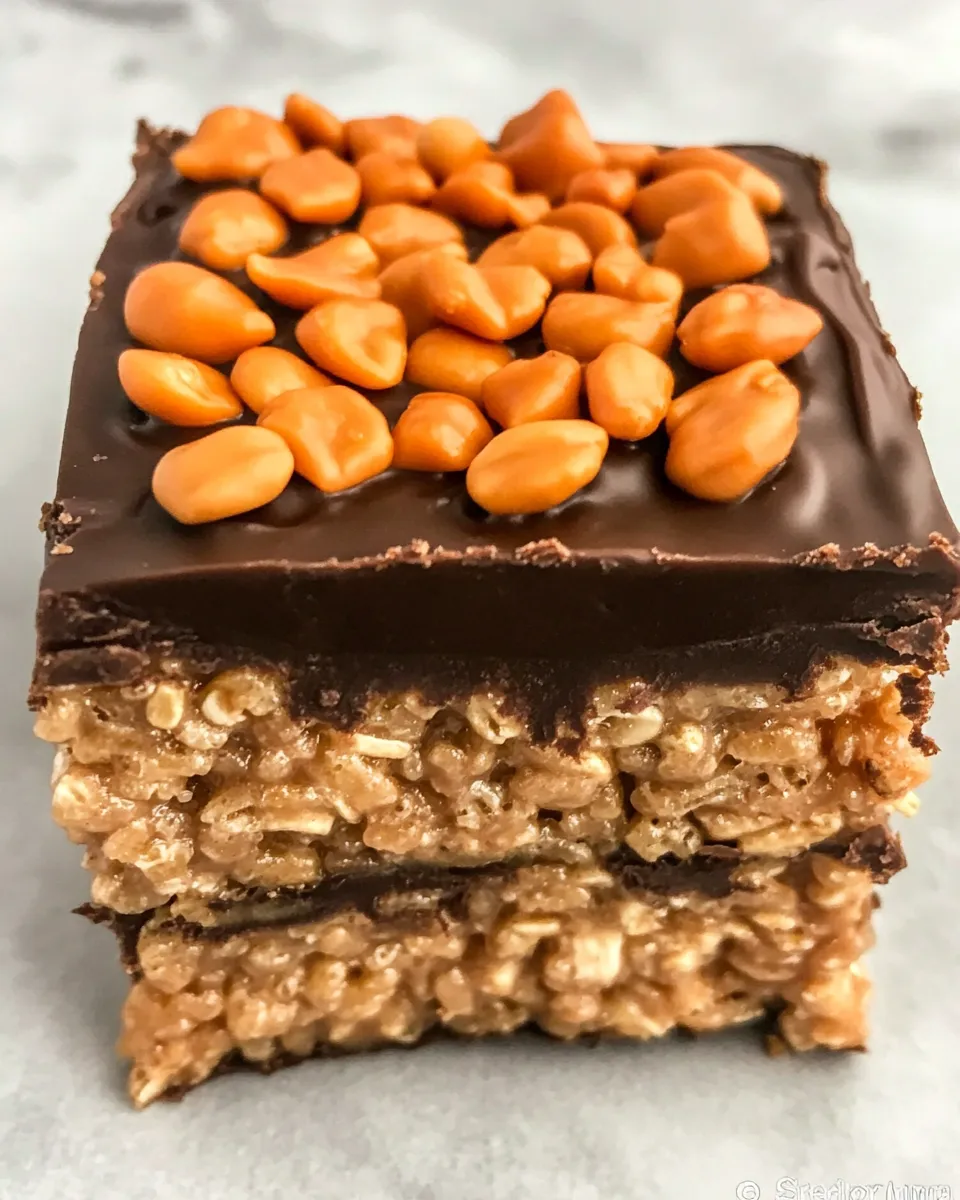
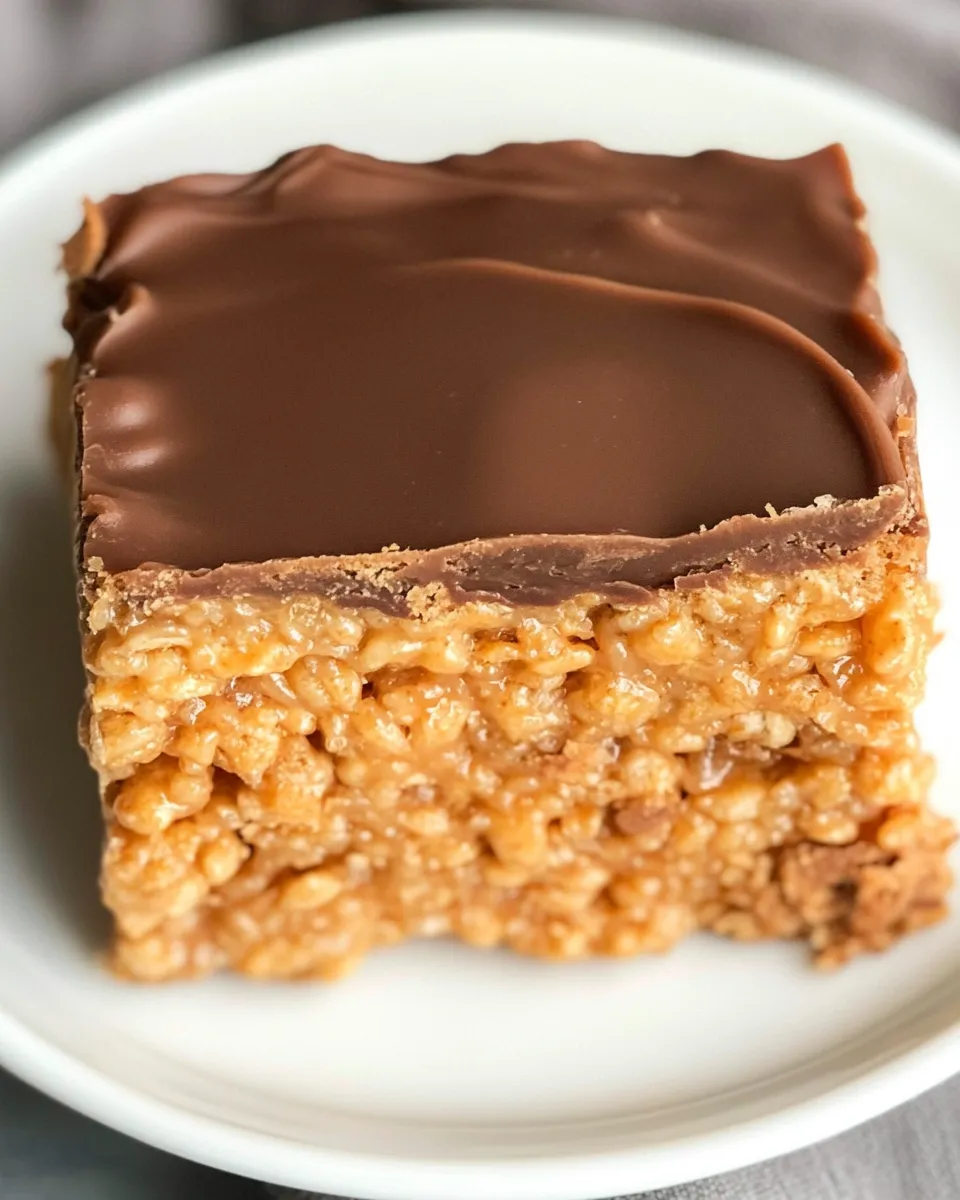
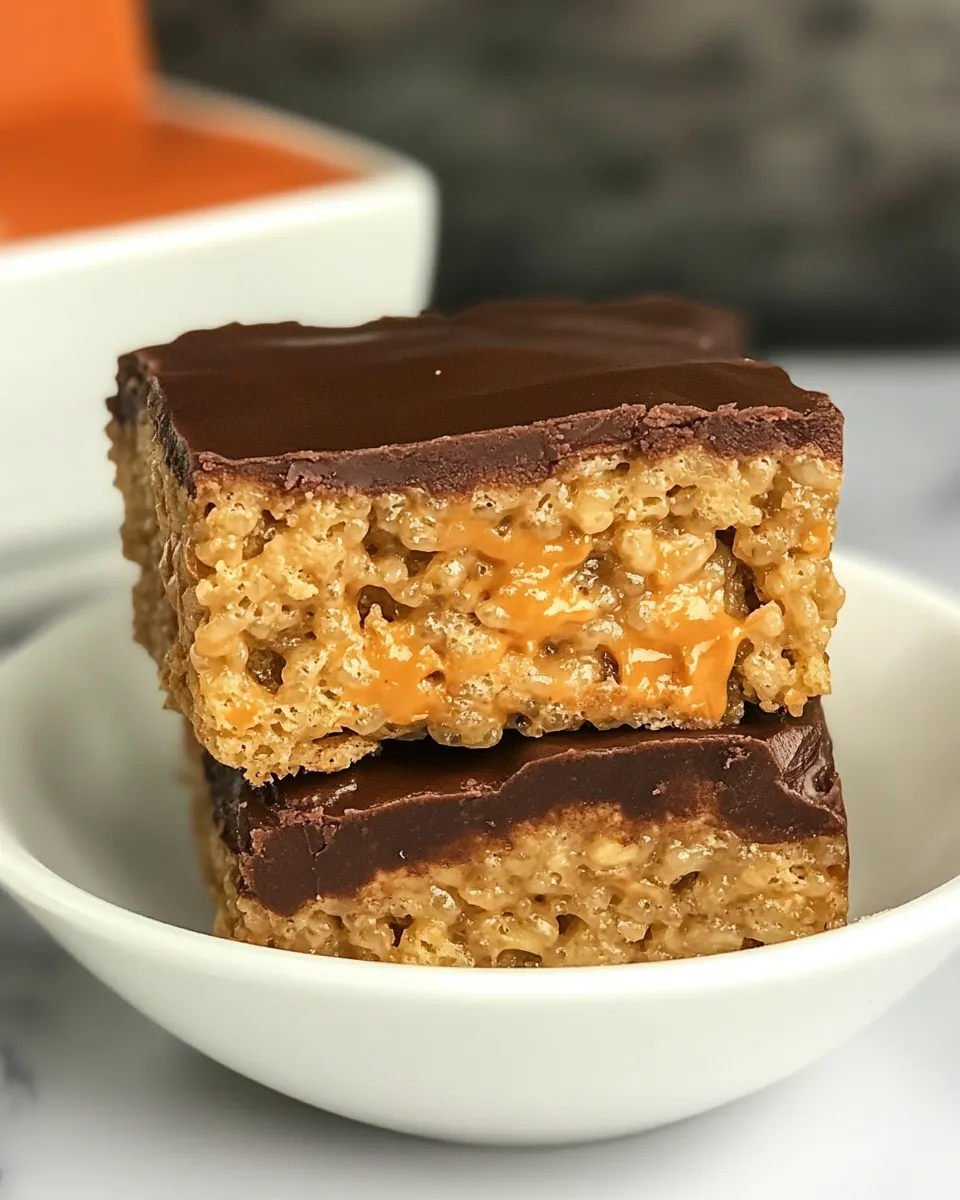
The beauty of Stuffed Peanut Butter Rice Krispie Treats lies in the perfect combination of textures and flavors. The crispness of the Rice Krispies cereal contrasts beautifully with the gooeyness of the melted marshmallows and peanut butter. By freezing the Reese’s Peanut Butter Cups before adding them, they maintain their shape and provide a delightful surprise in every bite. Not only is this treat easy to make, but it also brings comfort and nostalgia, making it a family favorite.
The Essentials
To whip up these delightful treats, you will need the following ingredients:
- 6 cups Rice Krispies cereal
- 1 cup sugar
- 1 cup light corn syrup (Karo brand works well)
- 1 cup creamy peanut butter
- 1 teaspoon vanilla extract
- 1 10-ounce bag of snack-sized Reese’s Peanut Butter Cups, frozen for about a half hour
Before You Start: Equipment
Gathering the right equipment will make your cooking process smoother. Here’s what you need:
- Large saucepan – to combine the ingredients
- Wooden spoon – for mixing
- 9×13 inch baking dish – for setting the treats
- Wax paper – to press down the mixture
- Measuring cups and spoons – for accurate ingredient measurements
Cook Stuffed Peanut Butter Rice Krispie Treats Like This
Creating these delicious treats is straightforward. Follow these steps to ensure they come out perfectly every time.
Step 1: Prepare Your Baking Dish
Start by greasing a 9×13 inch baking dish with a little butter or non-stick spray. This will prevent the treats from sticking to the dish.
Step 2: Melt the Ingredients
In a large saucepan, combine the sugar and light corn syrup over medium heat. Stir constantly until the mixture comes to a boil. Once it’s boiling, let it boil for 1 minute without stirring. Remove from heat and stir in the creamy peanut butter and vanilla extract until smooth.
Step 3: Combine with Rice Krispies
Add the Rice Krispies cereal to the peanut butter mixture. Stir gently until all the cereal is fully coated with the gooey mixture.
Step 4: Layer the Mixture
Take about half of the Rice Krispie mixture and evenly press it into the bottom of the prepared baking dish. Use wax paper to help press it down firmly, ensuring it’s evenly spread.
Step 5: Add the Peanut Butter Cups
Remove the frozen Reese’s Peanut Butter Cups from the freezer and arrange them in a single layer on top of the pressed Rice Krispie layer.
Step 6: Add the Top Layer
With the remaining Rice Krispie mixture, carefully press it over the top of the Reese’s Peanut Butter Cups. Again, use wax paper to press it down evenly.
Step 7: Allow to Set
Let the treats sit at room temperature for about 30 minutes to an hour, or until they are set. Once set, cut them into squares.
Easy Ingredient Swaps
If you need to adjust the recipe for dietary preferences or availability, here are some easy swaps:
- Use brown rice syrup instead of light corn syrup for a natural sweetener.
- Substitute sunflower seed butter for peanut butter for a nut-free version.
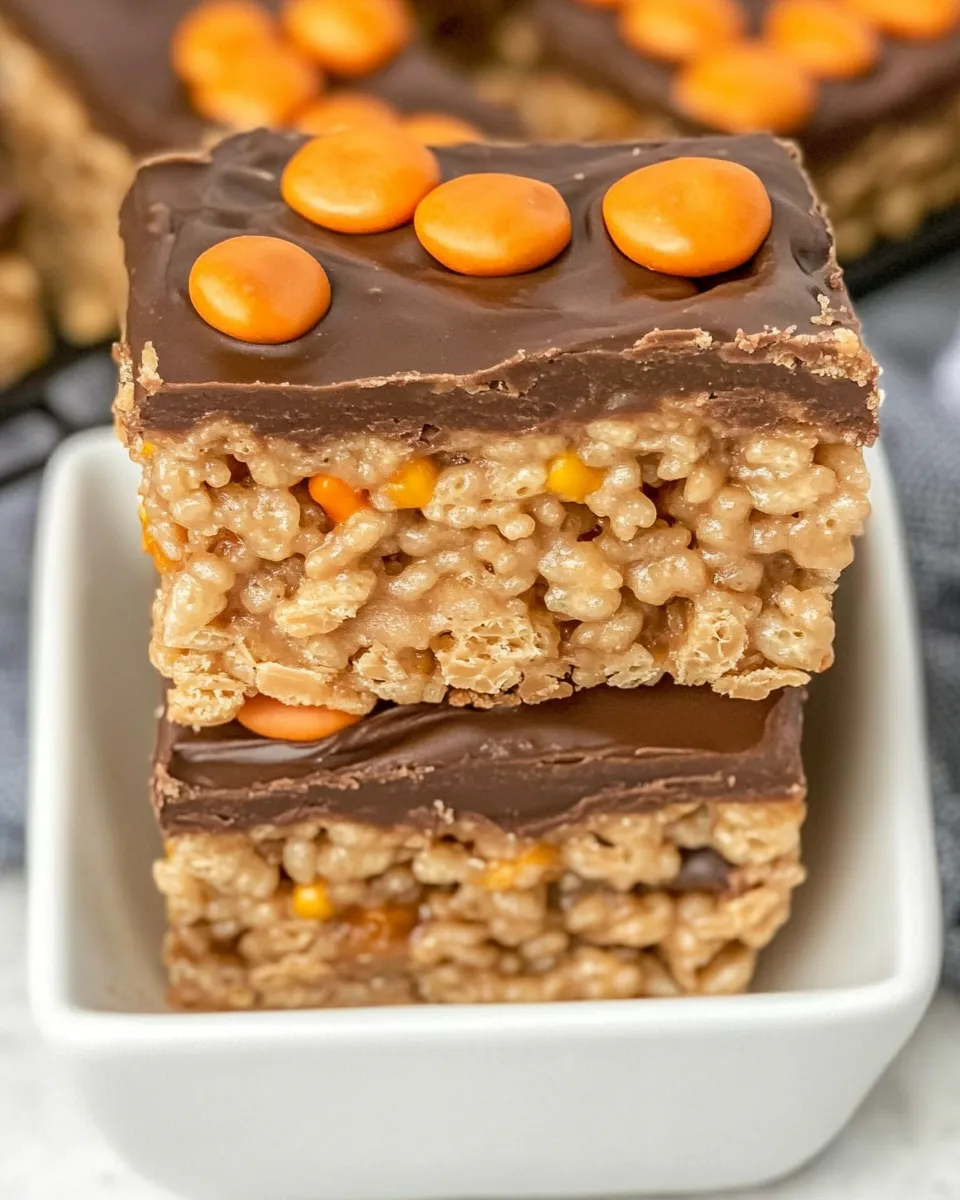
- Swap out the Reese’s Peanut Butter Cups for any chocolate-covered candy of your choice, like Snickers or M&M’s.
- For a crunchy twist, add chopped nuts or crispy cereal into the mixture.
Insider Tips
- Make sure to press the mixture firmly into the baking dish for that perfect chewy texture.
- Freezing the Reese’s Peanut Butter Cups is crucial to keeping them intact when you cut into the treats.
- For an extra layer of flavor, consider drizzling melted chocolate over the top before serving.
- Store leftovers in an airtight container at room temperature for the best texture.
Freezer-Friendly Notes
These Stuffed Peanut Butter Rice Krispie Treats are great for making ahead of time!
- Wrap individual squares tightly in plastic wrap and then place them in a freezer-safe bag.
- They can be frozen for up to 3 months, making them perfect for meal prep or a quick snack.
- To enjoy, simply thaw at room temperature for about 30 minutes before serving.
Ask the Chef
Can I use a different type of cereal?
Absolutely! While Rice Krispies are traditional, you can use any crisp rice cereal or even a combination of cereals for different flavors and textures.
What if I don’t have peanut butter on hand?
You can substitute with any nut or seed butter, such as almond butter or sunflower seed butter, depending on your dietary needs or preferences.
How do I store leftovers?
Keep the leftovers in an airtight container at room temperature. They should last for about a week, but they are likely to be eaten much sooner!
Can I make these treats vegan?
Yes! You can use maple syrup or agave nectar instead of corn syrup, and a vegan-friendly chocolate alternative for the filling.
That’s a Wrap
Stuffed Peanut Butter Rice Krispie Treats are a fantastic treat to whip up for friends and family, or simply to enjoy all by yourself. With their chewy exterior and rich, creamy peanut butter center, they are sure to impress. Whether you’re making them for a special occasion or just because, these treats are as fun to make as they are to eat. So gather your ingredients, follow the steps, and dive into this deliciously nostalgic dessert. You’ll find that these treats become a go-to favorite in your recipe arsenal!
Stuffed Peanut Butter Rice Krispie Treats
Ingredients
Equipment
Method
- Start by greasing a 9x13 inch baking dish with a little butter or non-stick spray.
- In a large saucepan, combine the sugar and light corn syrup over medium heat. Stir constantly until the mixture comes to a boil. Let it boil for 1 minute without stirring. Remove from heat and stir in the creamy peanut butter and vanilla extract until smooth.
- Add the Rice Krispies cereal to the peanut butter mixture. Stir gently until all the cereal is fully coated.
- Take about half of the Rice Krispie mixture and evenly press it into the bottom of the prepared baking dish.
- Remove the frozen Reese’s Peanut Butter Cups from the freezer and arrange them in a single layer on top of the pressed Rice Krispie layer.
- With the remaining Rice Krispie mixture, carefully press it over the top of the Reese’s Peanut Butter Cups.
- Let the treats sit at room temperature for about 30 minutes to an hour, or until they are set. Once set, cut them into squares.
Notes
- Press the mixture firmly into the baking dish for a perfect chewy texture.
- Freezing the Reese’s Peanut Butter Cups is crucial for maintaining their shape.
- Consider drizzling melted chocolate over the top for extra flavor!
- Store leftovers in an airtight container at room temperature for the best texture.