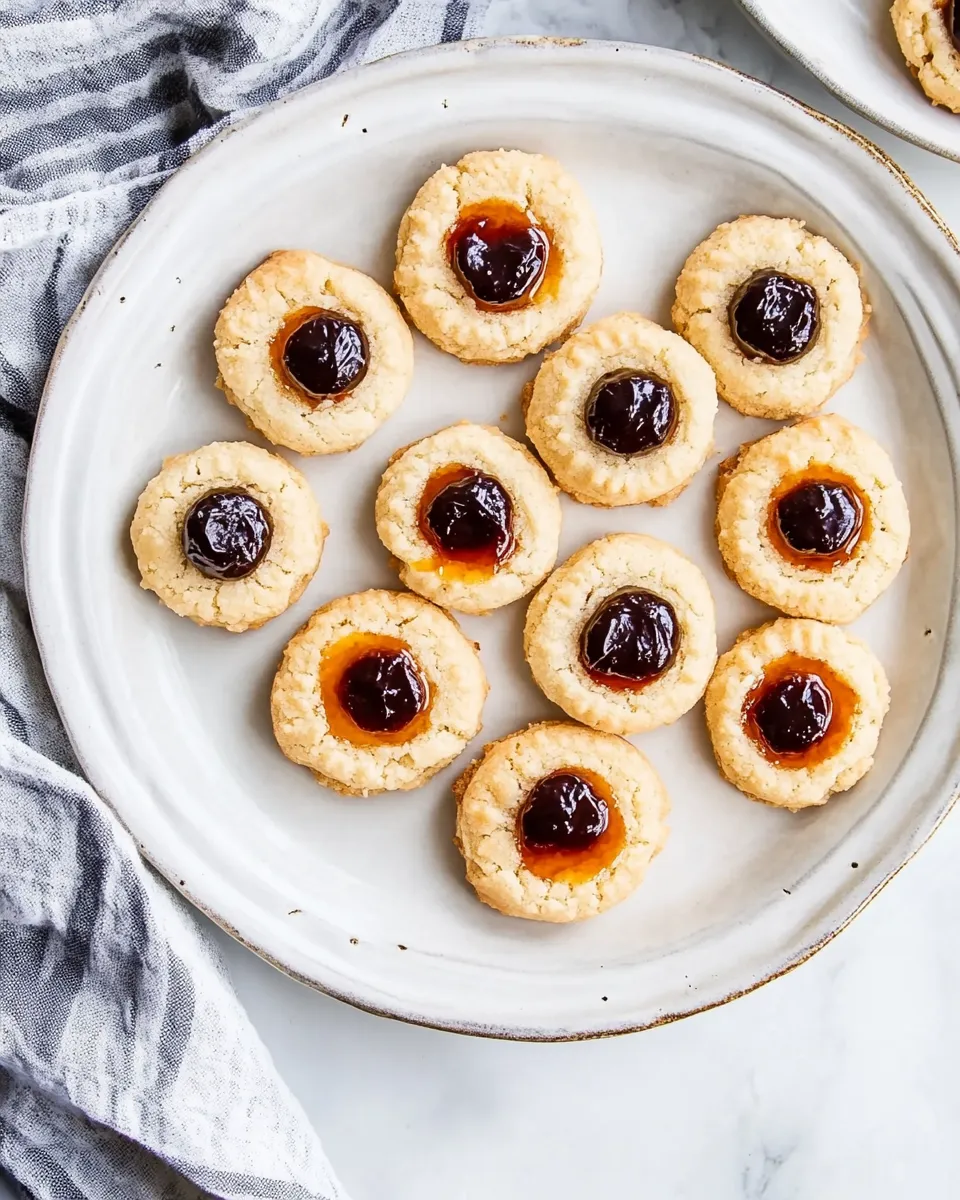
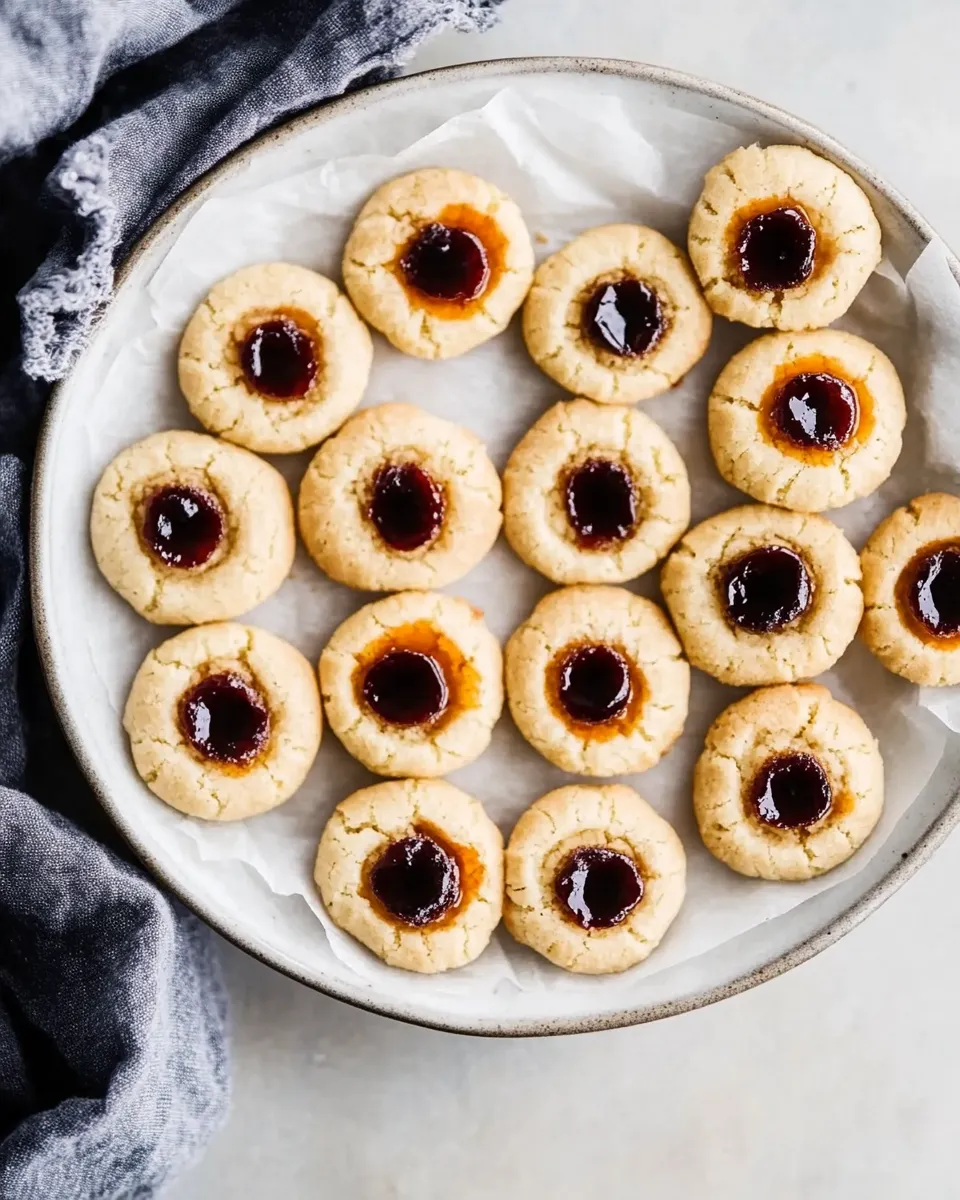
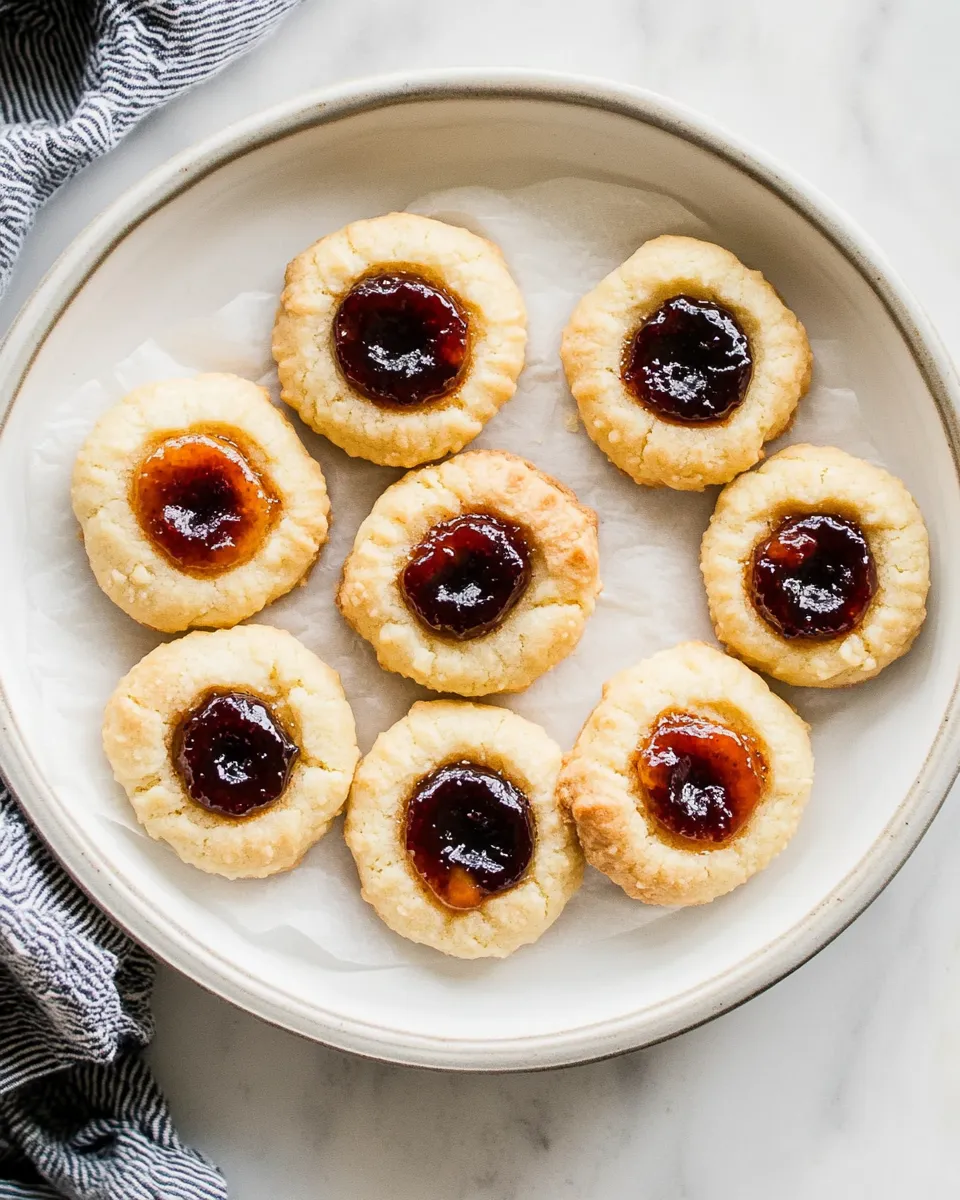
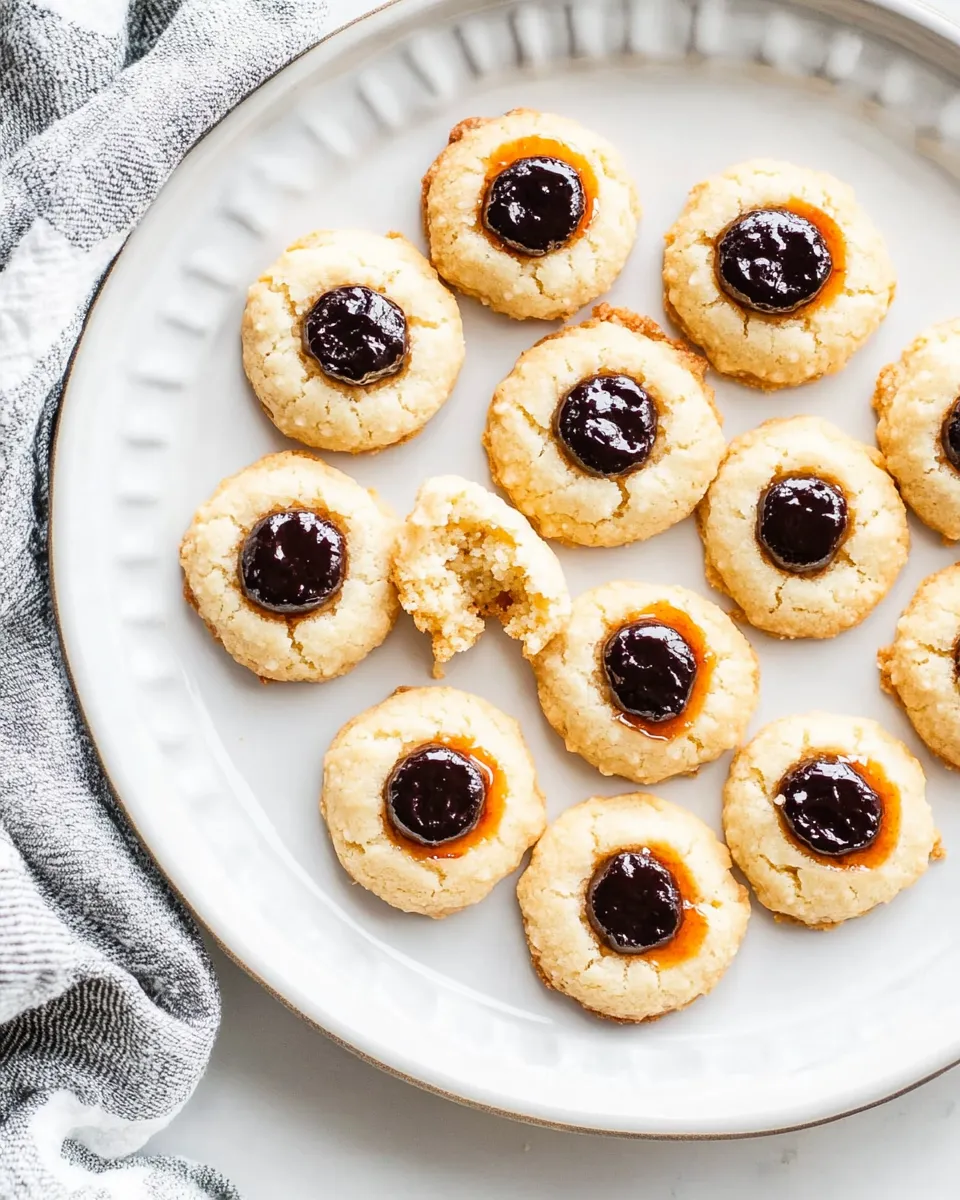
Vegan Thumbprint Cookies
Vegan Thumbprint Cookies are a delightful treat that combines a tender, crumbly texture with sweet, fruity fillings. These cookies are not only vegan but also gluten-free, making them perfect for a variety of dietary preferences. Whether you’re enjoying them with a cup of tea or serving them at a gathering, these cookies are sure to impress. With a simple blend of wholesome ingredients, you can create a batch that’s both satisfying and delicious. Let’s dive into the details of making these charming little bites.
Why It Works Every Time
The beauty of Vegan Thumbprint Cookies lies in their simplicity and the balance of flavors and textures. The combination of white rice flour and buckwheat flour provides a tender crumb while the cornstarch adds a lightness that helps the cookies hold their shape. The use of dairy-free butter ensures a rich, buttery taste without the use of animal products. A touch of cane sugar sweetens the dough just right, allowing the fillings—be it blueberry jam, apricot jam, or chocolate—to shine through. By following the steps carefully, you will achieve a batch of cookies that are not only visually appealing but also irresistibly tasty.
Ingredient Notes
- 1 cup White rice flour: This gluten-free flour gives the cookies a light and airy texture.
- ½ cup Buckwheat flour: Adds a nutty flavor and complements the rice flour for a well-rounded base.
- ½ cup Cornstarch or tapioca starch: Helps to create a crumbly texture and keeps the cookies from becoming dense.
- ½ cup Cane sugar: Provides sweetness to balance the flavors; you can also use coconut sugar for a deeper taste.
- 5 oz Dairy-free butter: Adds richness and moisture to the dough; can be substituted with coconut oil for a different flavor profile.
- 1 tsp Vanilla extract: Enhances the overall flavor of the cookies.
- ¼ tsp Salt: Balances the sweetness and enhances the flavors.
- 1 Tbsp Water (optional): Can be used if the dough is too crumbly and needs moisture.
- Blueberry jam (for filling before baking): A sweet and tangy option that pairs well with the cookie base.
- Apricot jam (for filling before baking): Offers a bright, fruity flavor that complements the cookies beautifully.
- Chocolate (for drizzling after baking): Adds a rich touch that makes these cookies even more indulgent.
- Lemon curd (for drizzling after baking): Provides a refreshing citrus flavor that contrasts nicely with the sweetness.
- Icing (optional): A simple powdered sugar icing can add a decorative touch.
Prep & Cook Tools
- Baking sheet: A flat tray for placing the cookies while they bake.
- Parchment paper: Use to line the baking sheet for easy removal of cookies.
- Mixing bowls: For combining the dry and wet ingredients.
- Whisk or fork: To mix the ingredients until smooth.
- Cookie scoop or spoon: To portion out the cookie dough evenly.
- Thumbprint tool: Use your thumb or the back of a measuring spoon to create wells in the cookies.
How to Prepare Vegan Thumbprint Cookies
Step 1: Preheat the Oven
Begin by preheating your oven to 350°F (175°C). This ensures that your cookies bake evenly and get that perfect golden color.
Step 2: Mix the Dry Ingredients
In a large mixing bowl, combine the white rice flour, buckwheat flour, cornstarch (or tapioca starch), cane sugar, and salt. Whisk together until well blended.
Step 3: Cream the Butter
In a separate bowl, beat the dairy-free butter until creamy. You can use a hand mixer or simply a fork. Add the vanilla extract and mix until combined.
Step 4: Combine Wet and Dry Ingredients
Gradually add the dry mixture to the creamed butter, mixing until a dough forms. If the dough is too crumbly, add water a tablespoon at a time until it comes together.
Step 5: Shape the Cookies
Using a cookie scoop or spoon, portion out the dough and roll it into balls, about 1 inch in diameter. Place them on the prepared baking sheet, spaced a couple of inches apart.
Step 6: Create the Thumbprint Wells
With your thumb or the back of a measuring spoon, gently press down in the center of each dough ball to create a well for the filling.
Step 7: Fill with Jam
Spoon a small amount of blueberry or apricot jam into each thumbprint well. Don’t overfill, as the jam may bubble over while baking.
Step 8: Bake the Cookies
Bake the cookies in the preheated oven for 12-15 minutes, or until the edges start to turn golden. Keep an eye on them to avoid overbaking.
Step 9: Cool and Drizzle
Once baked, remove the cookies from the oven and let them cool on the baking sheet for a few minutes before transferring them to a wire rack. Once cooled, drizzle with melted chocolate or lemon curd for an extra touch of flavor.
What to Use Instead
- White rice flour: You can use almond flour or oat flour for a different texture.
- Buckwheat flour: Substituting with quinoa flour can provide a similar nutty flavor.
- Cane sugar: Maple syrup or agave nectar can be used, though adjustments to the dry ingredients may be necessary.
- Dairy-free butter: Coconut oil or any vegan margarine can work as alternatives.
- Blueberry and apricot jam: Any fruit preserves or nut butters can serve as fillings.
Learn from These Mistakes
- Don’t skip the cooling step; this helps the cookies firm up and maintain their shape.
- Ensure your butter is at room temperature; cold butter can lead to uneven mixing.
- Be careful not to overfill the thumbprints with jam; just a teaspoon is usually sufficient.
- Keep an eye on the baking time; cookies can go from perfect to overbaked quickly.
Leftovers & Meal Prep
These Vegan Thumbprint Cookies can be stored in an airtight container at room temperature for up to a week. To enjoy them later, you can freeze the cookies for up to three months. Just be sure to separate layers with parchment paper to prevent sticking. When you’re ready to enjoy, simply thaw at room temperature or warm them slightly in the oven.
Quick Q&A
Can I use a different type of flour?
Yes! While the recipe calls for white rice and buckwheat flour, you can experiment with other gluten-free flours like almond or oat flour, keeping in mind that the texture may change slightly.
What can I substitute for the dairy-free butter?
Coconut oil or vegan margarine can be used as a substitute for dairy-free butter. Just ensure that the alternative is softened for easier mixing.
How do I know when the cookies are done baking?
The cookies are done when the edges are lightly golden. They may look soft in the center but will firm up as they cool.
Can I make these cookies nut-free?
Absolutely! Ensure you use flours and fillings that are nut-free, such as rice flour and fruit jams that do not contain nuts.
Bring It to the Table
Vegan Thumbprint Cookies are not only a treat for the taste buds, but they also make an attractive addition to any dessert table. Their colorful jam fillings and optional drizzles of chocolate or lemon curd create a visual feast that is hard to resist. Whether you are serving them at a party, gifting them to friends, or enjoying them yourself, these cookies are sure to bring joy to everyone who tries them.
These Vegan Thumbprint Cookies are a delightful way to indulge your sweet tooth while embracing a plant-based lifestyle. With their tender crumb and delicious fillings, they are bound to become a new favorite in your baking repertoire. So gather your ingredients, follow the steps, and enjoy the process of creating these charming little cookies that will brighten any day!
Vegan Thumbprint Cookies
Ingredients
Equipment
Method
- Step 1: Preheat your oven to 350°F (175°C).
- Step 2: In a large mixing bowl, combine the white rice flour, buckwheat flour, cornstarch, cane sugar, and salt. Whisk until well blended.
- Step 3: In a separate bowl, beat the dairy-free butter until creamy. Add the vanilla extract and mix until combined.
- Step 4: Gradually add the dry mixture to the creamed butter, mixing until a dough forms. Add water if the dough is too crumbly.
- Step 5: Portion the dough into balls, about 1 inch in diameter, and place them on the baking sheet.
- Step 6: Press down in the center of each ball to create a well for the filling.
- Step 7: Fill each well with a small amount of jam.
- Step 8: Bake for 12-15 minutes, or until the edges are golden.
- Step 9: Cool on the baking sheet before transferring to a wire rack. Drizzle with chocolate or lemon curd if desired.
Notes
- Store in an airtight container at room temperature for up to a week.
- Freeze for up to three months, separating layers with parchment paper.
- Experiment with different fillings like nut butters or fruit preserves.