Ingredients
Equipment
Method
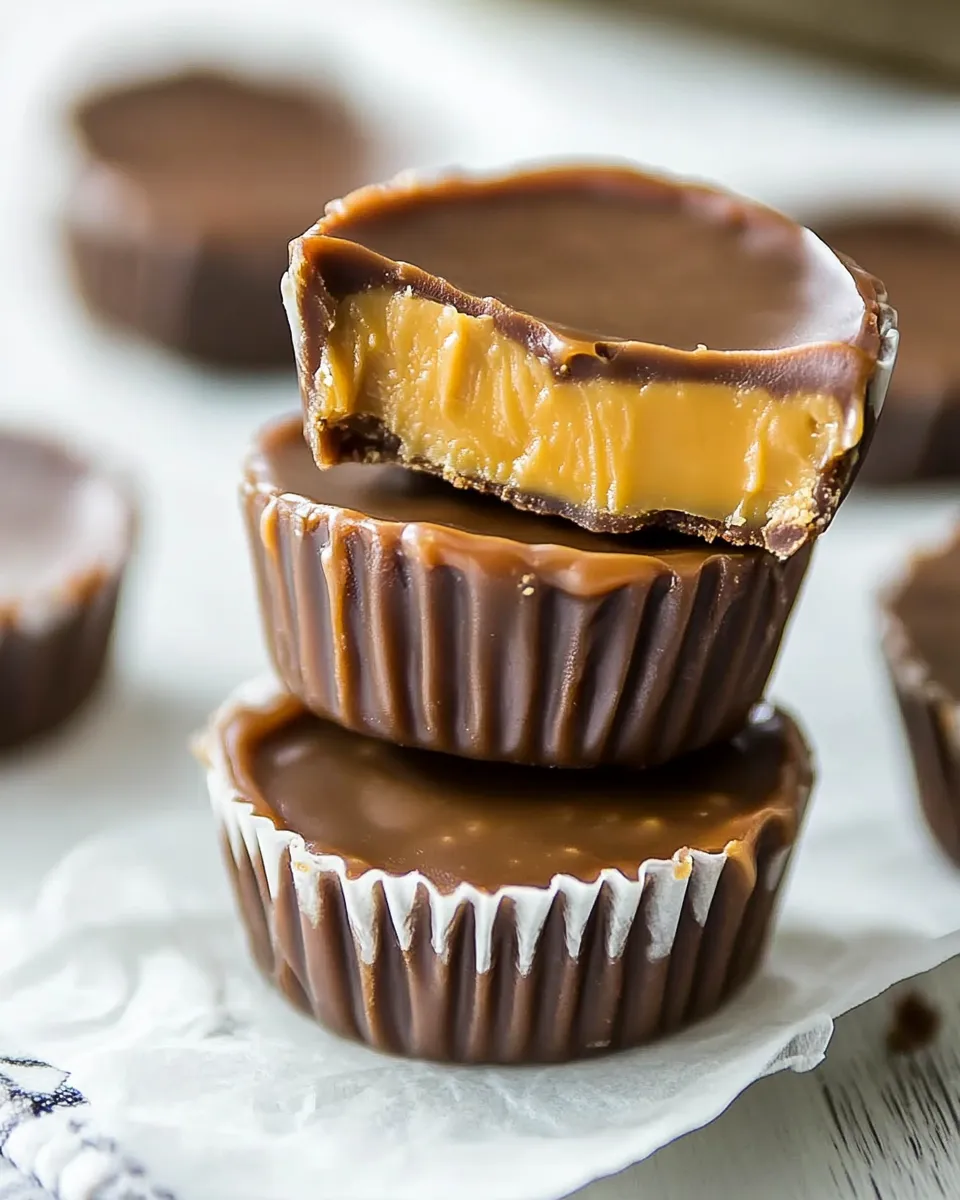
Caramel Peanut Butter Cups Instructions
- Start by melting your chocolate. Place the chocolate in a microwave-safe bowl and heat it in 30-second intervals, stirring in between, until it’s completely melted and smooth. Be careful not to overheat it.
- Using a spoon, pour a small amount of melted chocolate into each silicone muffin liner. Use the back of the spoon to spread the chocolate up the sides, creating a shell. Make sure to leave a little chocolate for the top. Place the liners in the freezer for about 10-15 minutes to set.
- In a separate microwave-safe bowl, combine the unwrapped caramels and heavy whipping cream. Heat in the microwave in 30-second intervals, stirring until the mixture is completely smooth. This is your luscious caramel layer.
- In a mixing bowl, combine the peanut butter, softened butter, powdered sugar, and brown sugar. Use a whisk to mix until everything is fully incorporated and smooth.
- Once the chocolate shells have set, remove them from the freezer. Add a spoonful of the peanut butter mixture into each chocolate shell, smoothing it out with the back of the spoon. Next, drizzle a layer of your warm caramel over the peanut butter. Finish with a final layer of the remaining melted chocolate, sealing everything in.
- Return the assembled cups to the freezer and let them chill for another 30 minutes to an hour until everything is set. This will ensure a perfect bite every time!
- Once set, gently peel the silicone liners away from the cups. Serve them up on a plate or store them in an airtight container for later. Enjoy your homemade Caramel Peanut Butter Cups!
Notes
- Store leftover cups in an airtight container in the refrigerator for up to a week.
- For longer storage, freeze them separated by parchment paper to prevent sticking.
- Feel free to customize with different chocolates or fillings for a unique twist!